|
25 February 2016
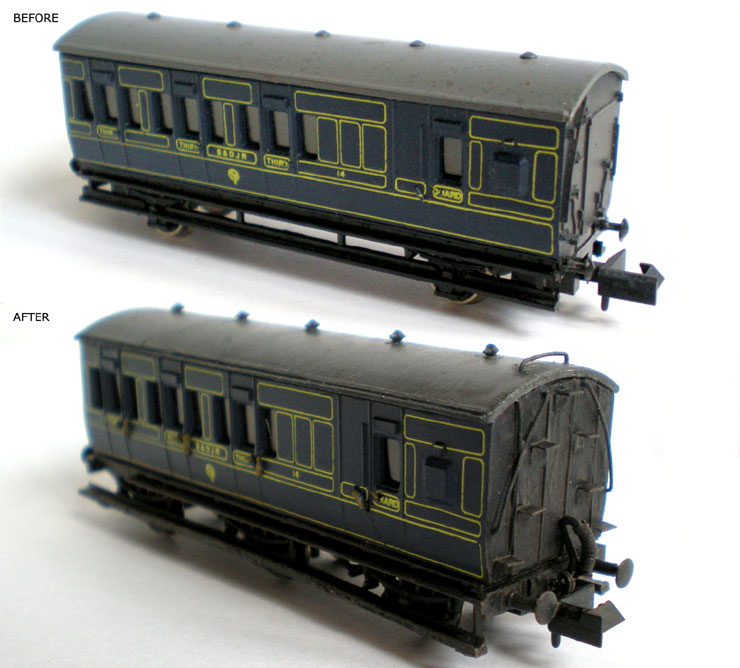
Here's a comparison shot of the latest carriage
conversion work, which involved taking apart a Graham Farish 4-wheel
coach in S&DJR livery, and putting it back together with extra
detailing.
The replacement six wheel 'Stove R' chassis really
makes a difference - with quite a bit of extra detailing, as does
the end detailing, roof vents, handrail, and even the sometimes
barely-visible door handles.
The work took around a couple of months, in small
stages, probably only an hour or so each evening.
Most of the parts were the same as for the
prototype LSWR carriage conversion project (see the
LSWR Farish
Carriage Conversions thread) although in this case the
original roof could be kept as this matched the original roof
type, which was very close to Midland Railway designs.
See
S&DJR Farish
Carriage Conversion for the full story.
27 February 2016
After the tricky work on the now-6-wheel
carriage, it's time to do a little easy wagon weathering. There are
plenty in the stock box to chose from, after all.
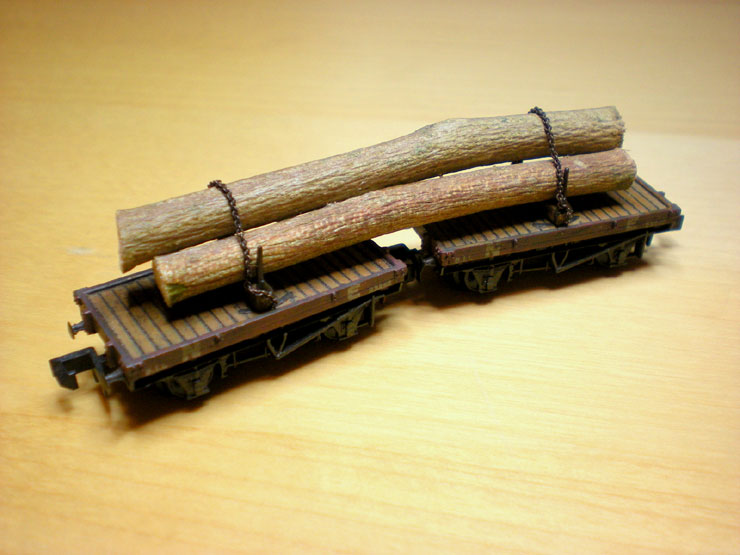
The first job was to unload these two
bolster wagons and replace their load with a new one. This is the
'before' shot, after work done several months ago to add the load
and chains:
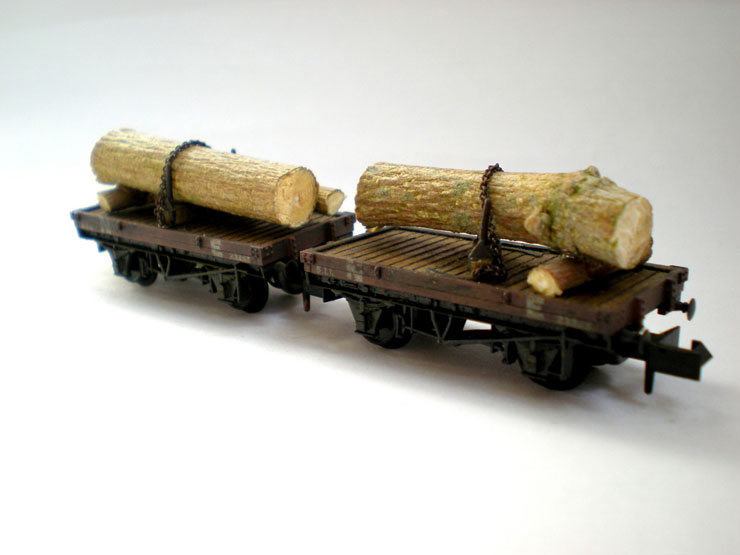
Now they're carrying a single load stretched across both wagons - a
nice-looking
and prototypical long load that still manages to traverse even the
tightest curves
on the layout.
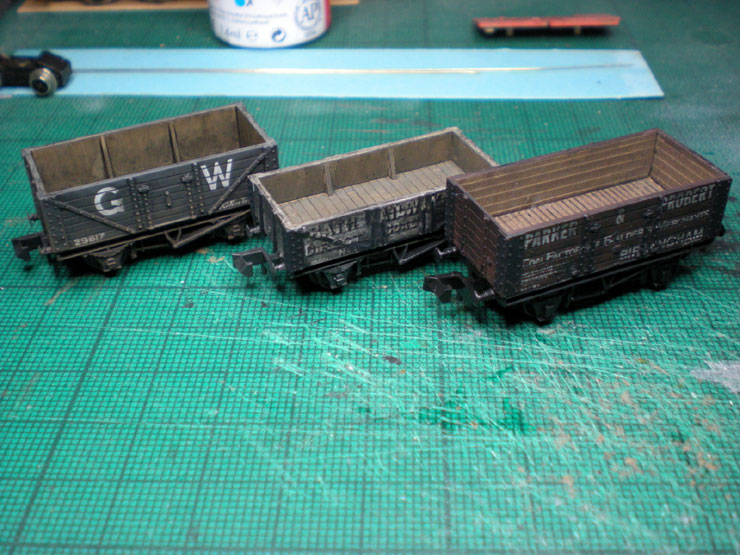
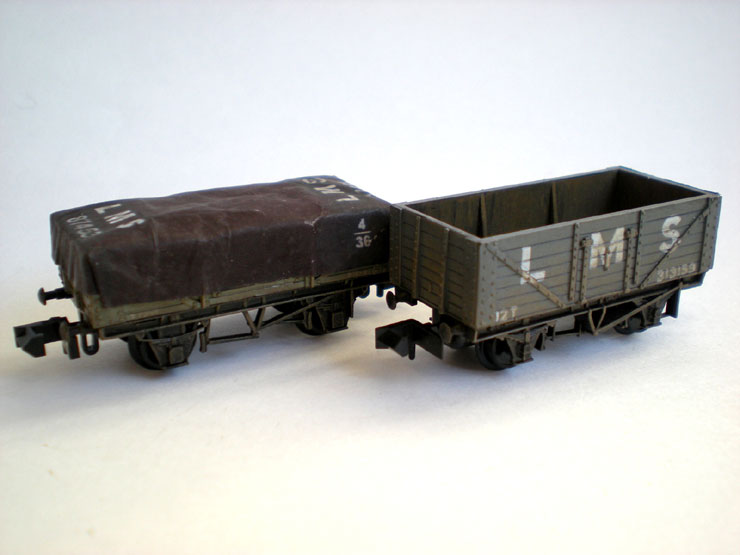
Next up were six ordinary open wagons, a mixture of coal-carrying
and general
goods wagons. The yellow Jameson's is an old Minitrix example. The
middle one is
a new-style Graham Farish, and the one on the right is a Mathiesons:
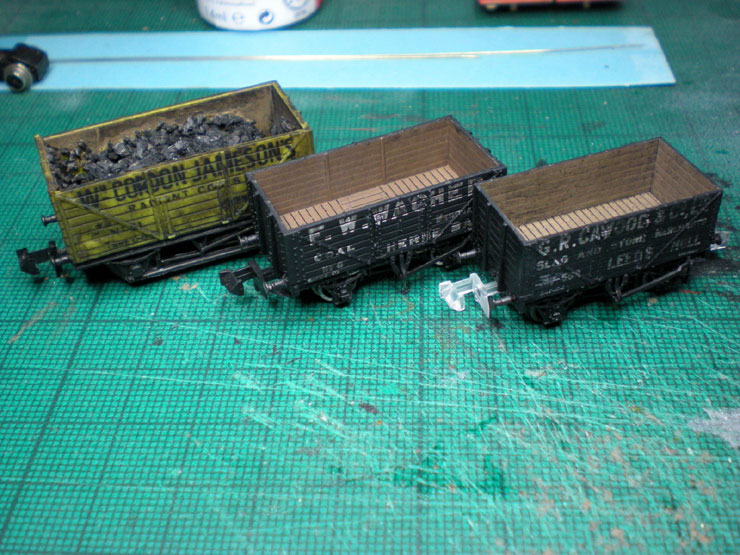
The other three are a Peco GW goods (no coal dust or dirt so more of
a brown
weathered staining), a Peco 5-plank coal wagon, and a Poole-era
7-plank that still
looks pretty good with some coal dust over it.
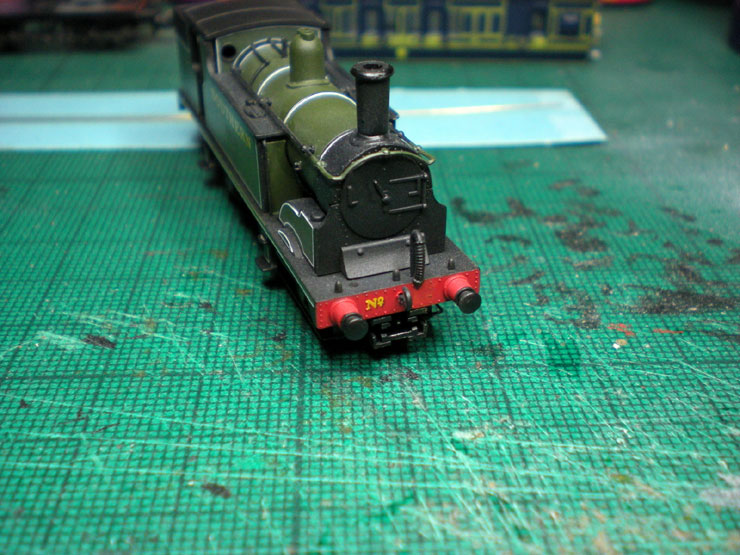
4 March 2016
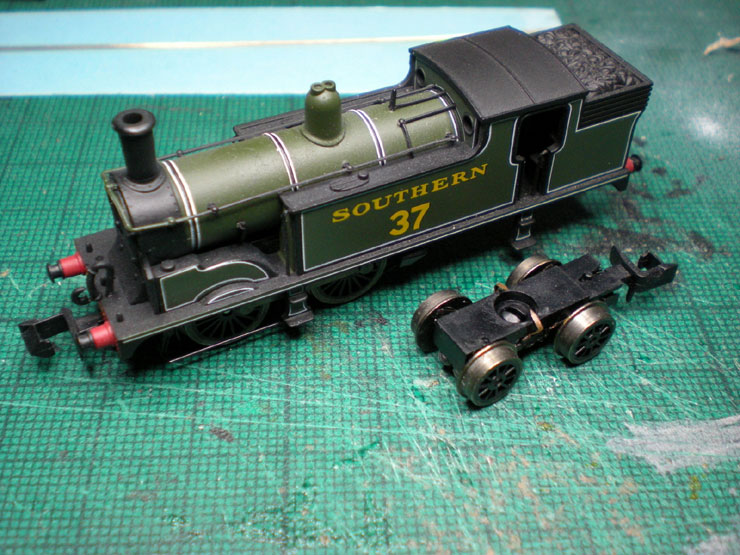
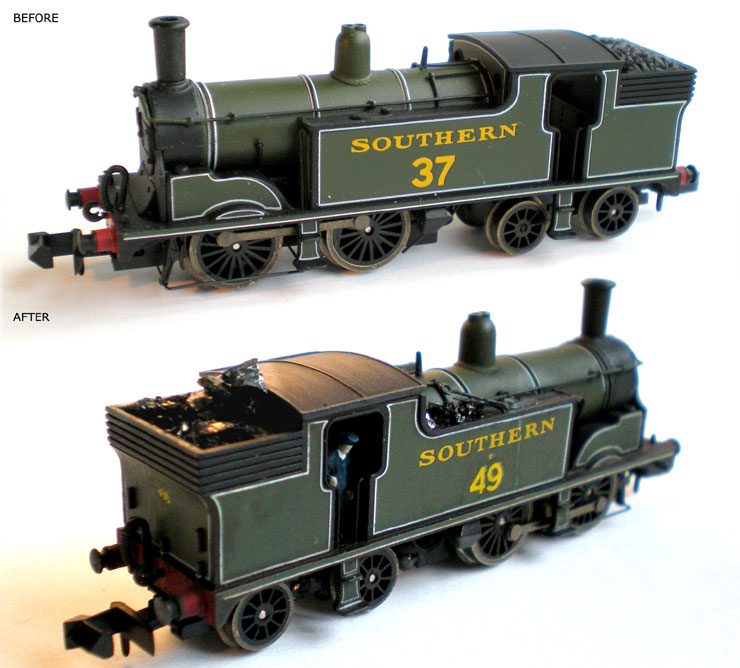
The Dapol M7 is notoriously weak and lightweight.
Results seem to be variable, with some models being almost okay
while others can barely pull themselves up an incline, let alone two
coaches.
This one is one of the latter, so I've added as
much lead weight underneath as it could take. It's still pretty weak
but I've wanted to add some detailing for quite a while. The first
job was to remove the rear chassis.
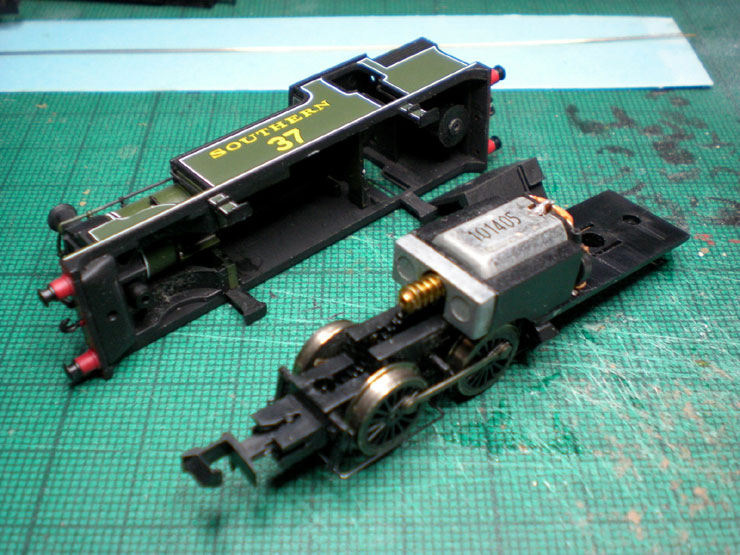
Removing the rear chassis allows you to access the back screw. This
and the front
screw just in front of the first set of driving wheels will allow
the bodywork to be
removed.

Body off.
Some extra weight can be added in the dead space underneath the coal
bunker,
although this hardly helps to add weight where it really needs to be
- over the
driving wheels.
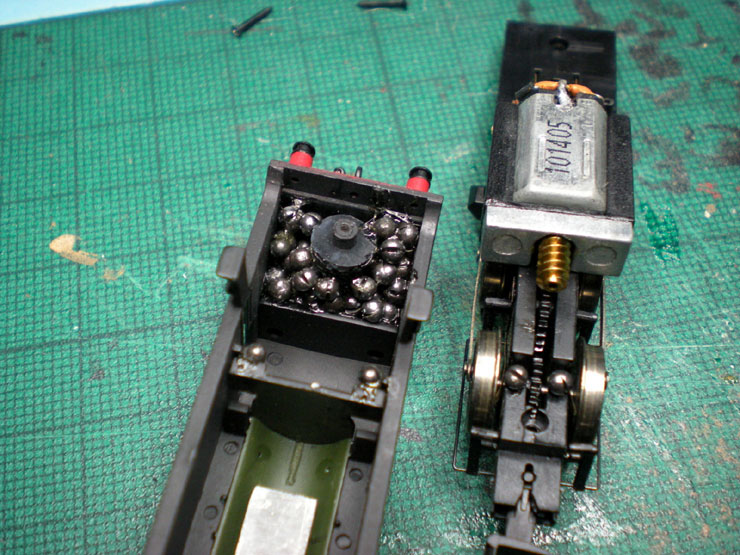
Remove the plastic coal load to reveal the empty bunker.
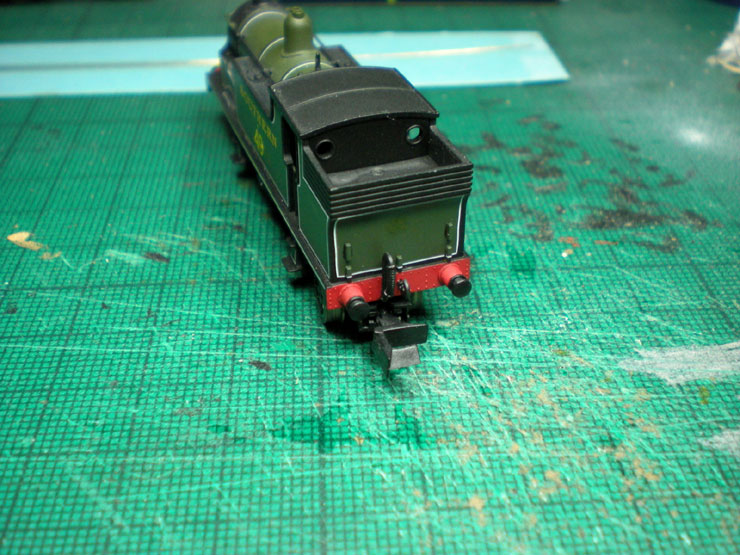
I also removed the front coupling to allow access to the buffer
beam. The name of
the game is renumbering, and the '37' has already been rubbed off
very gently with
a fibreglass pen.
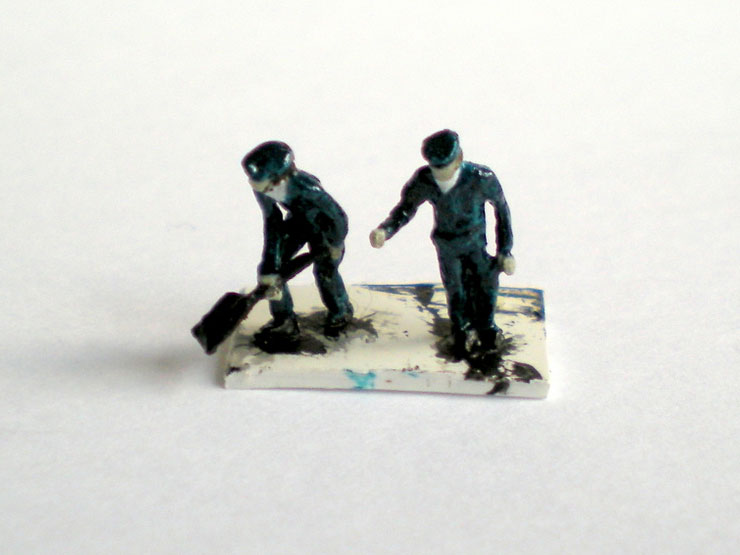
Also in preparation is a very finely modelled crew from N Brass
Loco. An undercoat
of Prussian Blue is overlaid with Railmatch dark blue to add tone
and uneveness to
the colour.
As I'm modelling 1930, the loco number also needed an 'E' for
Eastleigh. Once it
was dry and protected with a couple of layers of satin varnish, I
was able to add
some dust and dirt, plus a little water staining from some sloppy
refilling of the
tank.
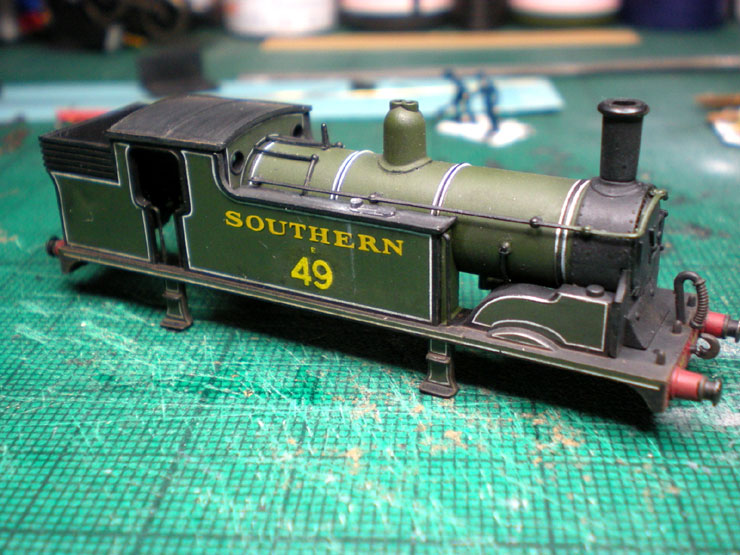
Then the coal was added, a full load for a day's station piloting
duties.
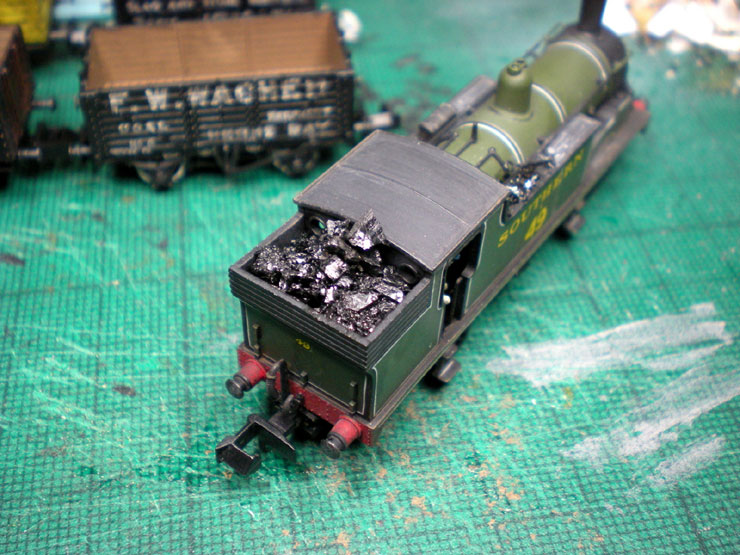
Last of all, the crew and some appropriate tools were added.
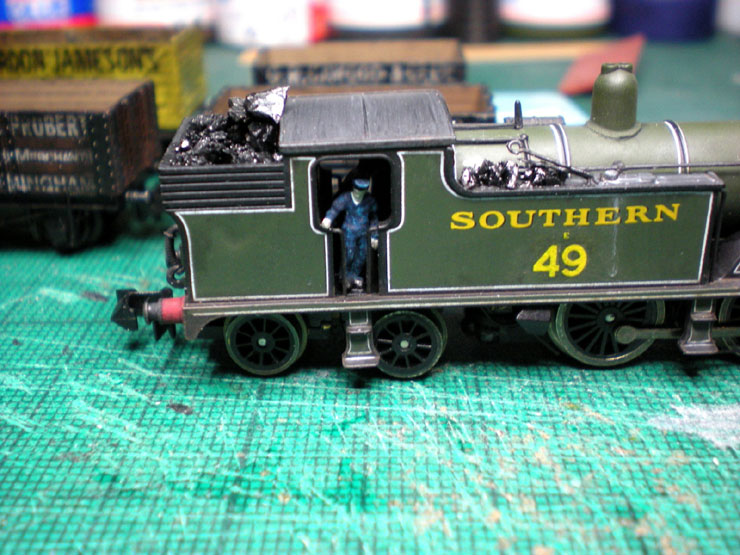
The before and after shots don't entirely do the work justice. It
looks better in real
life, especially with the plastic-looking shine taken off the
bodywork. You can just
about see the extra loco numbering on the back of the bunker.
There's already another project on the workbench. A report will
follow in due
course.
2 April 2016
A smallish update this time because a couple of
long-term workbench jobs still haven't come to a finish. While those
progress in small steps every evening, there is usually also a batch
of wagons being weathered at the same time.
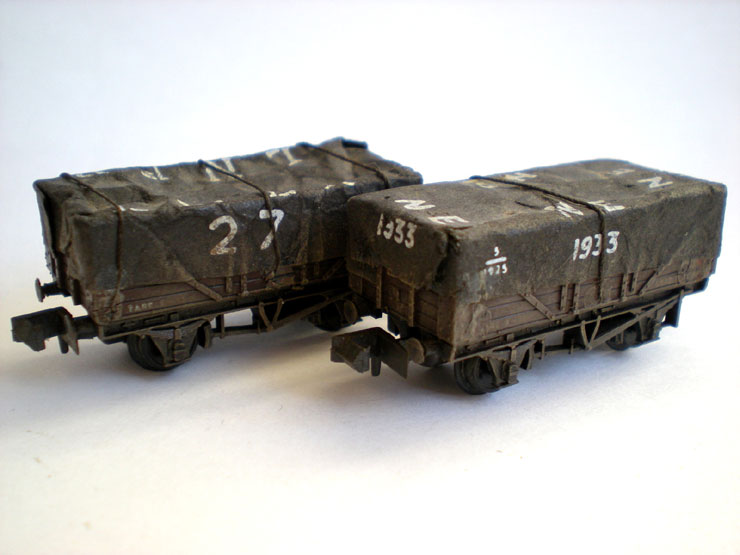
A couple of recent second-hand purchases:
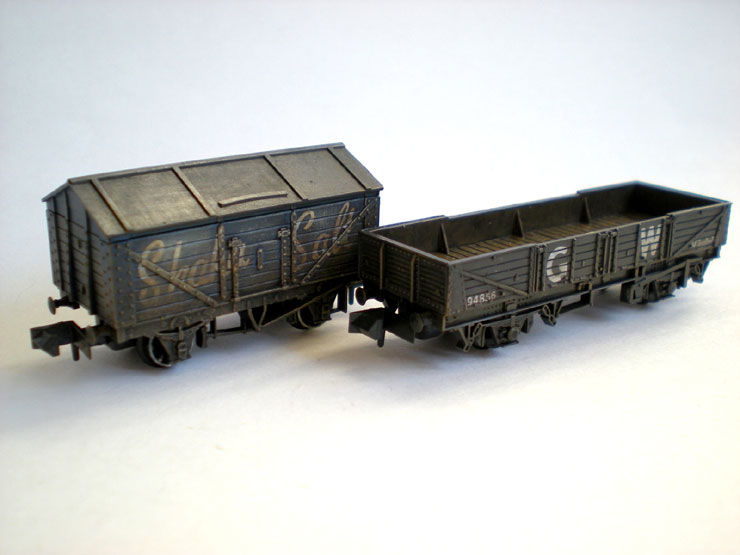
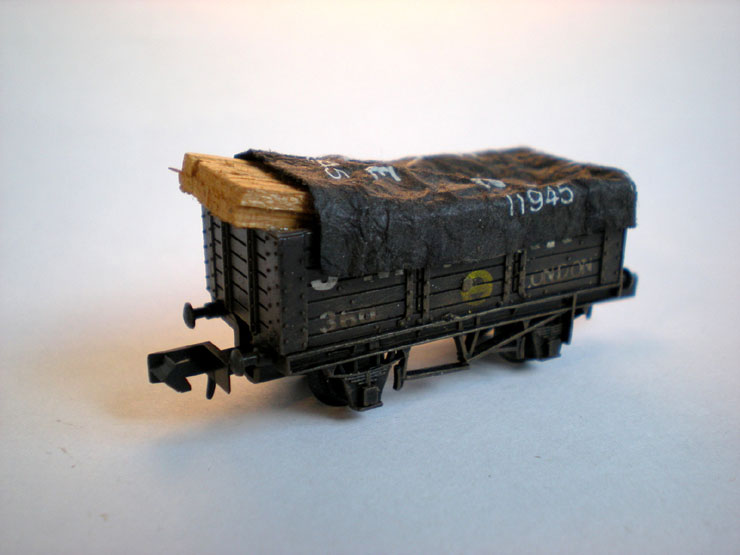
Disguising a 1930s wagon with a tarpaulin to hide the fact that it
was built around
six years too late for my purposes.
Two fairly shabby second-hand wagons that needed a lot of cleaning,
the ropes
'tied' back down, and some weathering:
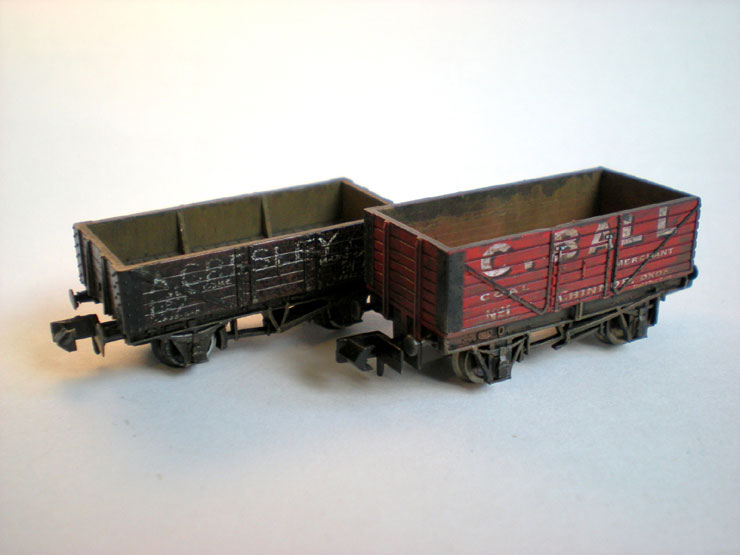
Two more 'rescues':
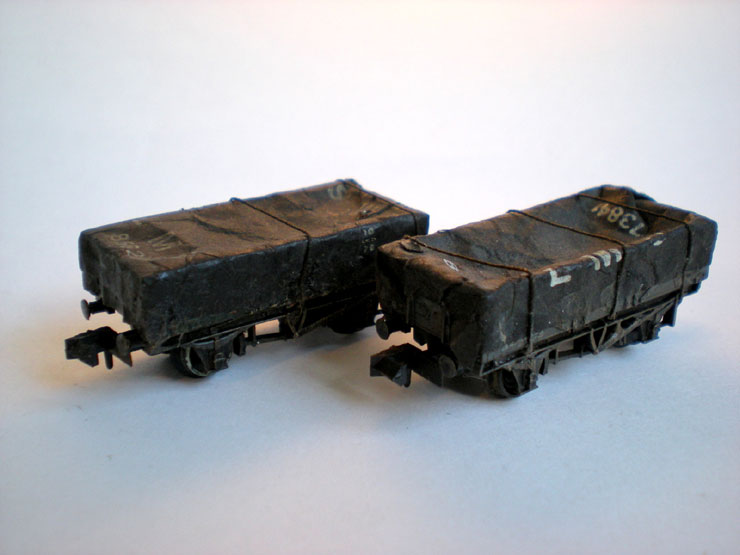
And another tarpaulin duo that needed a clean-up and re-tying down:
One of my first purchases back in 2013 finally gets a light
weathering:
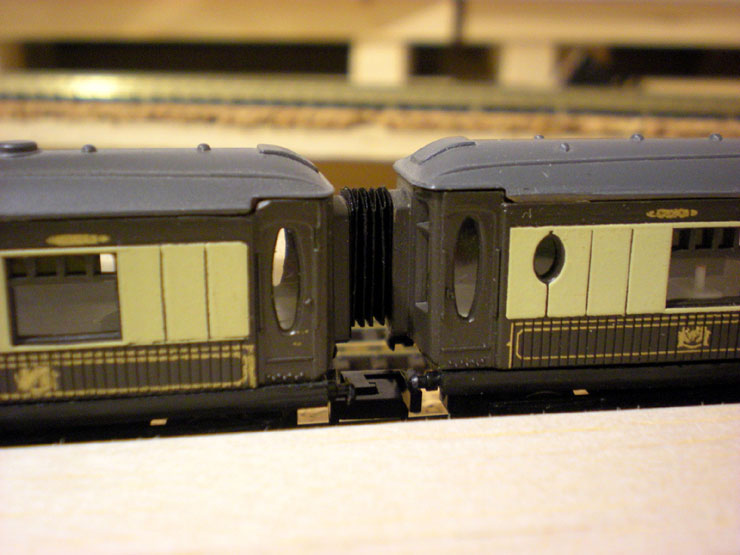
And now something different - testing corridor connectors for Barry
Morton. They work pretty well, but attaching them to one coach only
and a blanking plate to the other may not be suitable for tight
radius curves. I have a couple of places like that, and derailments
happened.
A good solution would be to have a half-connector on each coach
and no glue in the middle so that they can slide against each other
on the tightest curves. There's a lot of work to do on these
Pullmans anyway, so that's another job for the future:
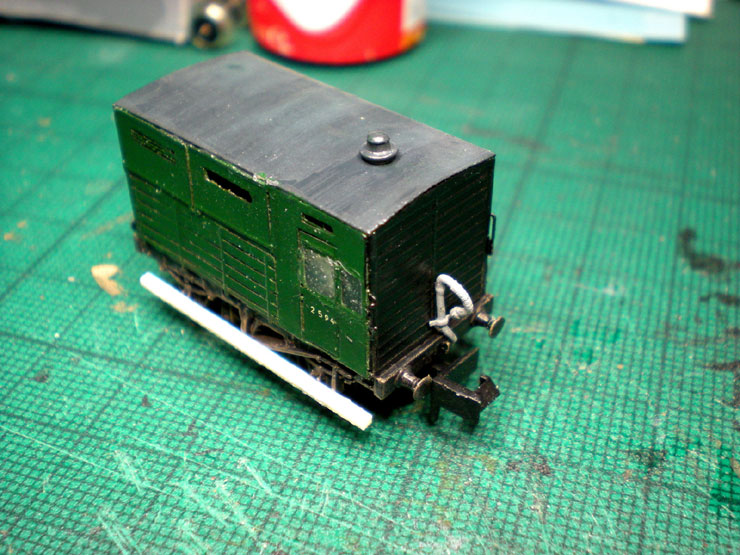
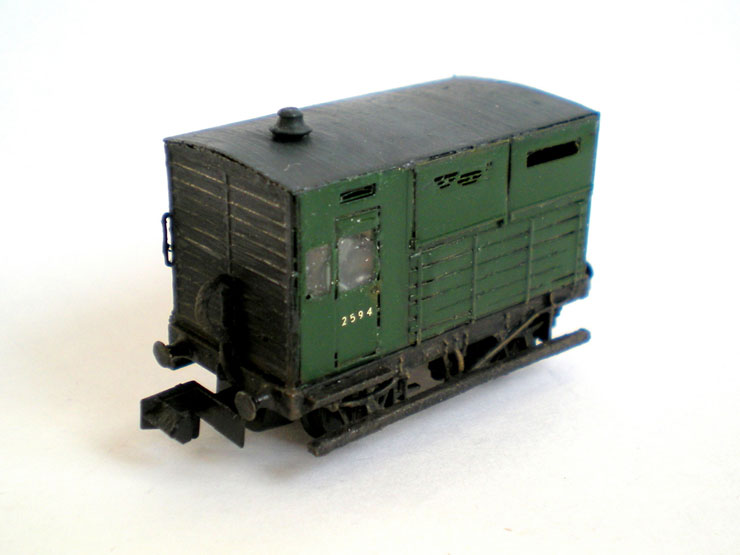
Something I got a while ago as clearance stock, pre-assembled by
Etched Pixels, this pre-Grouping LSWR horse box needed running
boards and steps, plus vacuum pipes, a tidy up of the Maunsell
Green paint and a repaint of the roof:
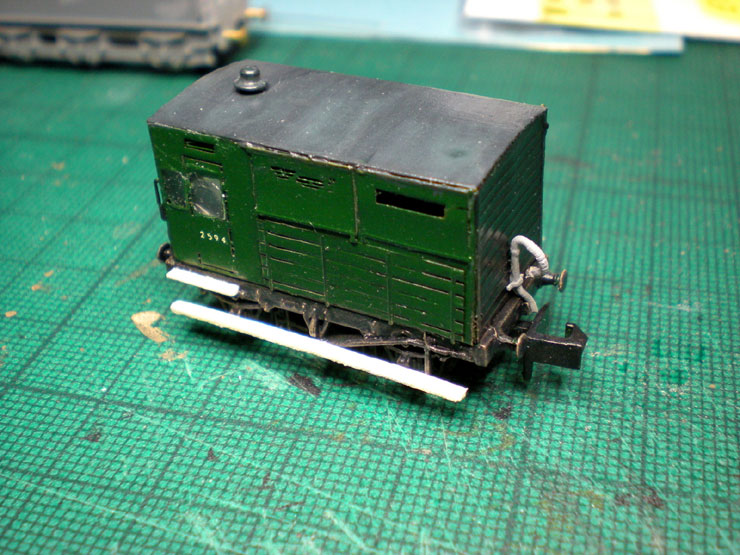

Finished and lightly weathered:
|