|
10 January 2014
Calling it a workbench sounds rather grandiose, but
I can at least aspire to one. This is where all of the modelling
work will be handled.
Having returned to N Gauge modelling late in March
2013, I collected together some rolling stock, and was able to put
together a test track in late November.
Since then I've been
cleaning wheels and track, oiling and running-in locos, and
collecting together the beginnings of a paint collection and the
tools to make use of it.
To start with, my work will mostly cover wagons, as
I get used to painting and weathering in N Gauge, so don't expect
anything grand just yet!
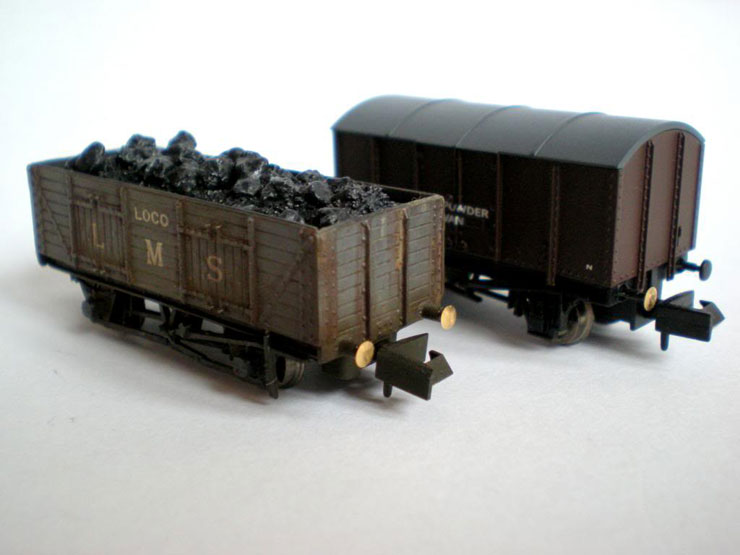
Not exactly a rolling stock kit or scratch build,
perhaps, but one of my first tasks now that I have some paints and
supplies has been to add the first batch of removable coal loads to
some of my wagons. Removable? Yes, and hopefully I'll actually make
use of that on the layout, although time will tell, of course.
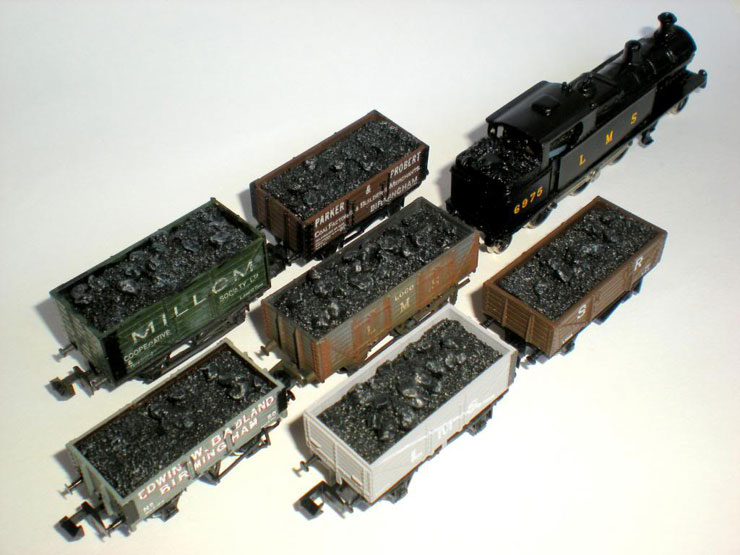
The base of each load is thick card, folded at either end to hold
the base close to the top of the wagon, and then painted black. Next
I added a mix from two different model coal, one a fine-scale 'real
coal' and the other the chunkier bits. Allow to dry and add a little
white drybrushing.
This is actually the result of two weeks of occasional
trial-and-error attempts, with the 'real coal' being added in the
first attempts and the lumpy stuff being added later. Only the
Millom and the weathered LMS LOCO wagon have brand new loads, with
both types of coal mixed and added together. Both of these have a
second layer of card added on top of the main strip to bulk out the
centre. The LOCO wagon had its strip gently folded in the middle to
create a peak, and I think this one has turned out to be the best of
the lot.
That's the way I'll be doing in in future.
Here's more from the second batch, with these SR wagons using the
card base again, with a second, shaped layer of card glued to the
top to help with the 'peak' effect and then adding two types of coal
mixed together on top of it:
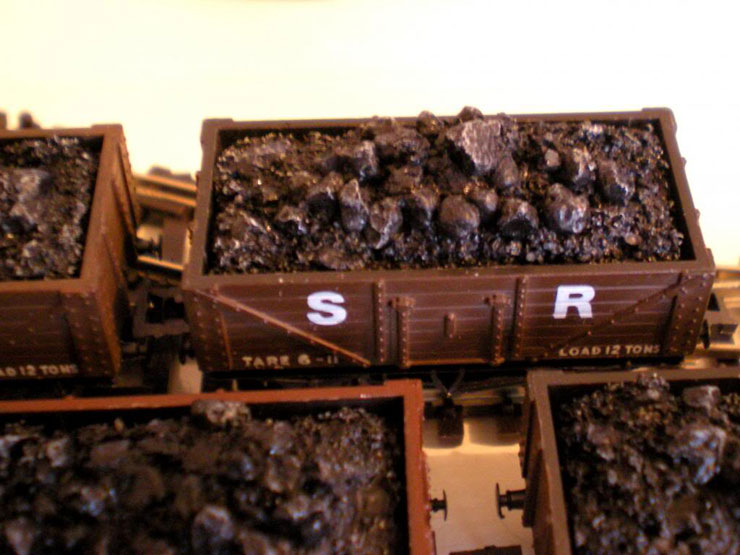
This time, along with the white drybrushing, I also used a bit of
gloss varnish to give some sides of the chunky coal a typically
shiny surface. It seems to work pretty well, although I still think
I need to find a better coal effect when it comes to adding coal to
locos.
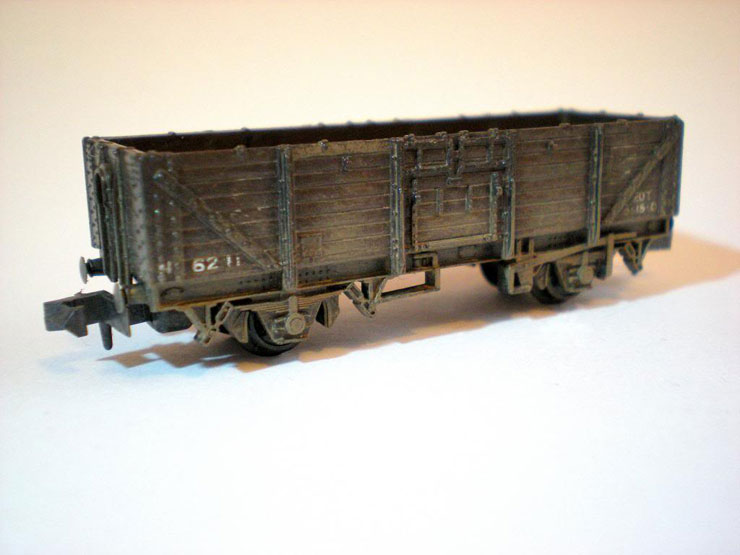
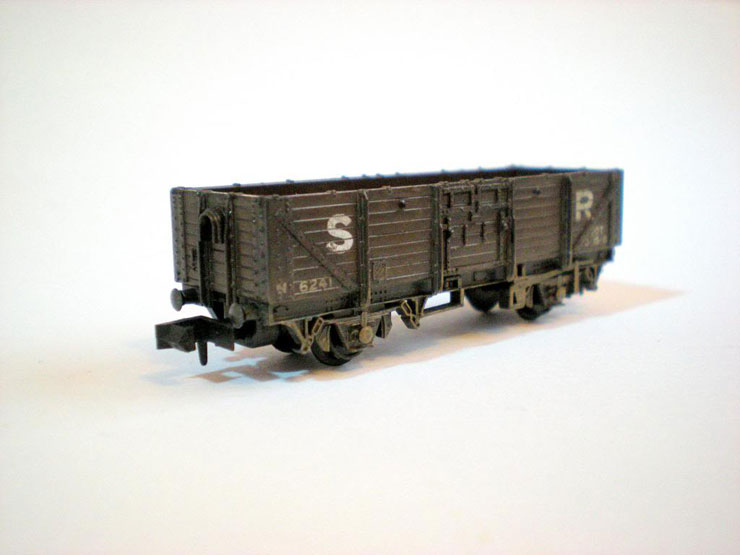
Just finished - my very first attempts at weathering:
The previous owner of this SR Ferry Wagon had largely scratched off
the SR decals, so I decided to go to town with this one, and show
replaced boards, and a distinctly uncared-for look. A bit extreme
for 1930 but this one's a bit of a one-off to see what I could do:
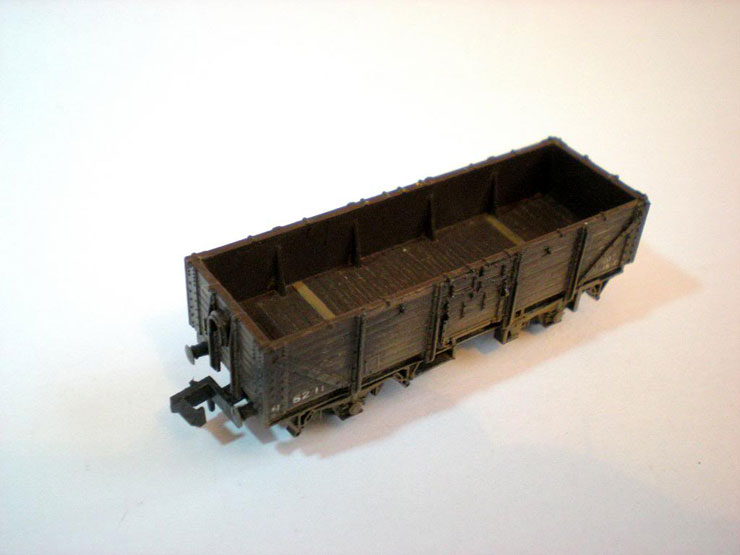
The next wagon is much more realistic for the period I'm modelling -
fairly respectable with a little wear-and-tear, all achieved with
Citadel black wash, diluted Humbrol wood brown (50/50 with acrylic
thinner), and some wood-colour drybrushing. Not sure if it's visible
here, but I also dabbed on a little gun metal to the buffers so that
some metal shows in the middle of the dirt where the buffers have
been bumping other wagons:
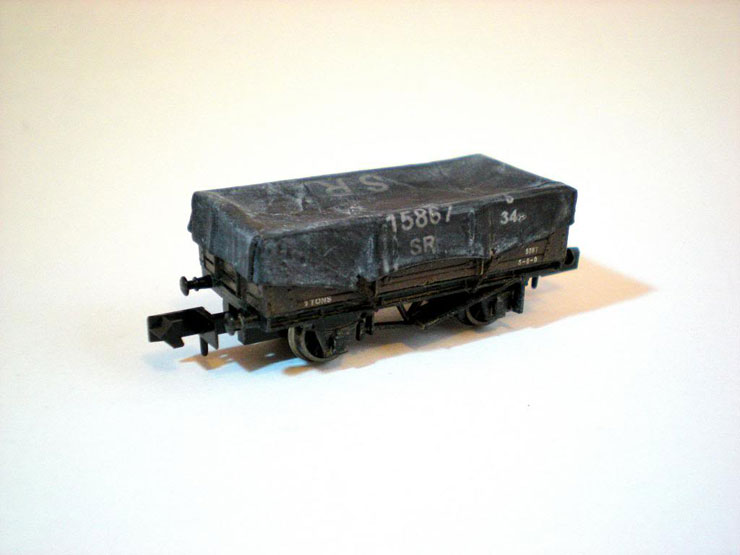
My very first tarpaulin cover on a lightly-weathered Farish 5-Plank
wagon. The plastic on these seems to be more rubber-based than with
the Peco wagons, with the result that it doesn't like to take the
paint quite so well, especially on the chassis. The rope ties were a
bugger to get on and tie together. Superglue wouldn't 'take' to the
chassis at all (later advice was to wash the chassis in soapy water
before painting, and I'll report on this next time):
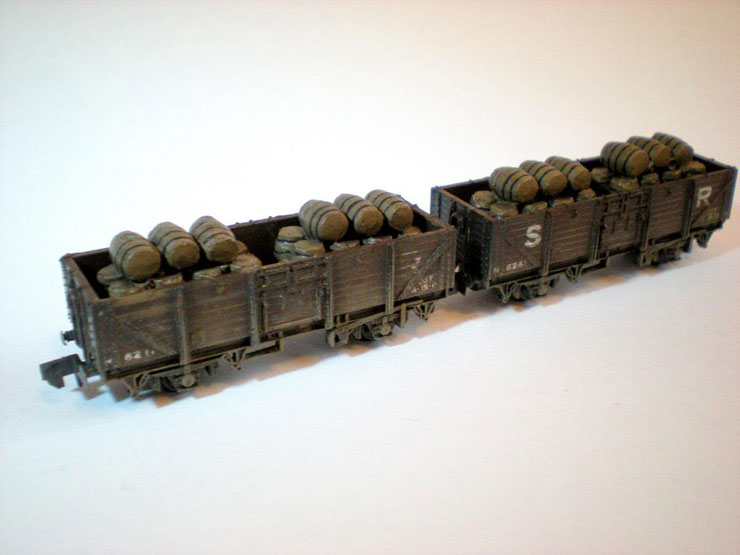
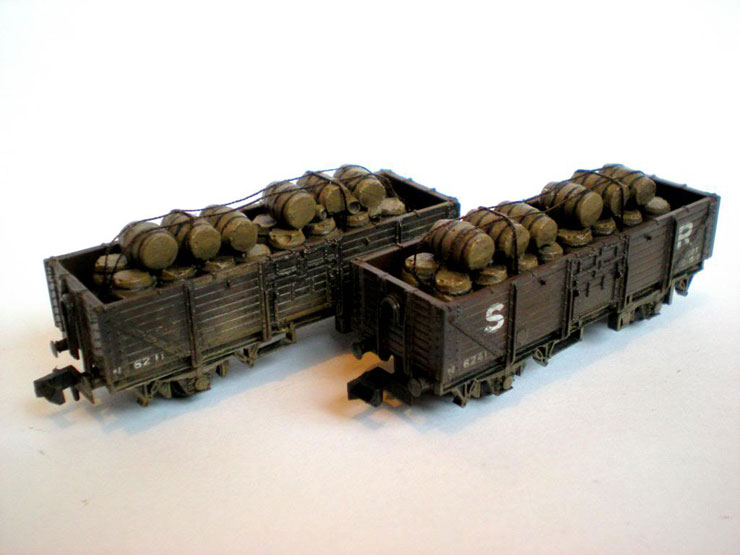
And my first wagon loads that aren't coal. I need to strap these
down with something other than thread for the ropes. I'd like to
attach the ropes to the barrels but not to the wagon, so that the
whole load is removable. But the ropes have to look like they're
secured to the buffers when the loads are being carried:
The tarpaulin was a very quick job - two passes with a brush and
some drying time in between. In fact, I think folding it and getting
that bundled effect on the sides took longer! Now another shot of
weathered wagons - this being my second batch. I think the mud
splashes were a little strong with these, but I'll leave them to
stand out because of it:
Again the Farish plastic chassis (and also the
Dapol) didn't take a wash very well so I think I'll definitely
provide a solid undercoat in future. Colours used: Humbrol black
33 (50/50 thinner mix), Humbrol brown 110, Tamiya dark iron &
gun metal, plus a matt varnish, with a touch of gloss varnish on
some of the less dirtied metalwork at the corners.
11 January 2014
Something new for today.
I tried strands of wire as rope, but they would
have needed painting and didn't seem particularly well-disposed to
stay where I wanted them to stay, so I switched back to cotton
thread and, thanks to a bit of outside advice, devised a way of
securing the barrel load inside the wagon instead of outside.
This is what the finished article looks like. It's
not ideal as the thread isn't as tightly secured as I would have
liked, but it conveys a general feeling of strapping.
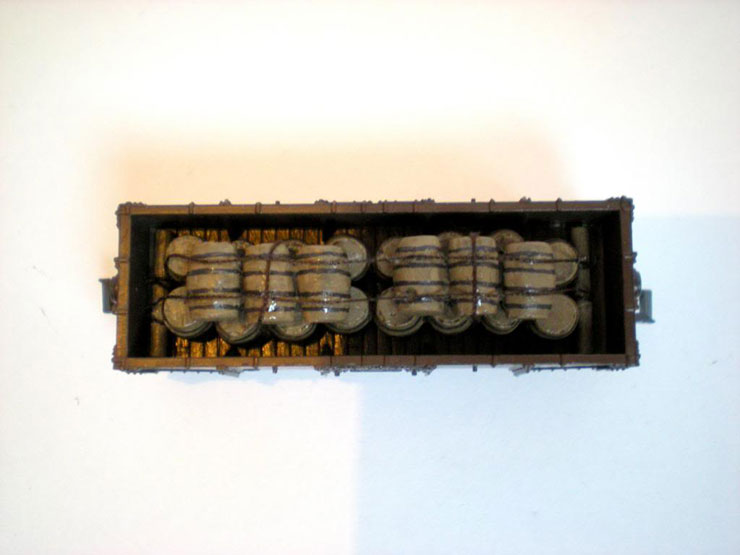
To add a bit more realism to the 'rope' strapping,
I had to come up with a way of making it look secured inside the
wagon. The answer was wooden bars fixed to the wagon base around
which the rope could be tied. Entirely invented, of course. To my
knowledge this approach was never used in real life (although I'm
happy to be proved wrong).
The whole thing is a removable load; barrels, rope,
bars and all, and they stay pretty secure while in transit, so I
think I've achieved my main aim - an interesting cargo.
14 January 2014
The latest batch of weathered wagons was completed
last night. This still involved a degree of experimentation, but I
think I've worked out how to get it exactly right next time. Each
phase is done on a different night to allow each layer of paint to
dry fully. It means that you only need to spend up to an hour a
night on these, so plenty of time to get on with other things (or
work on a bigger batch of wagons).
The wagons were washed in soapy water to remove the
greasiness from the plastic chassis. This didn't entirely work so
perhaps a longer soak is needed. I left them in for a minute or so
this time. All paints used were acrylics.
Each chassis received an undercoat of Humbrol 33
black. The wagon interiors had a wash of Humbrol 110 natural wood
mixed five parts paint to ten parts thinner. This could probably be
reduced to seven parts thinner next time.
The next night, the wagon body exteriors were given
a wash of Humbrol RC401 dirty black mixed 50/50 with thinner. I
didn't think the first coat darkened them enough so I immediately
gave them a second coat, but my advice would be to leave that for
another night so that you can really see how the first coat dries. I
probably won't wash all wagons this heavily, although this does look
pretty good. As these are coal-carrying wagons, the interiors were
given a watered 50/50 black wash too, with elements of the brown
still showing in places while the black provides a 'dirty layer' of
grime.
The chassis were given a 60/40 wash of Railmatch
2402 Frame Dirt and thinner, followed by a light drybrushing of
frame dirt on chassis and lower body, followed by a light
drybrushing of dirty black on the body to blend in the wash and
frame dirt and provide 'cleaner' spots (where you don't drybrush).
If you only give the body a single wash of black, then you can
drybrush a little more heavily and really control the grime that's
added.
Then provide a touch of Humbrol RC 402 rust to the
metalwork and a touch of Tamiya X-10 gun metal to the buffers to
reduce the plastic look of these.
Now I just need to give them a coat of matt varnish
tonight.
16 January 2014
The wagon weathering is pretty straightforward. I
think I got it right for coal wagons on the third attempt, and right
on the first attempt for general goods wagons. If in any doubt, just
apply thinner washes of paint in layers until you're happy. Or use a
couple of old Farish wagons that were cheap to buy and really go for
it.
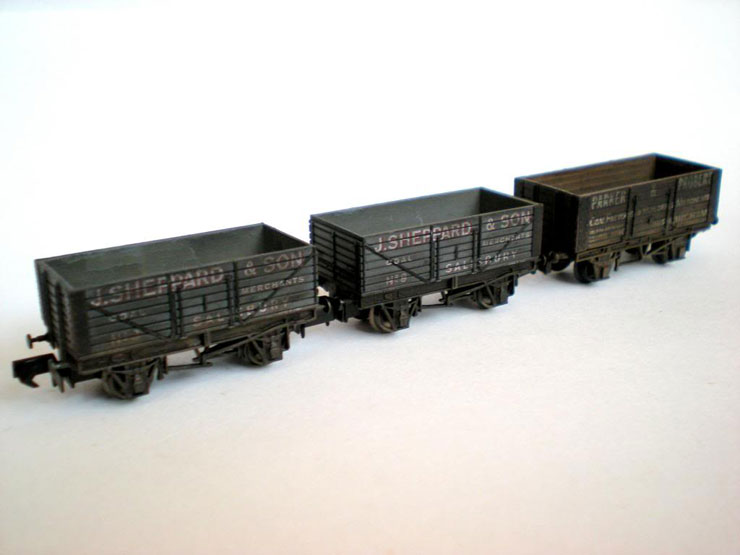
28 February 2014
Having finished a major project, I'm catching up on
wagon work. First job to repaint a Farish SR cattle wagon into LMS
colours (the wagon isn't accurate for the SR, but it is accurate for
the LMS in 1923-36). The repaint's done and now I'm going through
the excruciating torture of lettering it. No photos until the
lettering has been blended into the wagon and I've finished
weathering it.
Also done - replacement buffers for broken wagons:
The LOCO wagon on the left is also having its
lettering finished off. More pain!
18 March 2014
Not much to show recently, as I've been
concentrating on decorating the house. But a few things are finally
falling off the production conveyor belt.
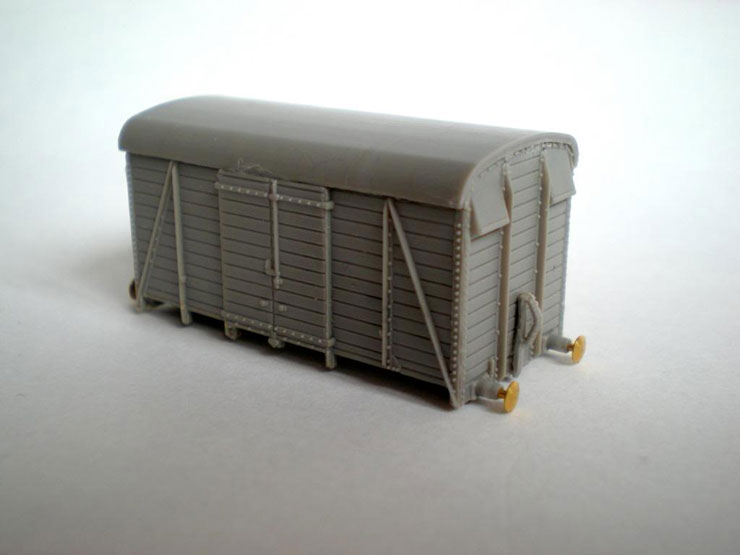
Ready for undercoating is NGS kit NGK21, the
earlier, even-planked twin vent van. It's been a bit of a slow
process to put together as I don't have the right drill bit for
opening out the buffers and the rest was a first-time process, so
I've been finding my way a bit:
I've also been fine-tuning my wagon weathering.
I was being too heavy with the black wash for the
average 1930 wagon, so after providing these two with running
numbers I gave them a single thinned black wash, making sure that I
dabbed and blotched the wash to simulate the uneven collection of
dirt. I gave them an hour or so to dry and dabbed again in some
places to thicken it in a very controlled fashion (this time). It
doesn't show up too well in these photos, but I overlaid that with a
wash of frame dirt, a light drybrushing in 'wood' brown, and a dab
of rust over the bolts:
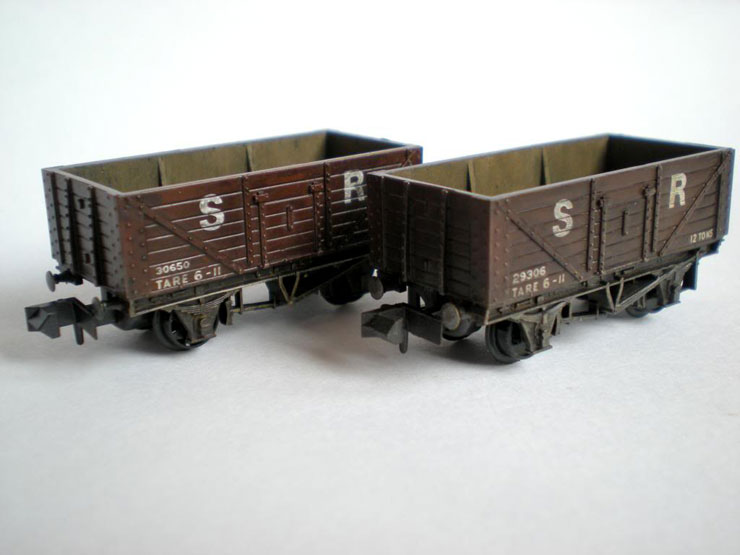
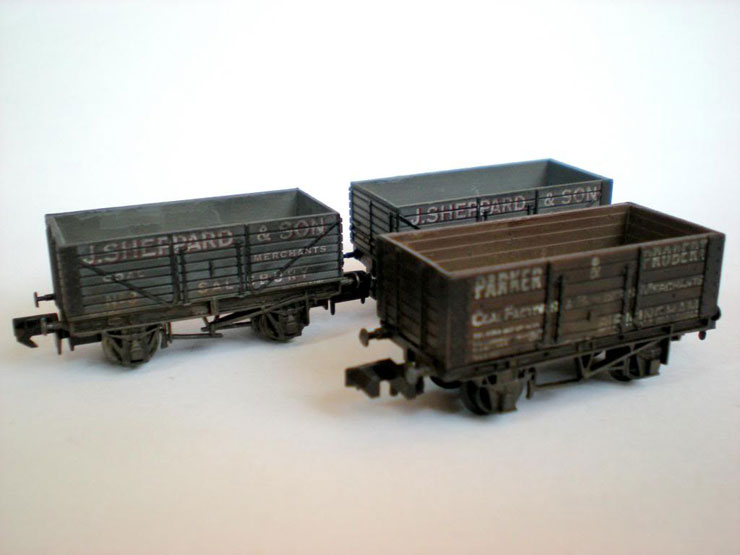
The wagon interiors have also been painted this
time, a thinned wash of brown in two coats. This doesn't entirely
overlay the original colour but instead gives it a nicely used
quality. I'll be washing all open wagons like this in future:
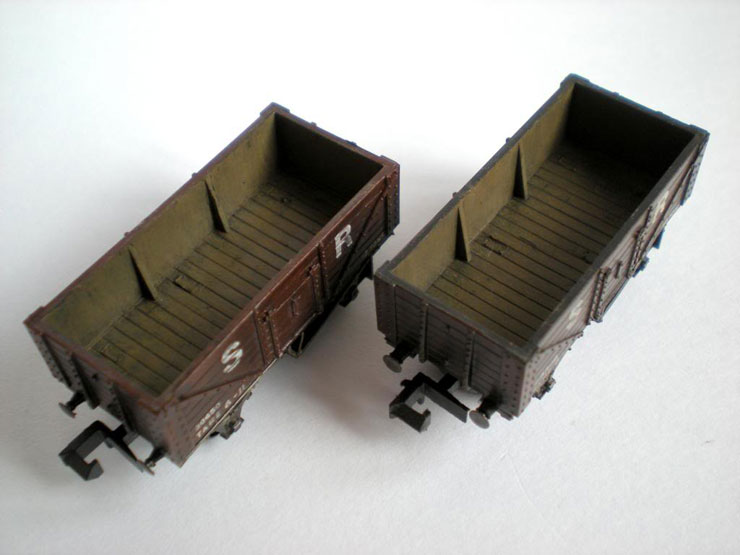
Then I made up two removable coal loads using real
Welsh coal that was kindly supplied to me:
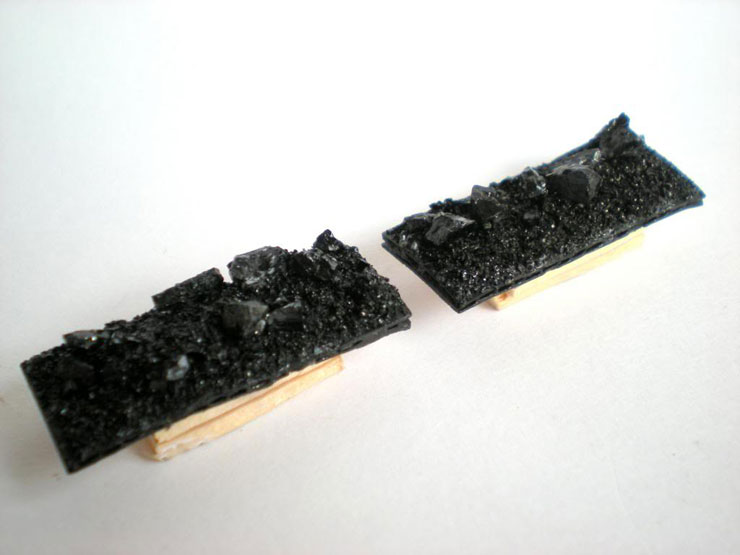
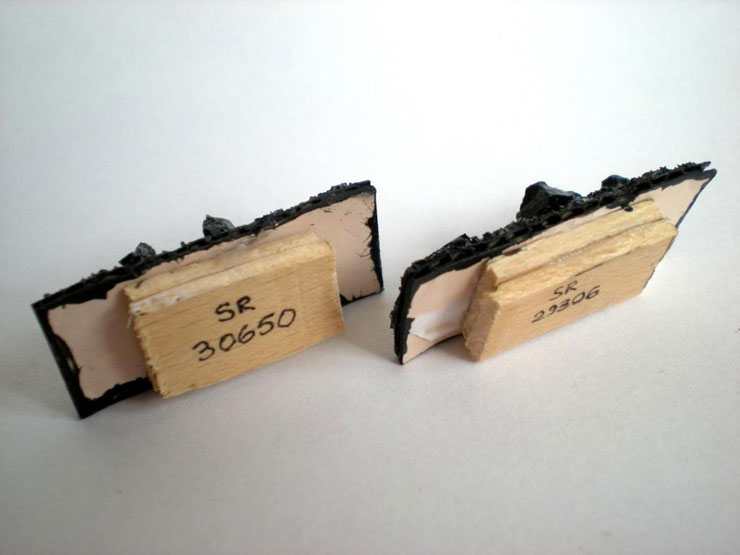
This is a new approach (Coal Loads Version 2), with
a flat base mounted on off-cuts of Magnum lolly sticks (a perfect
excuse for getting more Magnums!). The real coal is mixed with a
finer version that I bought some tome ago. Mixing them together will
make the big stuff go further and provides a realistic mixture of
sizes. The finished load is sealed with a coat of Pledge
multi-surface wax:
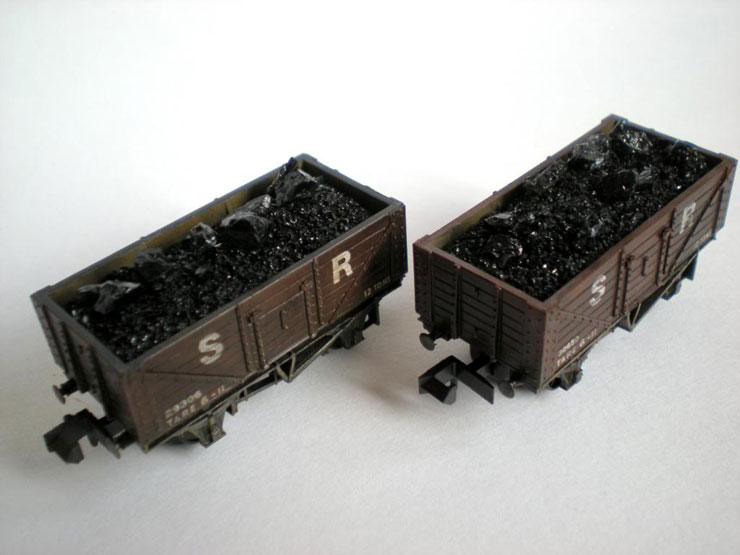
As you can see, they look pretty perfect when
loaded up:
And apart from being able to remove them very
easily by tipping them at one end, you can also use a magnet, as the
layer between card and coal is make of tin can offcuts:
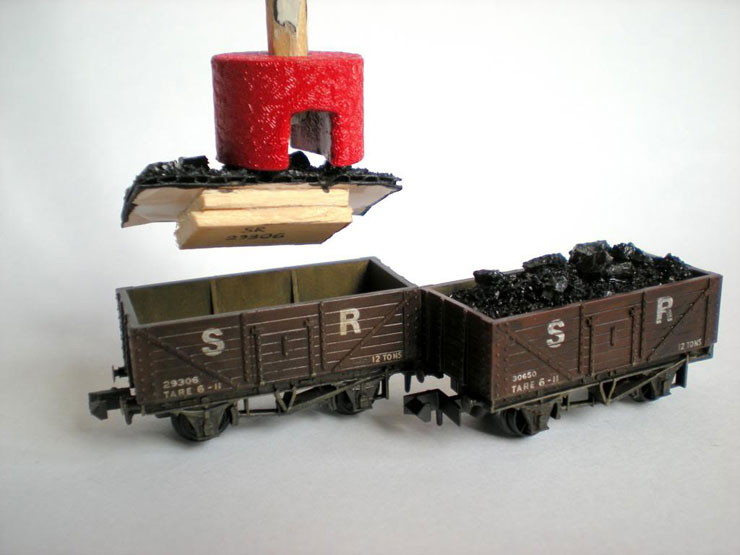
The magnet needs a bit of padding, though. Maybe a
foam wrap. The attraction is so strong that the loads snap up, and
sometimes some of the coal snaps off.
That's all for now, folks.
|