|
18 August 2014
I've been keeping my head down for a while, just
getting on with stuff. A lot of modelling projects require short
steps of work, a little bit each evening, so they take quite a while
before there's anything worth reporting.
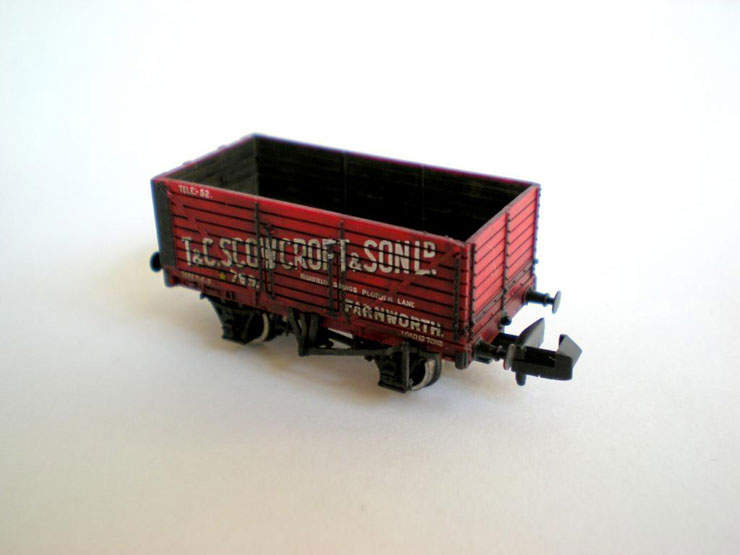
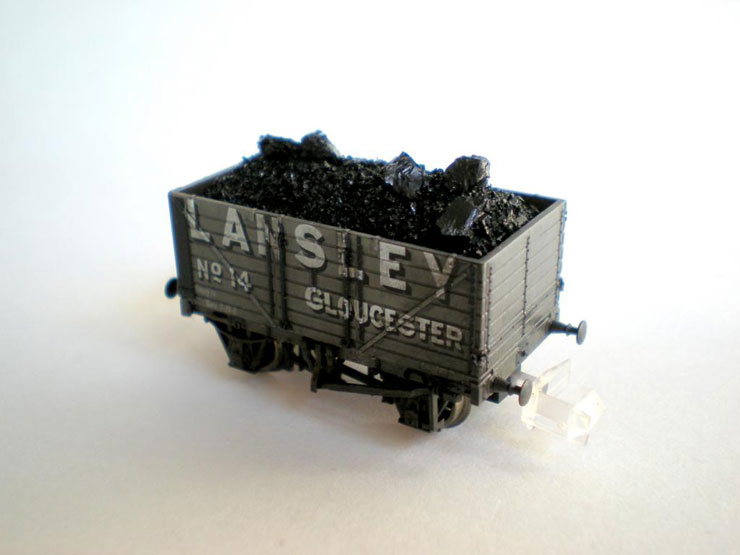
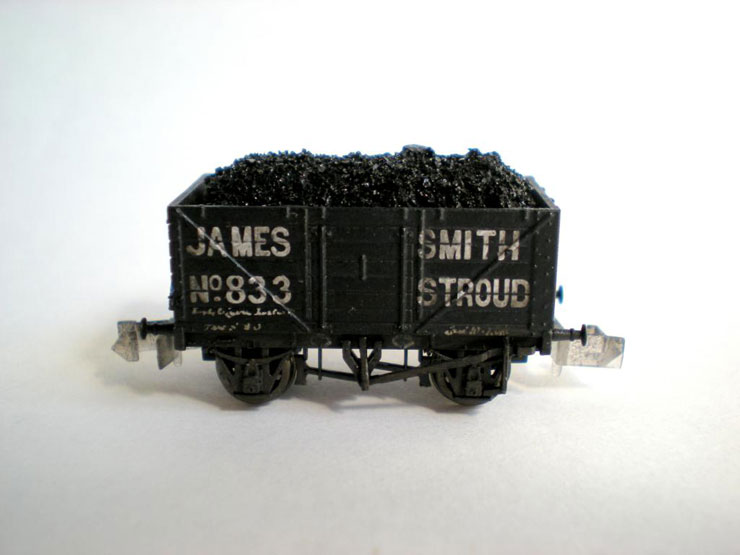
Mostly my recent work has involved weathering
wagons and fine-tuning the construction of magnetic removable
coal loads.
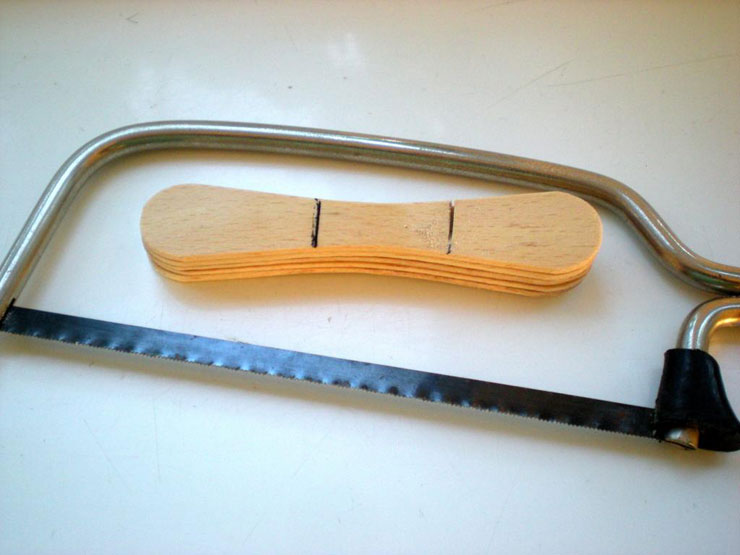
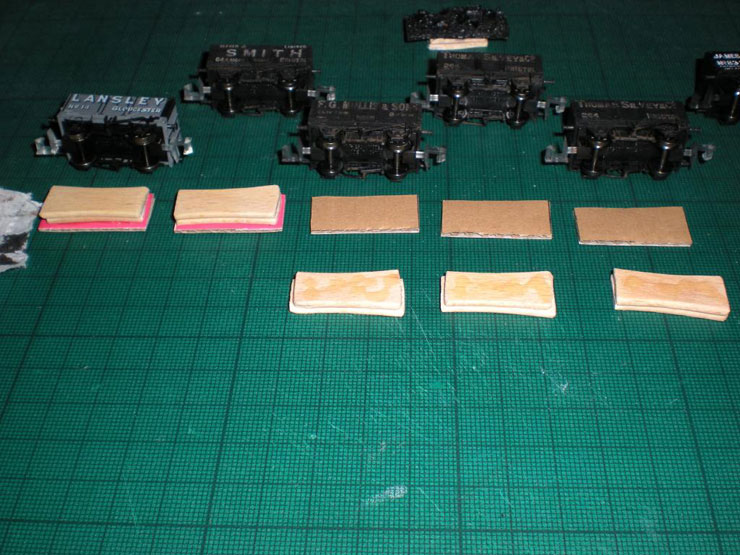
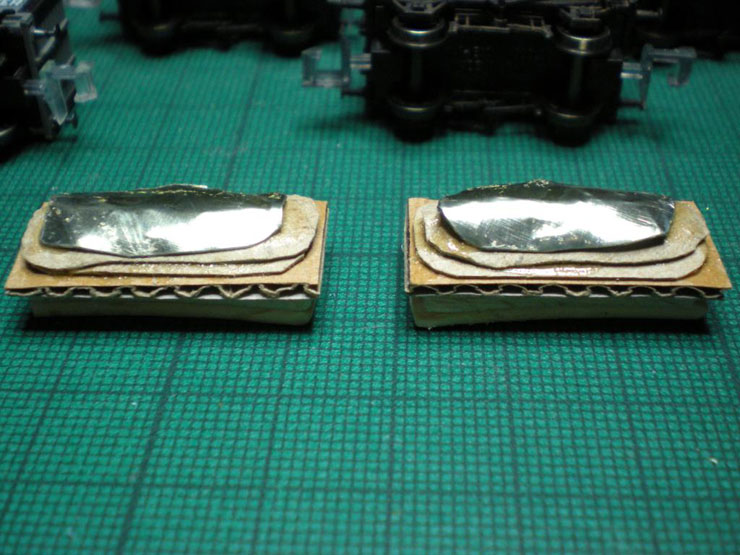
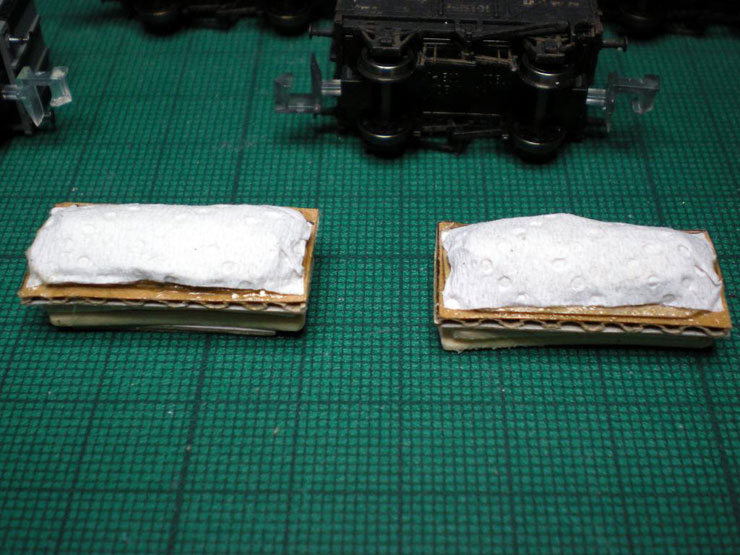
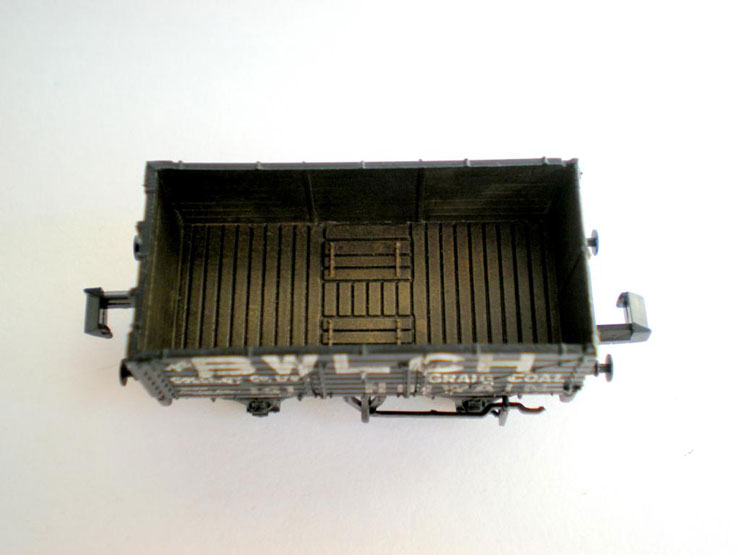
Below are a few pics of the most recent work
and a step-through of building the almost-perfected coal loads.
Ingredients are tin (from any tin can), Magnum
lolly sticks (other lolly sticks are available), corrugated card,
thin uncorrugated card, Bostik, kitchen paper, black paint, real
coal, PVA (wood) glue which is diluted with water to glue down
the coal, and Klear to seal in the coal load after the glue has
dried.
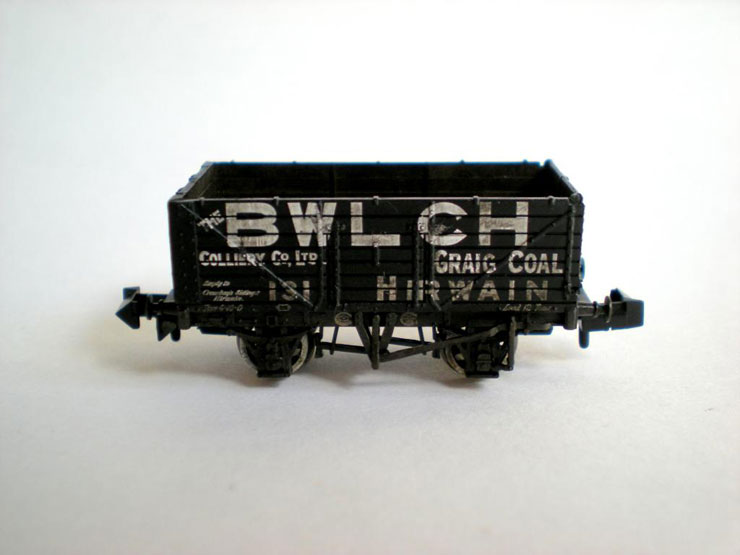
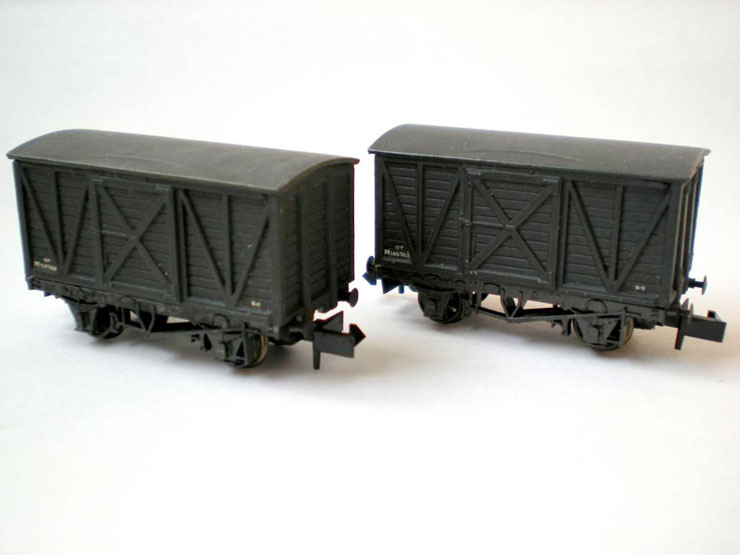
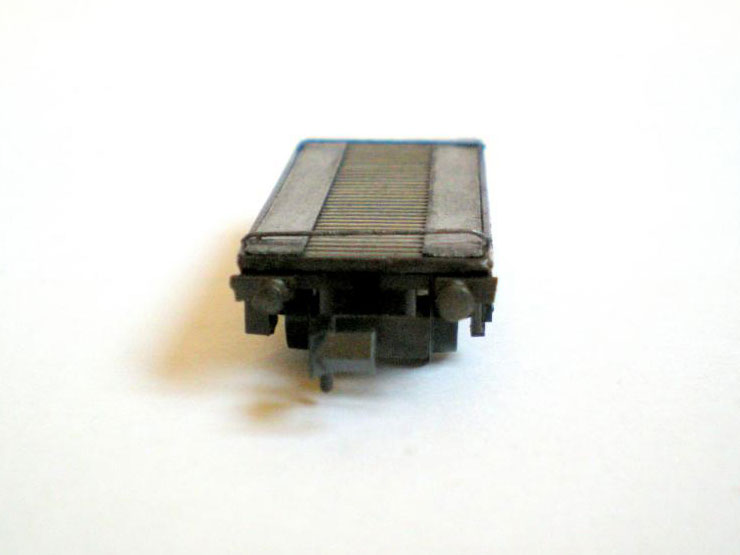
The best coal wagons available are from the
Mathieson range. These are all nine foot wheelbase wagons, so they
look quite a bit shorter than the usual Peco, Farish, or Dapol
offerings, and much more appropriate for my 1930 layout setting:

Wagon loads in place:
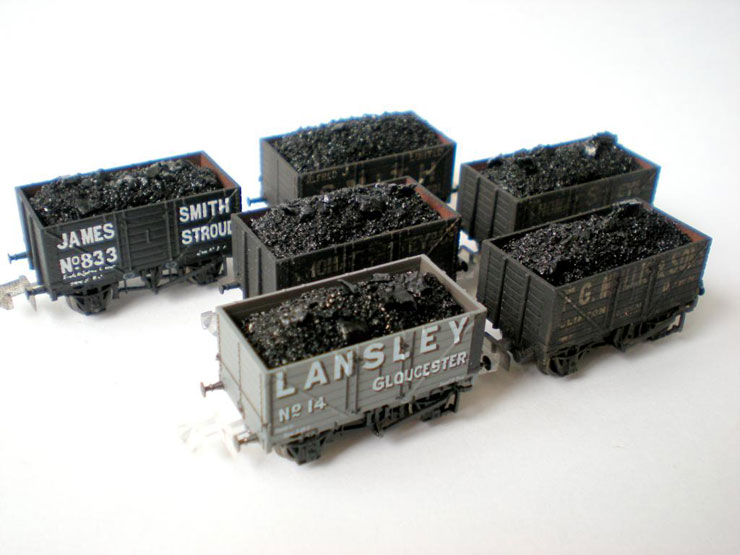
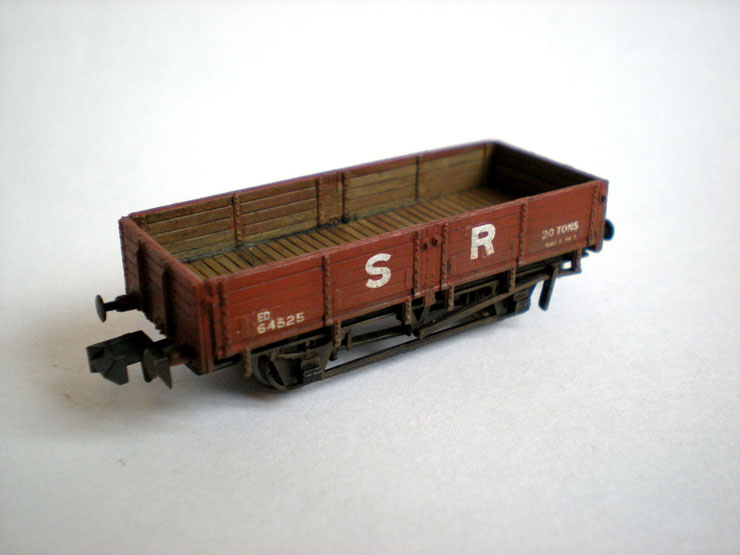
Weathered wagons, lightly weathered for 1930:

That's it for now.
5 October 2014
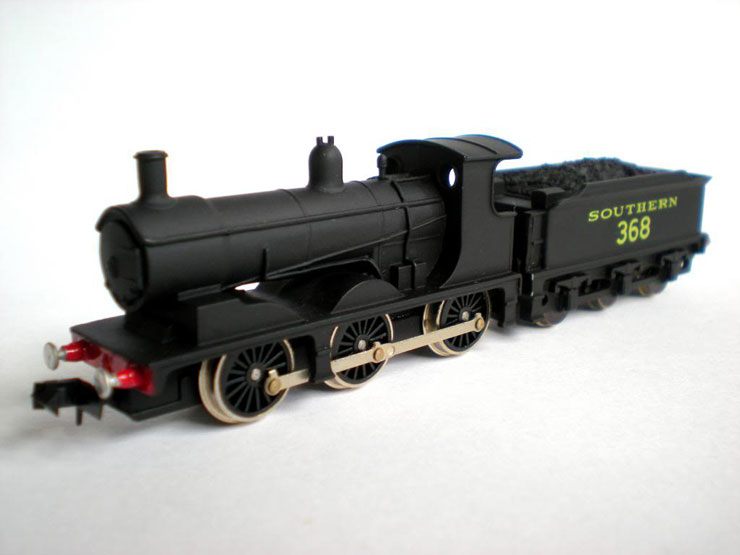
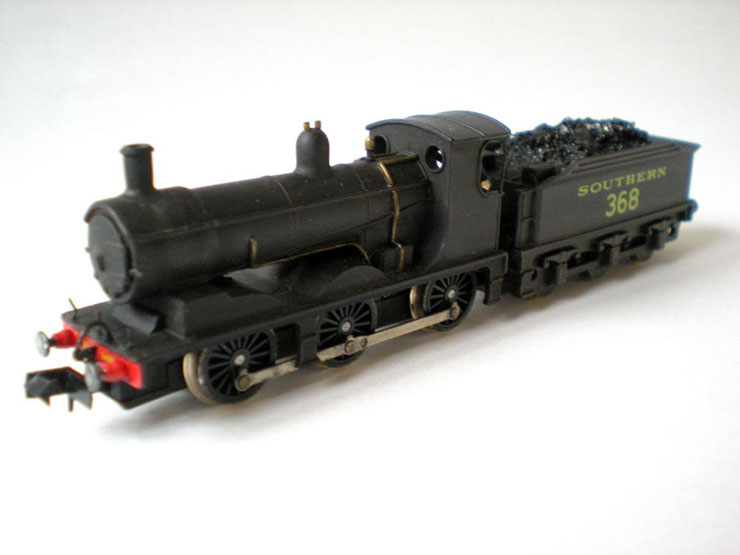
Here's a 'before' shot of my Union Mills Class 700
0-6-0 Drummond loco in SR goods black:
The 'after' shots are coming very soon.
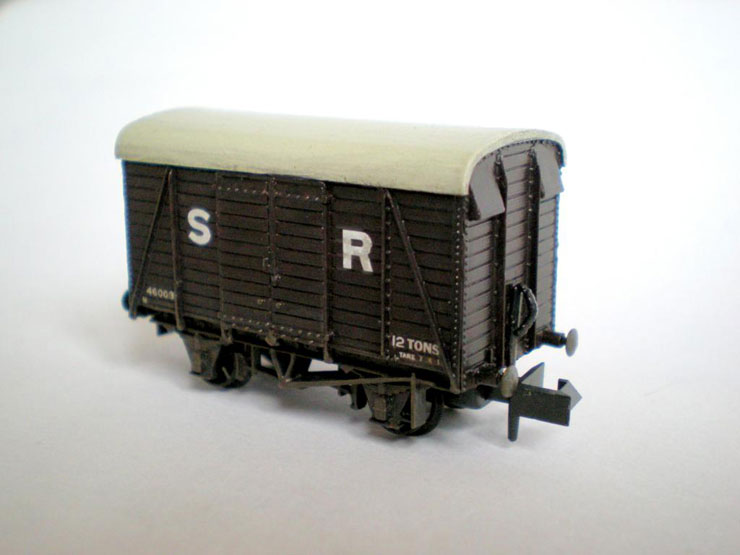
I also don't seem to have posted a photo of the
completed NGS SR covered van, so here that is:
16 October 2014
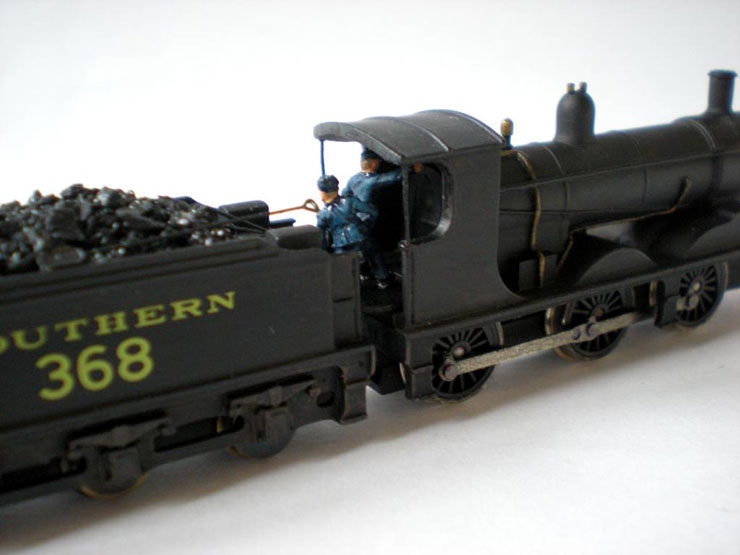
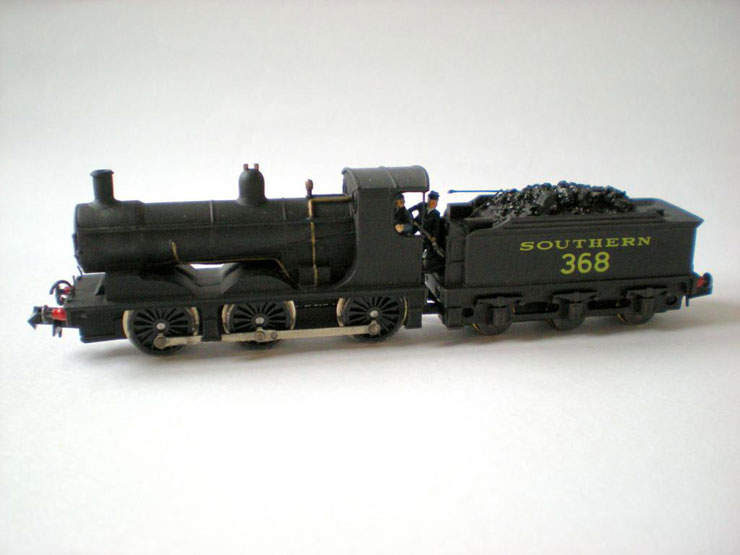
A little later than expected, here are the 'after'
shots of the Union Mills Class 700 0-6-0:
It has had a wash of brown and black to dull it down
and take off that jet blackness that comes with it when new, and the
wheel rims and motion have been dulled with a 50/50 wash of enamel
black and thinner. The front has a coupling hook and links, vacuum
pipe, and five lamp irons added (the two on the smokebox were
buggers to add, and if you don't scrape the loco's paint down to the
metal they just fall off with the slightest knock).
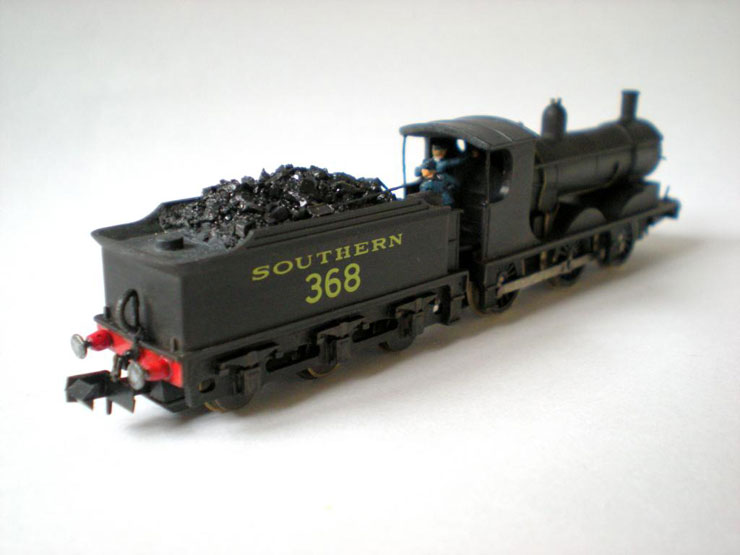
The back end has a coupling hook and link, and
vacuum pipe, handrails on the cab, real coal in the tender, plenty
of fireman's tools, and the fireman and driver themselves on a
home-made fall plate that's fixed to the loco cab and which swivels
over the tender.

I haven't done anything but add some basics.
Certainly I wasn't going to replace moulded handrails and the like.
It just takes time, that's all, in this case a bit of time each
evening for two or three weeks to complete the work:
17 October 2014
I'm still at the 'starter' level in terms of
weathering. I wanted to add a lot more in terms of water stains and
general dust, but wasn't confident that I was applying the paint
well, so I thought it was better to leave it with a general
dulling-down for now and have another crack at it in the future.
20 November 2014
A couple of NGS Midland external-framed vans
purchased via eBay, and in BR dark grey and markings:
Reconverted back into LMS style with some heavy
dry-brushing and new decals:
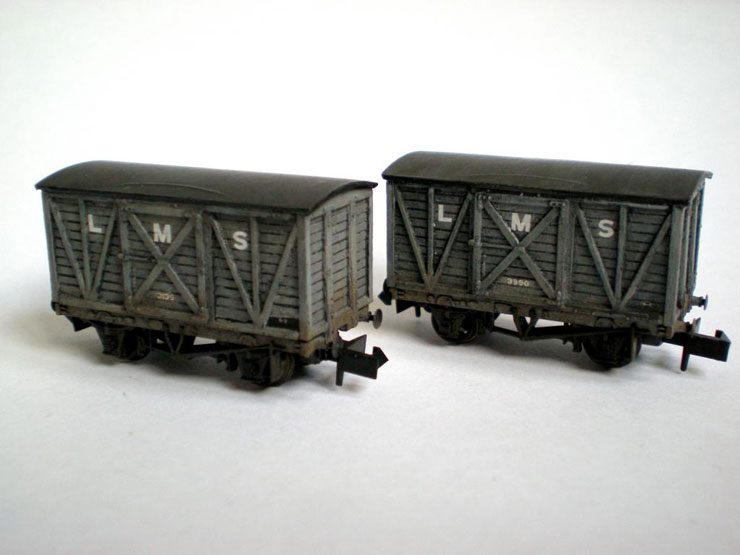
20 November 2014
I'm sometimes a bit ham-fisted at dry brushing. It
may be that I'm not patient enough to 'dry' the brush before
applying it to the subject, or that I'm using cheapo brushes, but
when you're doing rough and ready wagons that have already seen
about thirty years of service even on my 1930 layout then you can't
go far wrong. The dry-brushed grey was washed in dark grey, and the
dry-brushed frame dirt went on after a wash of frame dirt. That way
you get a more even spread of brown muck. Or at least, that's the
theory.
29 November 2014
A P&D Marsh bolster wagon converted into an SR road
van (actually the sole example on a steel chassis) with a bit of
filler in the central slot, a couple of steel plates on either side
of the deck (added late, so perhaps a little bulky), and a bit of
brass rod thrown on to hold vehicles in place.
In fact, the most difficult part of the job was
getting the decals in place:
10 December 2014
No actual work lately, but I've been gathering
together the parts for a Farish suburban coach upgrade (or
retrograde). See the
LSWR Farish
Carriage Conversions thread for full details.
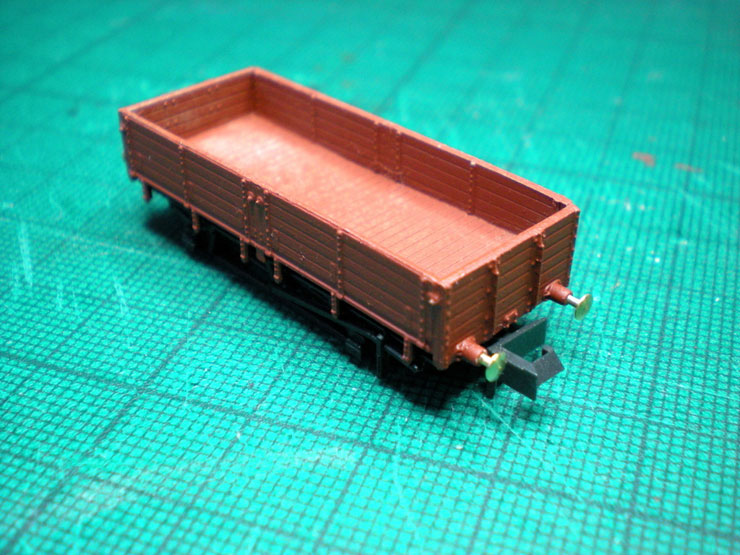
23 August 2014
I thought I'd do a few 'easy' wagon kits after the
coach work, but nothing is entirely easy if you want to do it
properly...
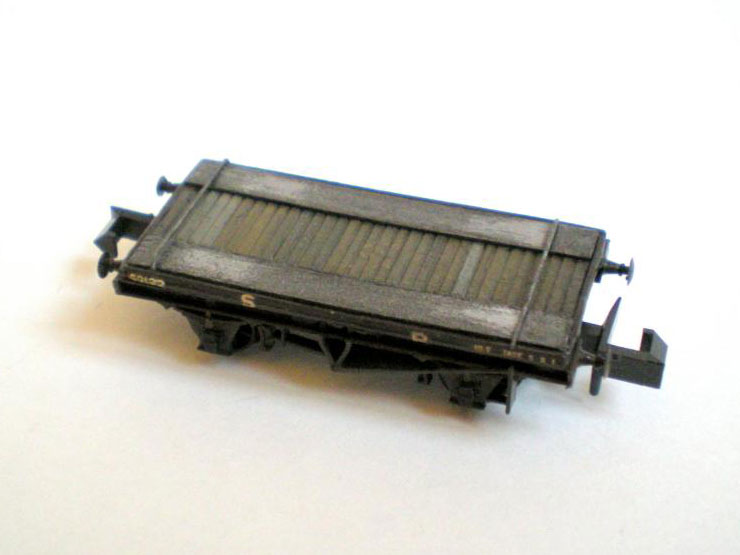
A Parkside Dundas 20T SR sleeper wagon, for my new
SR engineer's train of 1930:
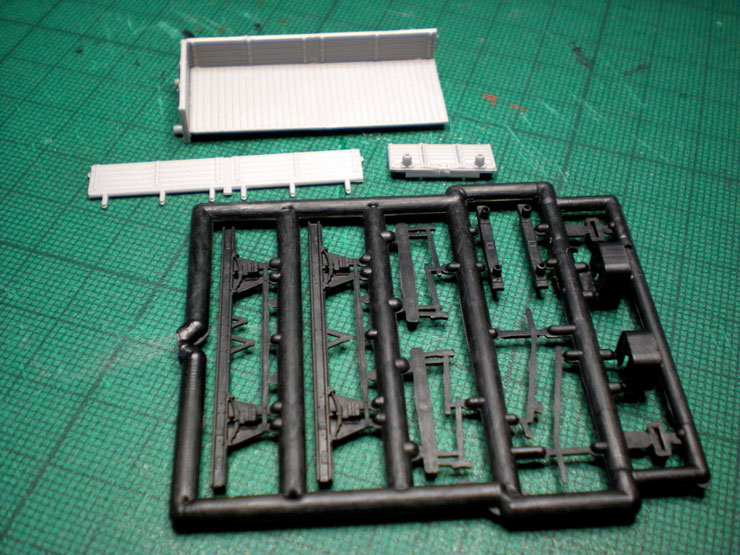
Assembled:
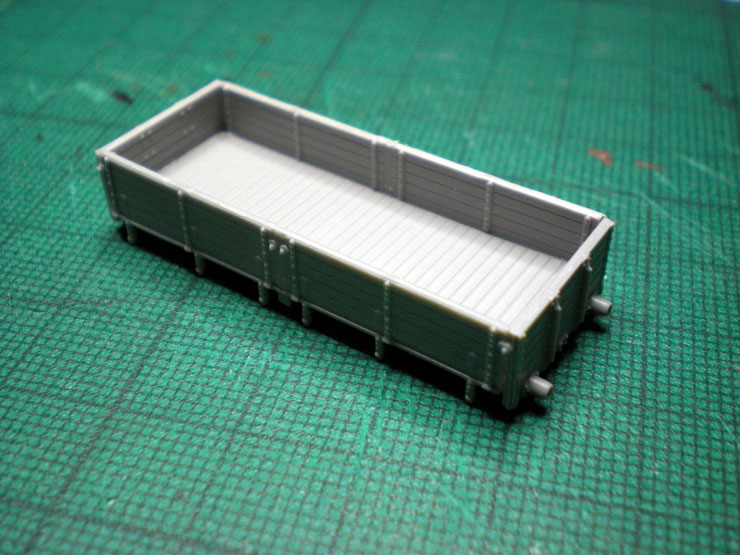
Roughly sprayed in bauxite:
Buffers and chassis fitted:
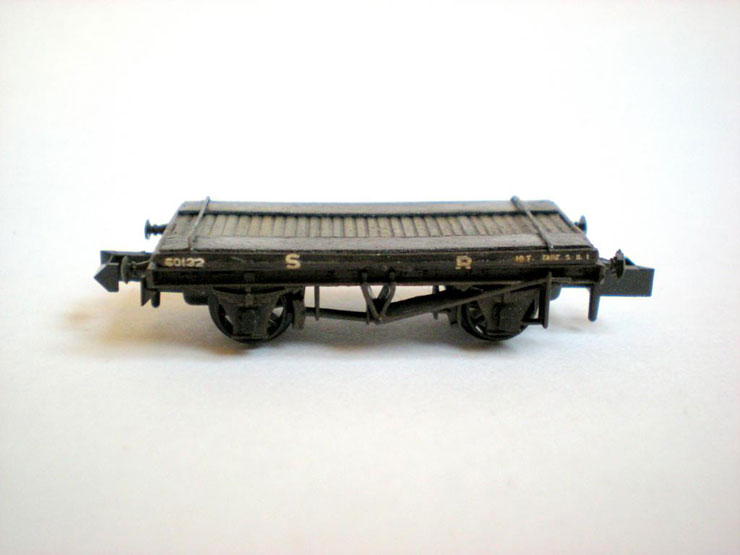
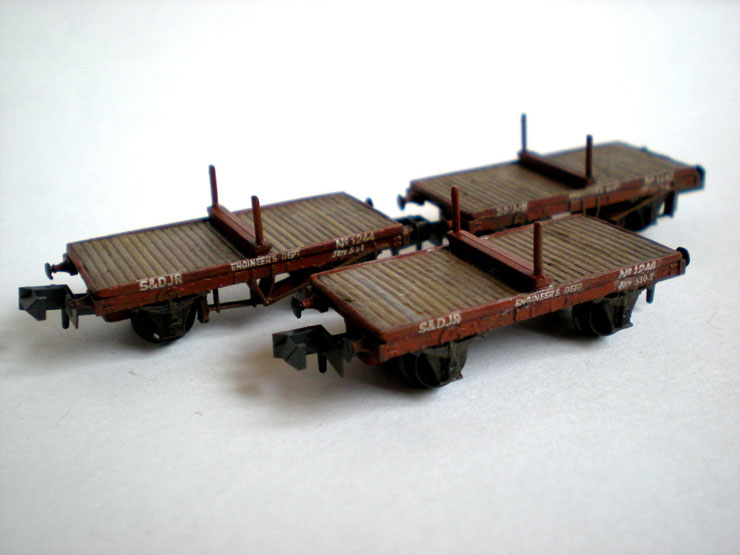
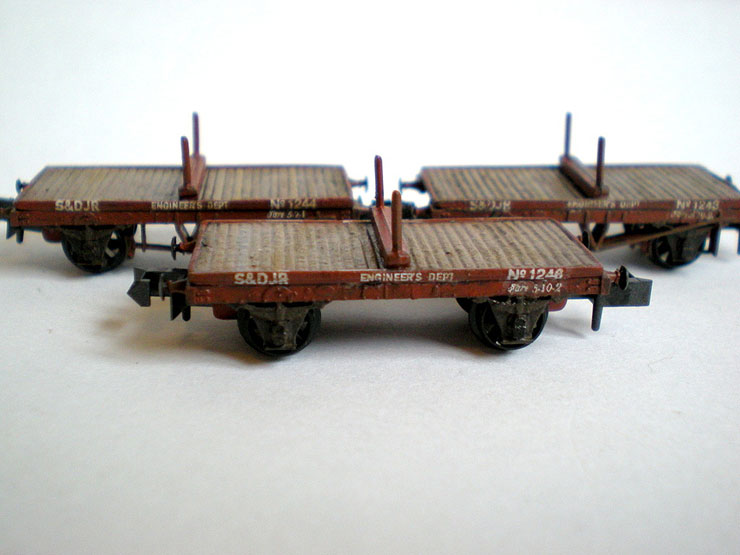
A pause with the sleeper wagon as three P&D Marsh
bolster wagons are sprayed and painted in S&DJR engineer's bauxite,
and three P&D Marsh 1-plank wagons are prepared for SR
stone-carrying services:
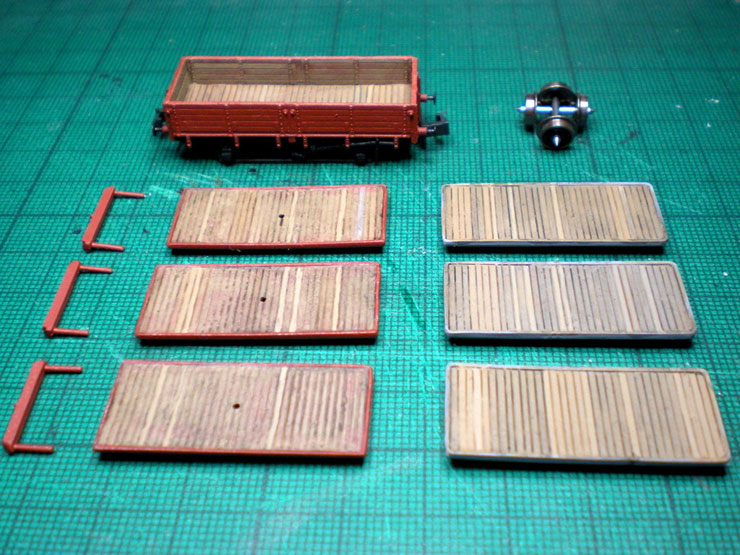
Assembling:

1-plank wagons finished and awaiting weathering:
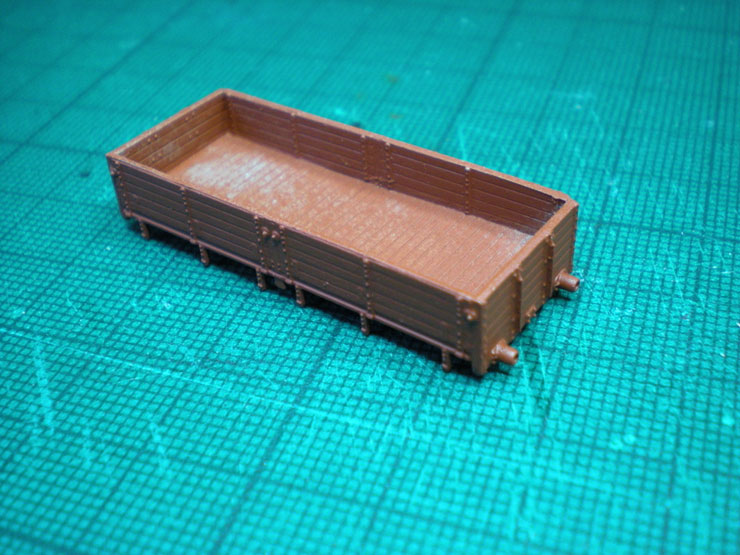
The sleeper wagon gets its insides painted so that
it looks suitably used, and a full weathering to complete it:
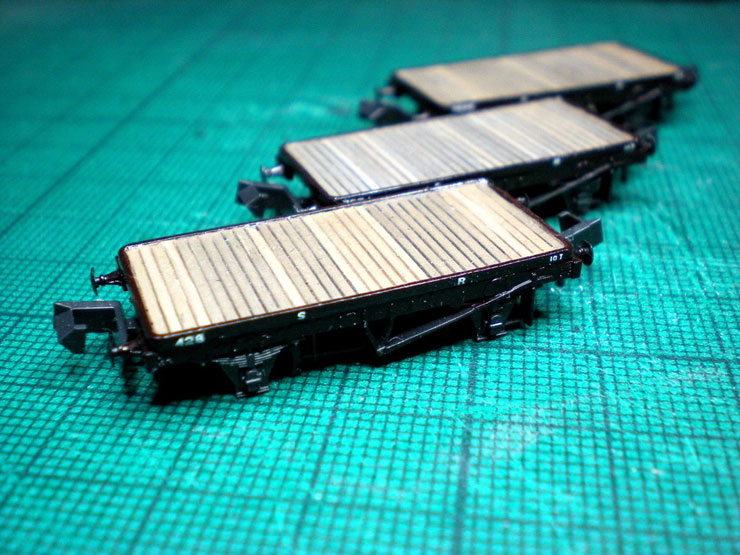
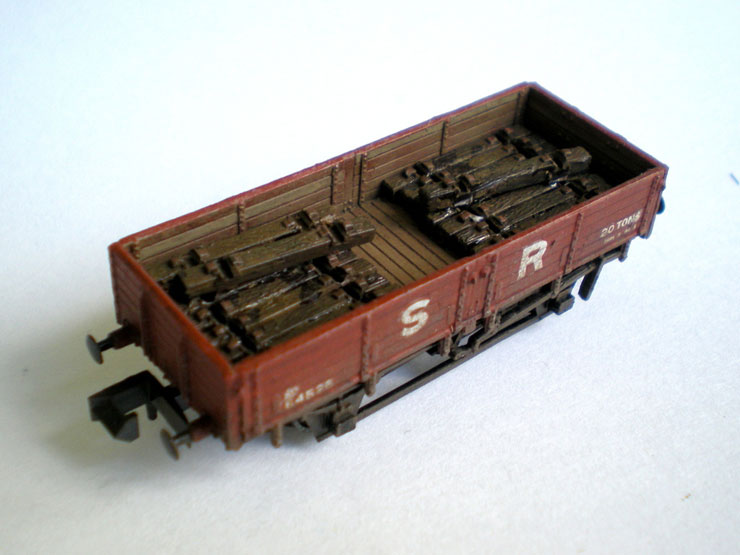
The three S&DJR bolster wagons are completed and
ready to gain a load of used rails (if I actually had any spare
rail!):
Final pics to come showing loads added.
26 August 2015
The paints used are Humbrol acrylics where
available, some enamels otherwise, a few Railmatch, a couple of
Tamiya, a spray undercoat and bauxite, plus some
not-quite-the-cheapest brushes. And a lot of patience. Each layer or
coat is applied on a different night so that the previous one is
able to dry fully. It means that even a single wagon weathering can
take a week or so, but it's worth it (and I work in batches anyway -
six is a good number of wagons to take in one go).
Finished last night were two SR engineer's ballast
wagons. They were converted from Farish Bachmann 3-plank LMS wagons
with a quick spray of bauxite, and a bit of paint on the insides:
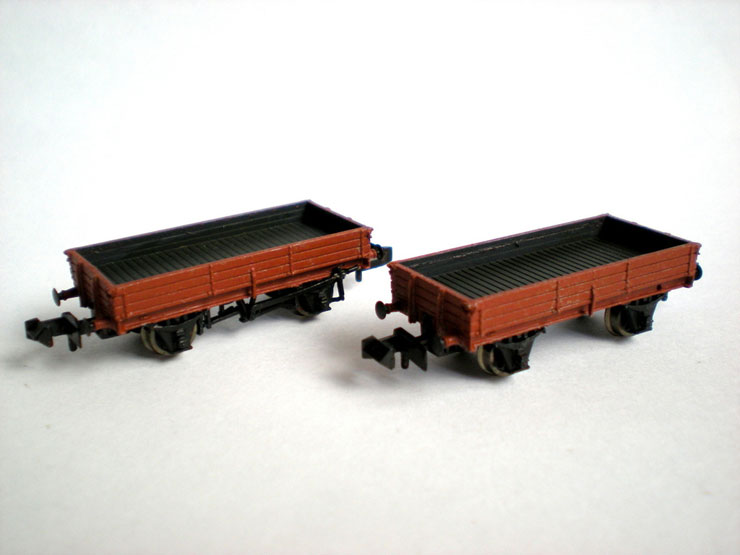
Then they were lettered, weathered as normal, and
then given a very dry brushing of white/light brown to mimic ballast
dust. Shame I have no ballast! The layout hasn't reached that stage
yet:
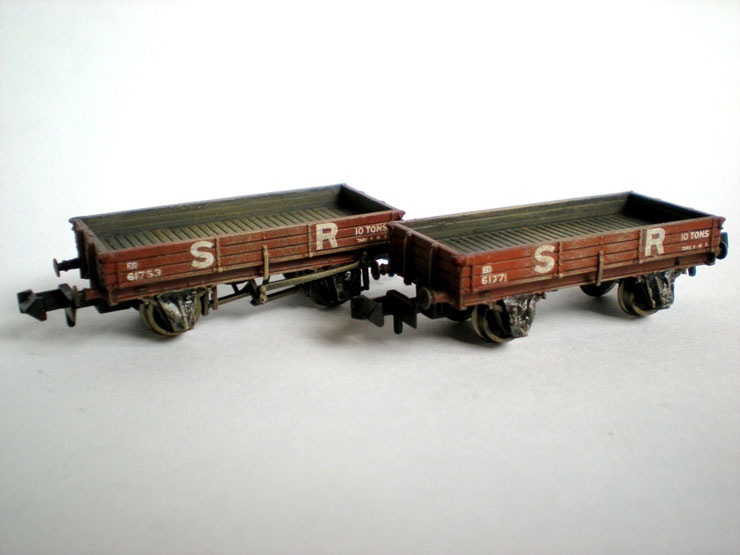
The shiny layer over the axle boxes are leather
dust guards (paper, painted a watered black, screwed up, glued on,
touched up on the black, gloss varnished, and then dusted with
stone.
1 September 2015
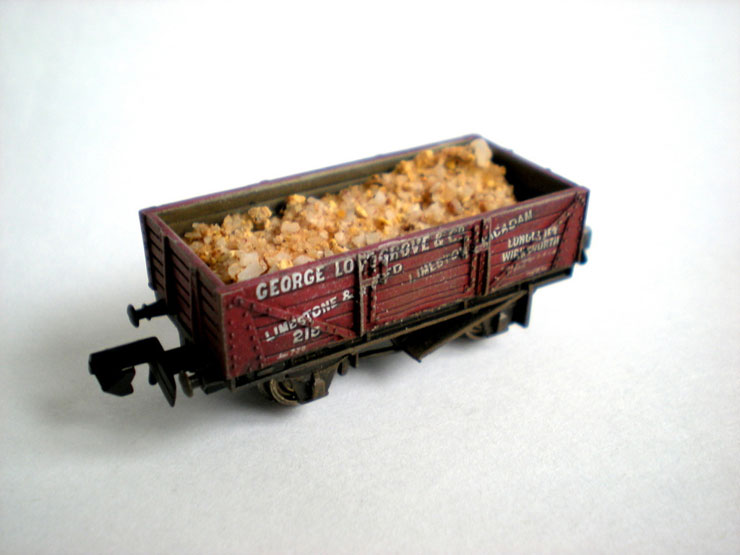
A few minor bits and pieces to report, starting
with a newly-weathered George Lovegrove wagon with a real mineral
load - crushed gravel:
A sleeper load for the engineer's department
sleeper wagon:
And three completed P&D Marsh 1-plank wagons (with
very nicely defined decks that paint up pretty easily), complete
with Portland stone loads that are roped down for carriage:
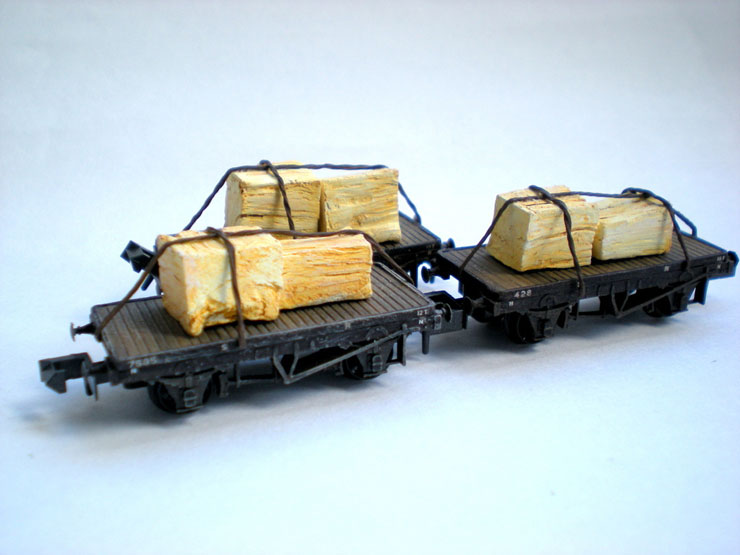
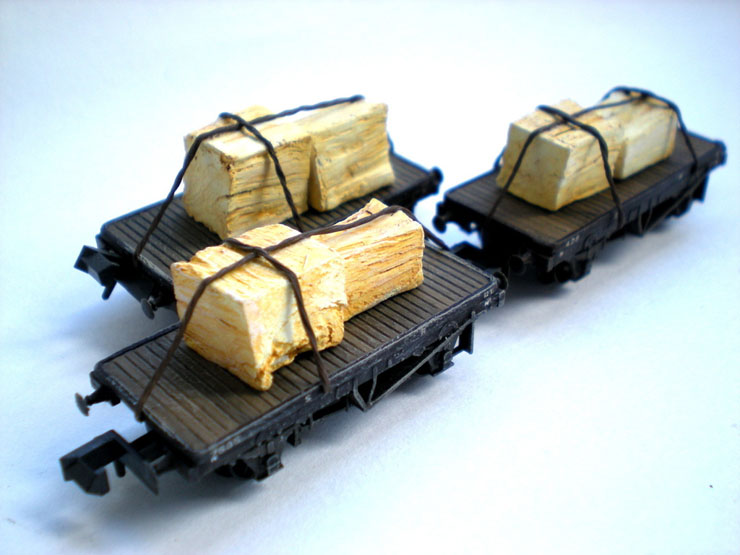
I'm very pleased with these, although I'm still not
entirely convinced about the ropes.
9 September 2015
Luckily the Lytchett Manor chain arrived today,
although I think I'm going to try rope instead. It seems to have
become unavoidable that these loads will be glued in place, so rope
should be easy to secure. The chains will be used for the bolster
wagons...
In the meantime I've been weathering a clutch of
brake vans. As I'm going to put a lamp on the back end of each van,
I've been wondering whether it's worth removing one coupling and
adding a hook and chain. The question is how do you remove the
coupling from this without destroying it? It certainly doesn't twist
and pull out with any reasonable level of effort.

|