|
28 April 2015
Time for another update.
Work on the first carriage conversion has been
ongoing, but there are stages in which not very much at all seems
to happen, and then you reach a stage where very much indeed seems
to happen and suddenly you're a whole lot closer to completing the
project. Building the layout has been a very similar process so
far (see the
Layout
Work thread).
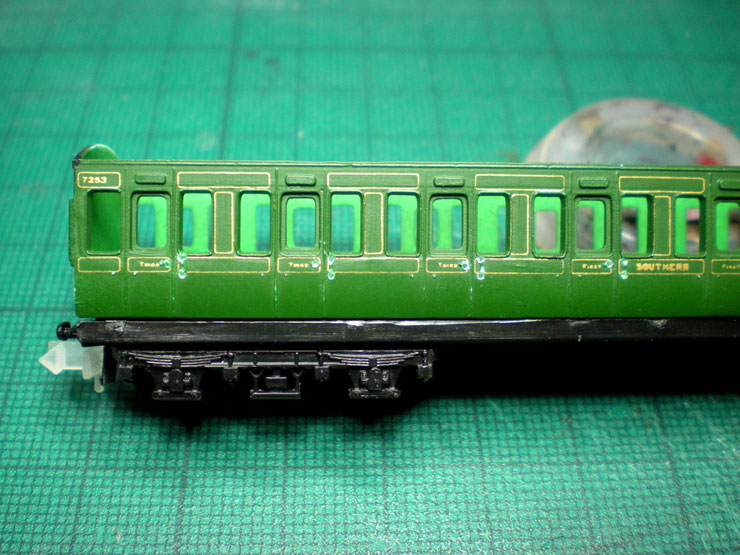
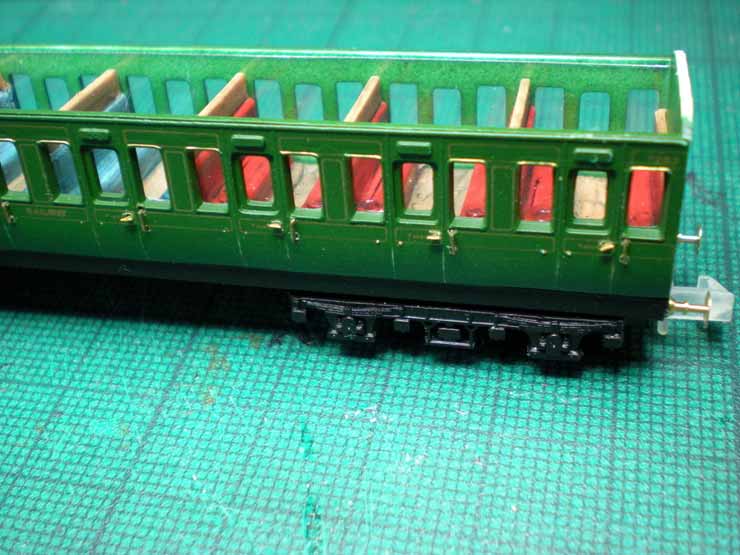
The holes for door handles and grab handles have
all been drilled, using an 0.5 bit. That's not as easy as it sounds
as I broke a drill bit by pressing too hard. You have to allow the
drill bit to find its own way through the plastic.
You also have to be careful to place the grab handle
drill holes immediately above and below the existing moulded grab,
and I seem to have drifted a little in some cases, which is all
too easily done. Never mind, they'll fit eventually, after a bit of
pushing and tweaking, and no one will be any the wiser:
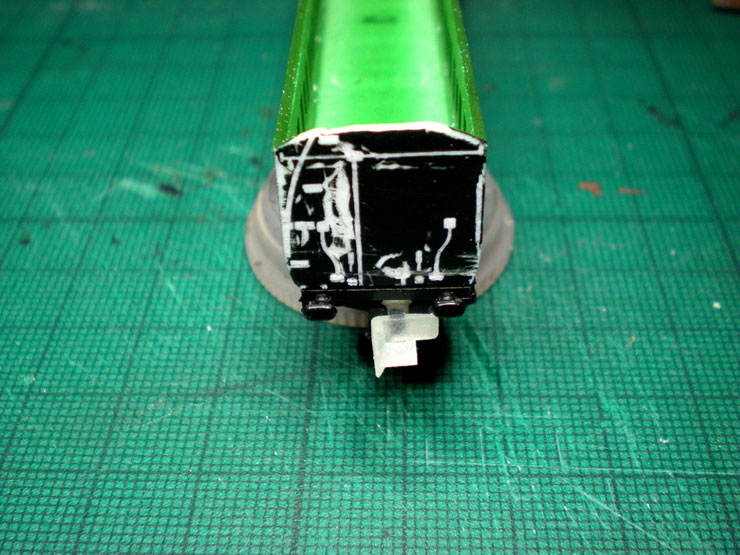
Before adding the new handles, it's best to carry
on with the demolition work first, so I scraped and filed off all
end-carriage detail, and also peeled off some of the top edge - a
little too much as it seems that the existing ends will do fine with
the new roof, with a minimum of filling around the gaps. So be very
careful to peel off only a little of the central top edge of each
carriage end:
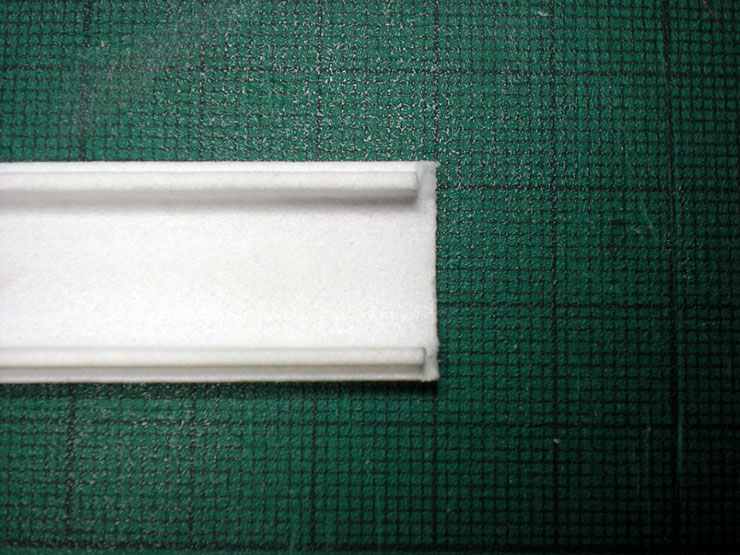
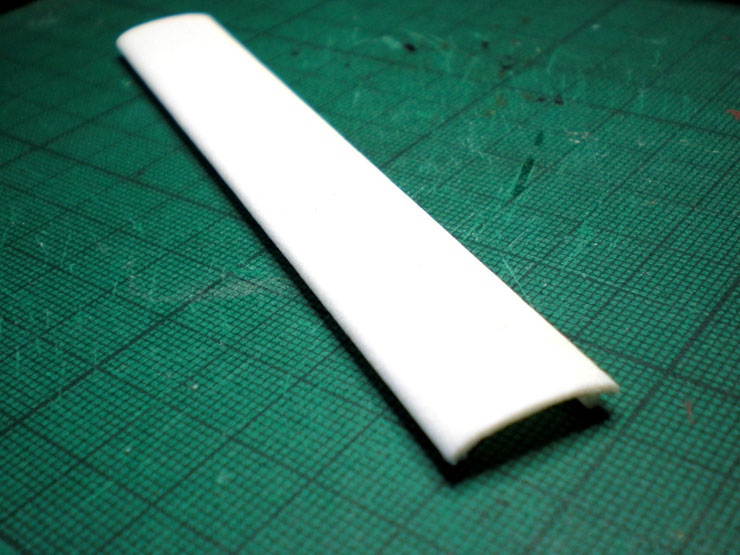
The Etched Pixels 3D-print roof needs to have its
supports pruned back so that it sits over the carriage end. Only a
millimetre or so needs to come off, and again, I know this because I
took off a little too much:
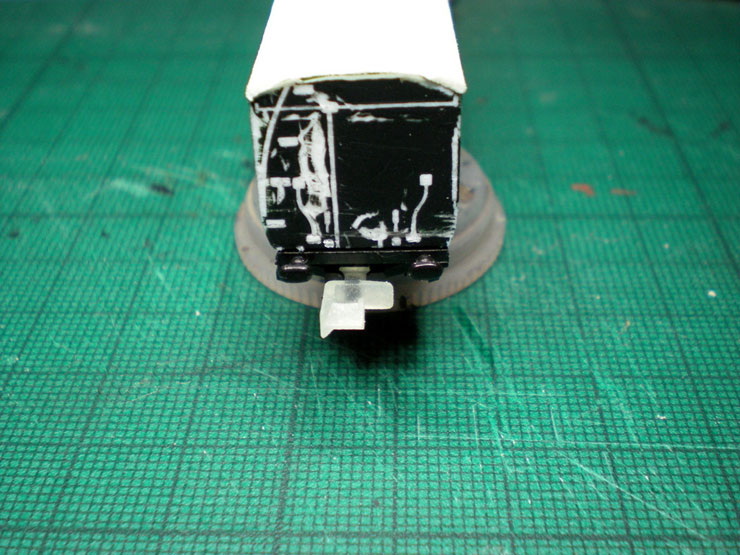
When fitted, the new roof will sit over the end
pieces quite nicely:
5 May 2015
The tricky part about experimental work like this
is that you're not entirely sure of the order of work until you get
there. I've rearranged the list several times and am still making
minor changes. It'll all be much easier next time, but progress this
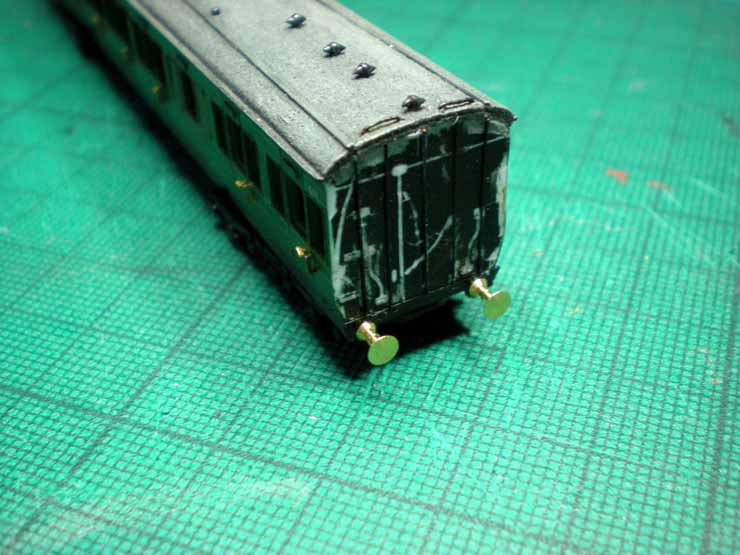
time is slow - albeit very encouraging. More destruction before
construction - cut off the old buffers and file smooth, mark a
centre point using something like a set of old pizza cutter wheels,
drill a pilot hole, and then a larger hole for the Etched Pixels
brass buffers:
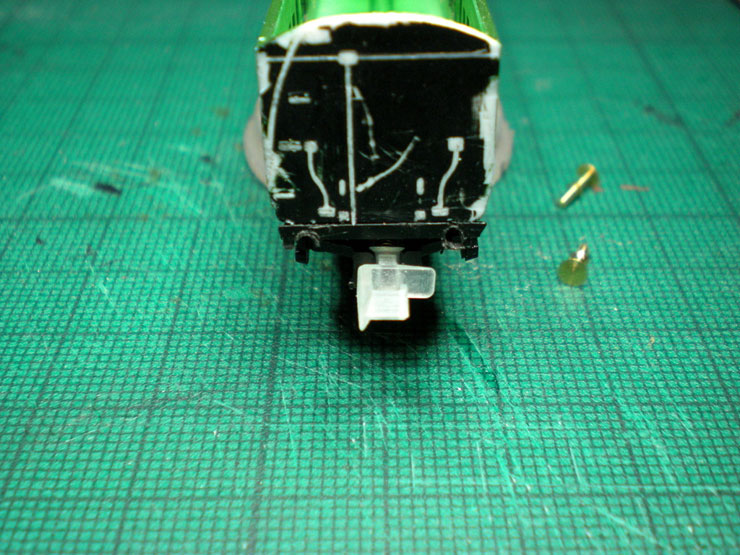
The hardest part is making sure both drill holes
are entirely level:
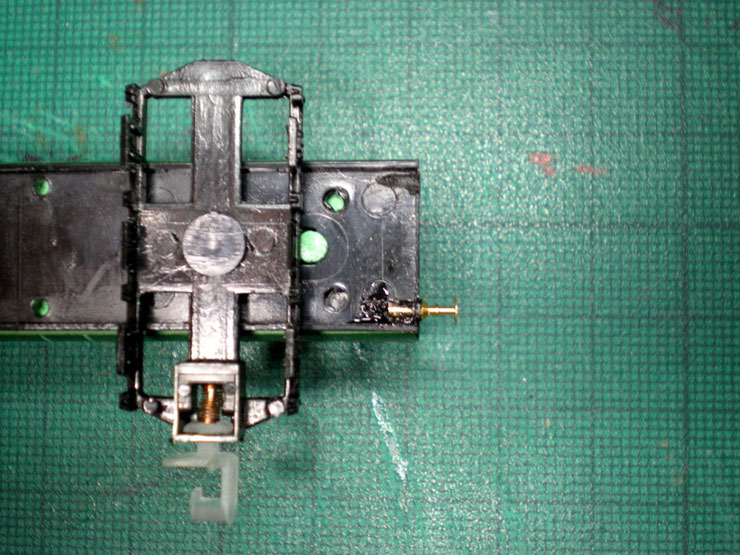
Managed it at one end (shown below), but the other
end was a bit wonky. Luckily a quick bit of padding inside the hole
forced the wonky offender downwards into leveldom:
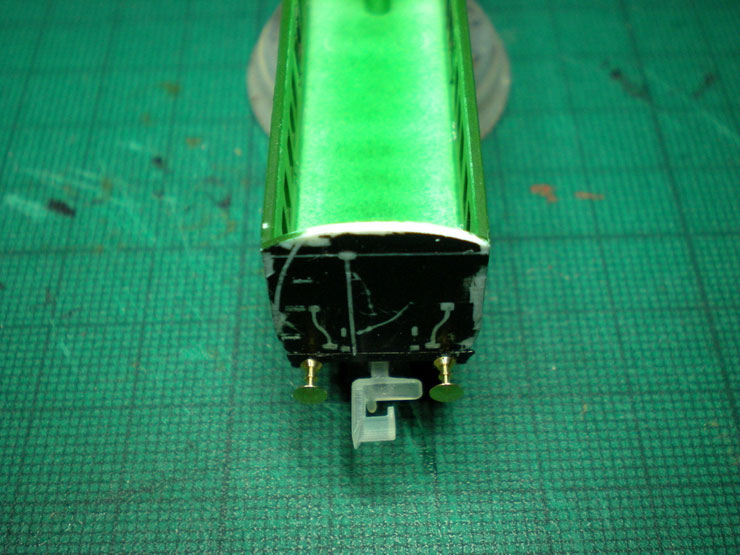
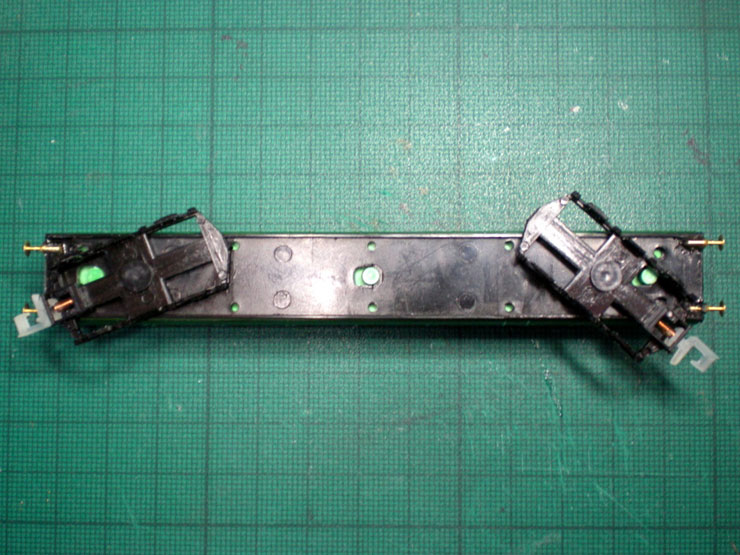
A mix of Bostik and superglue liberally coating the
holes and covering the fitted buffers offers flexibility and
strength... usually. All four buffers in place. They're noticeably
longer than the old ones so my hope of close-coupling goes up in
flames. Next time I want to find LSWR-pattern buffers with a shorter
shank:
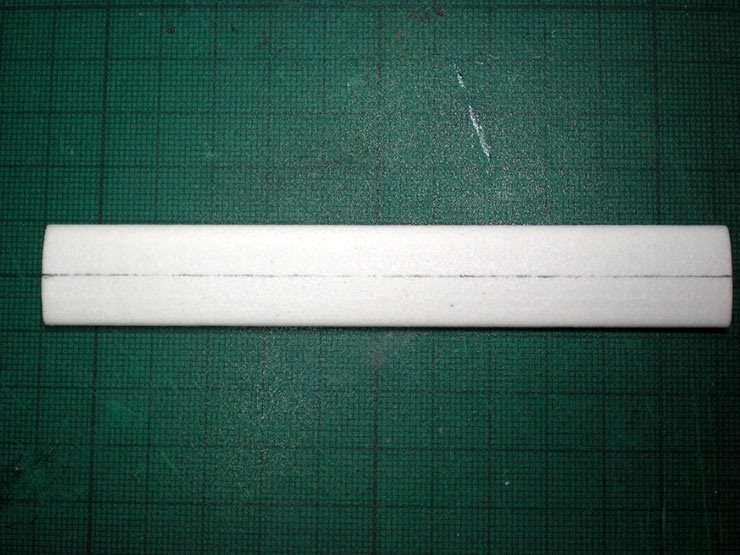
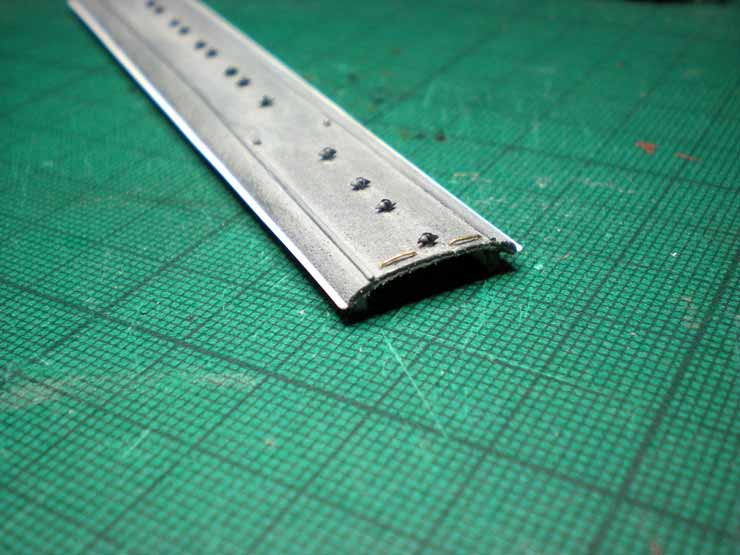
Now it's roof time, 3D-printed by Etched Pixels.
The first step is adding roof vents:
I've seen the way it can be done with a brass kit, but wanted
to simplify it. I marked out a centre line at each end, 9mm
being the line required:

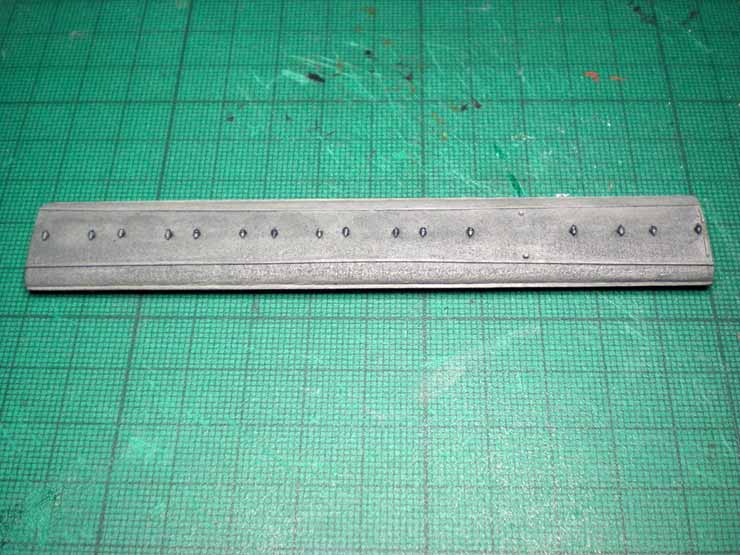
Then filled in the rest of the centre line:
And then, keeping it very, very simple, lined up
the roof against the body and marked the centre of each
compartment's window seat (don't worry that it looks out of
alignment in the photo - that's because the windows you are looking
at are on the nearside, while the roof is sitting next to the
offside):
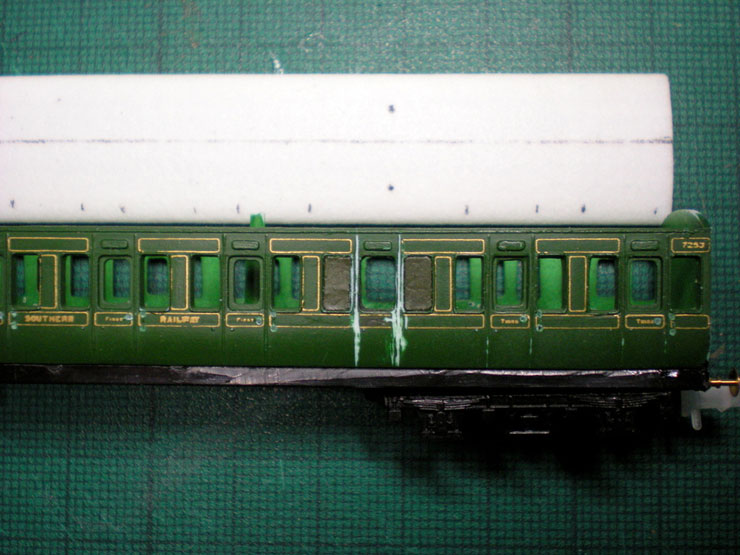
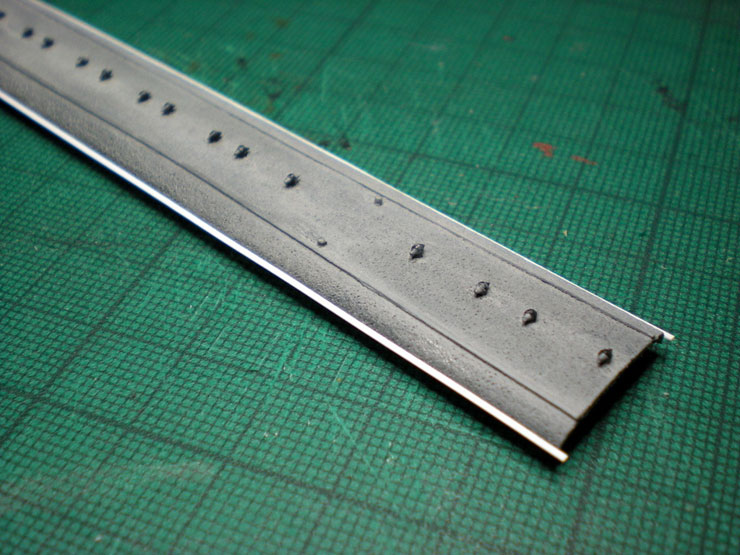
The next step will be to drill the holes.
28 May 2015
Time for another update. The work has been
proceeding apace, an hour or two most evenings and then leave
various bits to dry. Even so, it's taking a while, partially because
I'm still working out the correct order of works and partially
because I'm fine-tuning and correcting things as I go. It's really
starting to get there though.
The roof has its rain strips and now also its
cantrails. These were quite tricky to attach. I used a thin line of
Bostik to get each one in place and then soaked in superglue from
underneath. It worked. They're about as solid as can be:
Fitting the grab handles and then door handles was
pretty easy, done over the space of two evenings. They were inserted
and then glued from inside where possible. Where not, a dab of glue
was added to the handle and it was guided carefully and quickly into
the slot:
Attaching grab handles to the roof was much
trickier, not helped by a blunt drill bit and a couple of breakages:
The green, red, and blue paintwork inside the
carriage was touched-up where the door handles had scraped through
it. It wasn't possible to fold over the handle shafts, so they were
painted instead. A test with the roof on seems to hide up any minor
'problems' like this:

Finally, for now, the microstrip used for the
cantrails seemed too thick when compared to line drawings. I'd use
the thinner version next time - the same thickness as for rain
strips. This time I filed them gently and also chamfered the
corners. They seem to work okay like this. The roof has been fully
undercoated and now has its first wash of Railmatch roof dirt. There
will be several more washes to come but I already like the toned
effect. This is a roof that started off white and darkened gradually
over years of service, so the washes should reflect that:
29 May 2015
I was going to scrape off the old carriage
numbering tonight but I was distracted by the realisation that the
planned-for set and side numbers were too late for 1930. Two hours
of research and head-scratching later and I've come up with 1910
four-car bogie sets and numbers that could well have been divided
into two-car units (or more probably three, but were certainly still
in use) until the early 1930s. That's probably the closest I can
hope to get with coach bodies which don't entirely match any diagram
anyway, so I'm happy with it.
20 June 2015
It's been a while coming, but I'm more than happy
to announce that construction work has been completed. Hurrah!
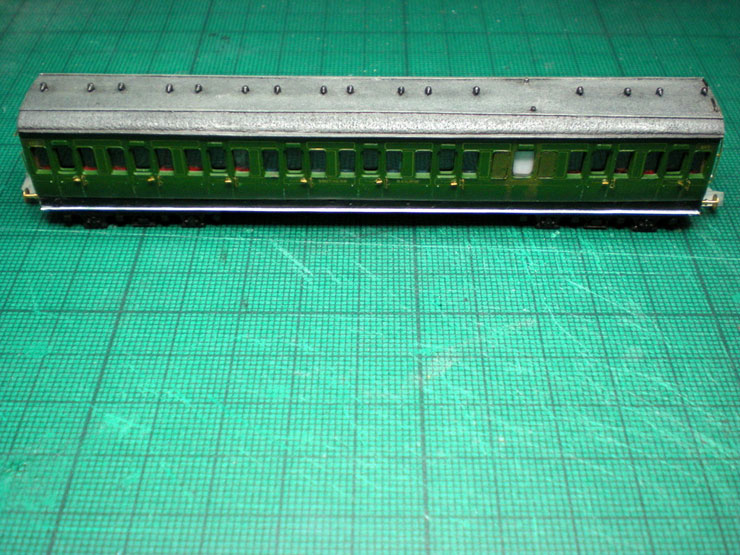
Here's how it happened. The roof was glued into
place (spot the new carriage numbering, although these decals are
not the sharpest I've ever seen):

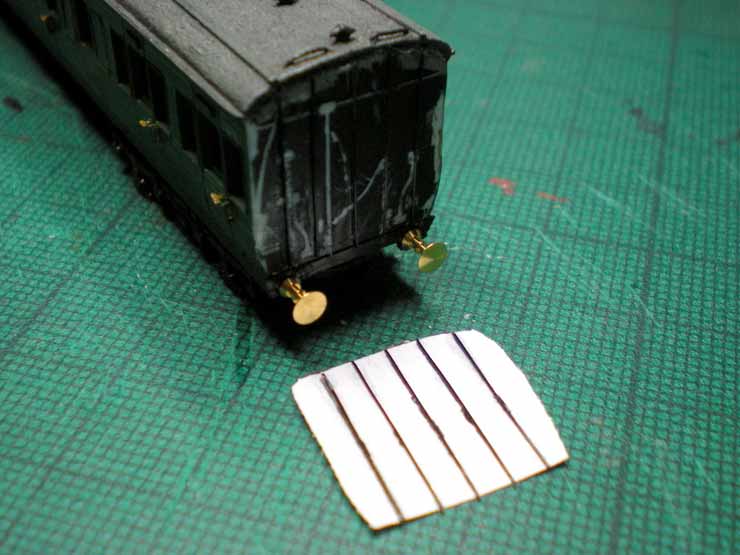
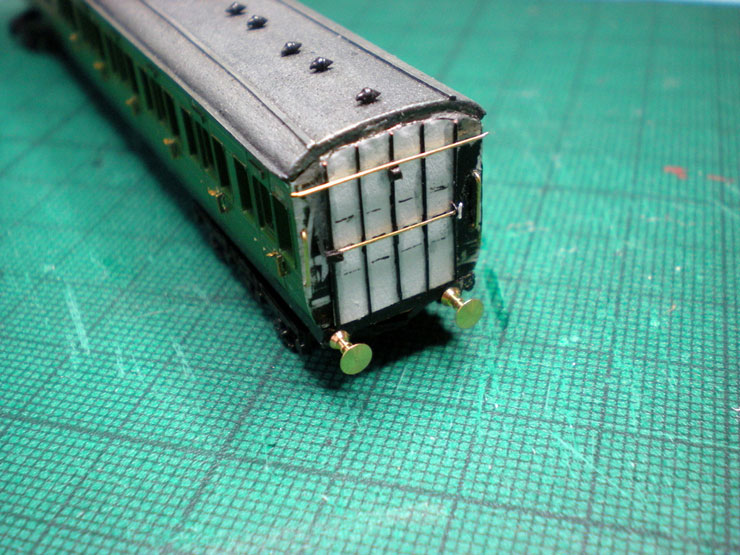
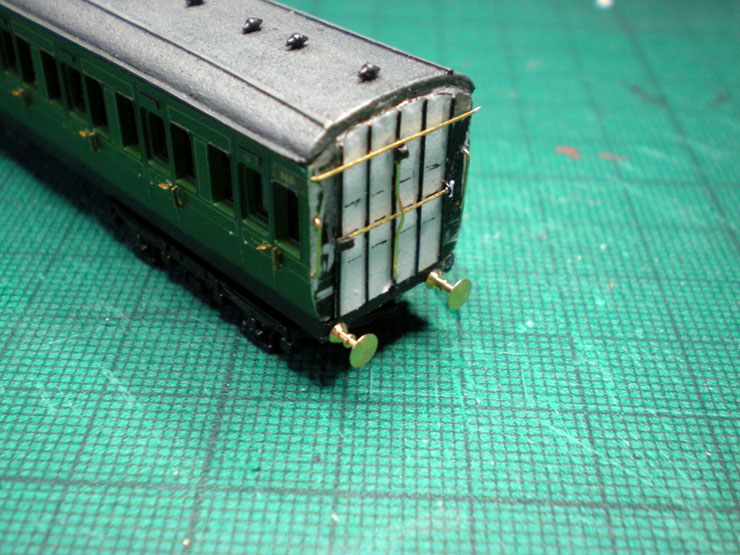
Next began the very tricky process of gluing the
vertical strips on each carriage end:
In fact it was so slow and fiddly that I worked out
a cheat for the other end - glue the strips onto paper and glue that
onto the end of the carriage. The bonus is that it will help to hide
any moulding details still present. Using a sharp knife, remove the
outer edge of paper so that the paper ends underneath the verticals.
There's less likelihood of it showing up that way:
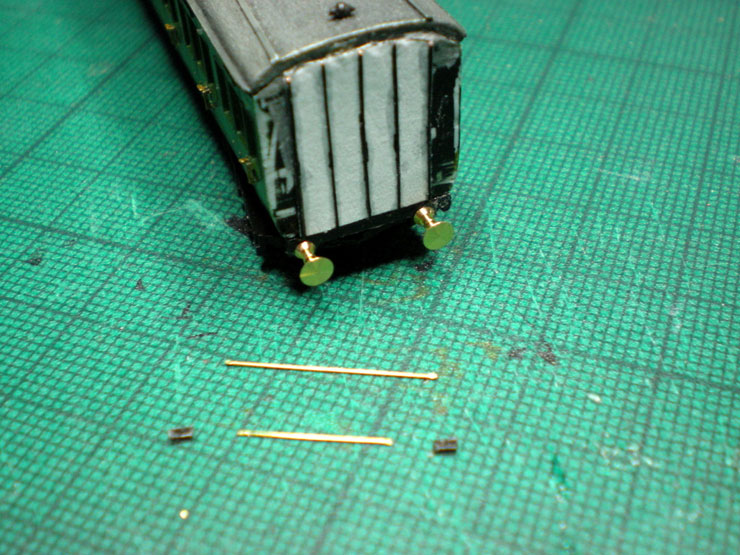
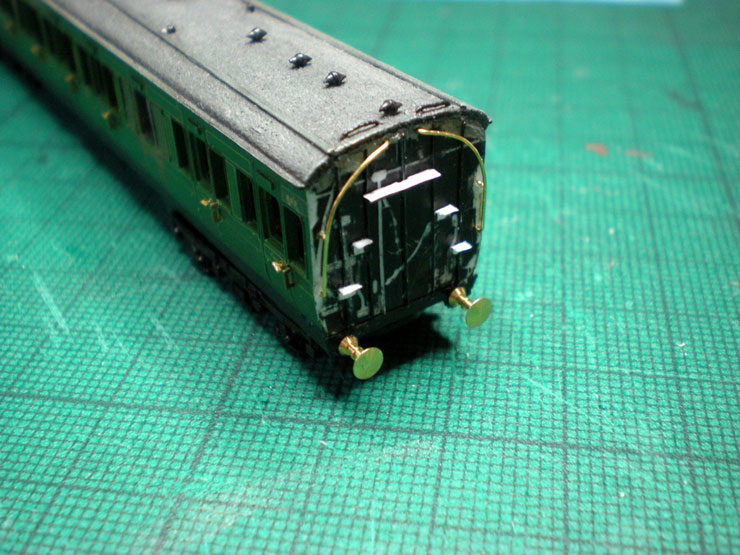
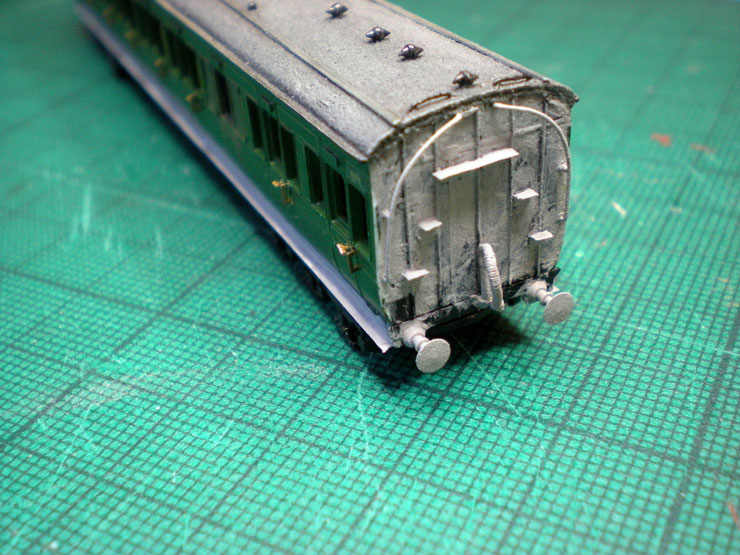
Now prepare the end detailing for the far end (the
non-steps end):

Vertical strips and cheat in place, horizontal rods
ready to go on:
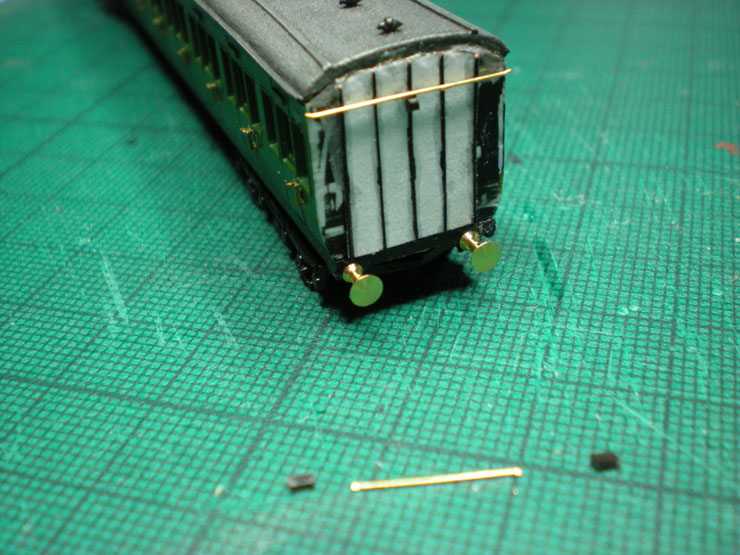
Top rod in place, plus black box thing underneath
it (cut from a piece of removed
moulded battery box):
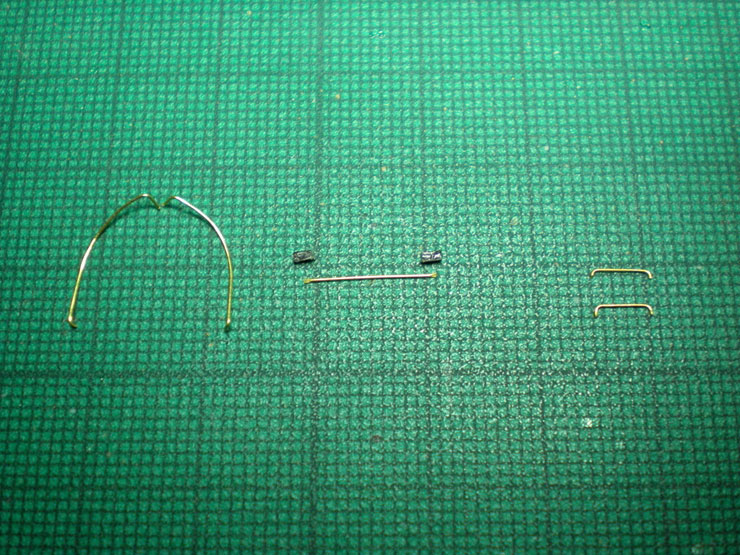
The second horizontal bar and black boxes, plus
vertical hand rails for the same
end and curved handrails for the
'steps' end of the carriage:
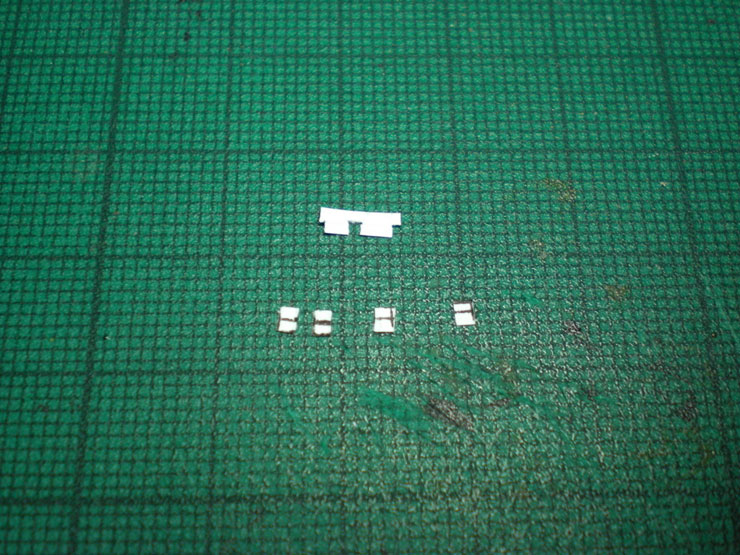
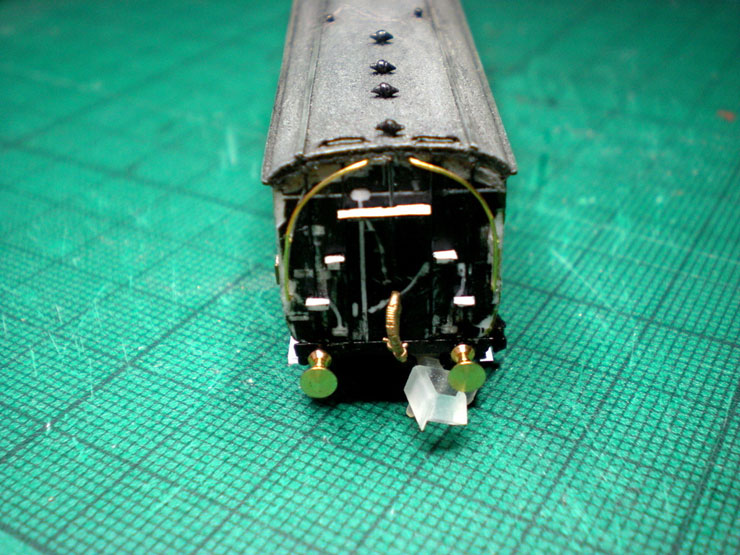
The steps themselves, using paper (I bet you didn't
see that coming). Simply fold
into an L-shape and soak gently in
superglue to harden:
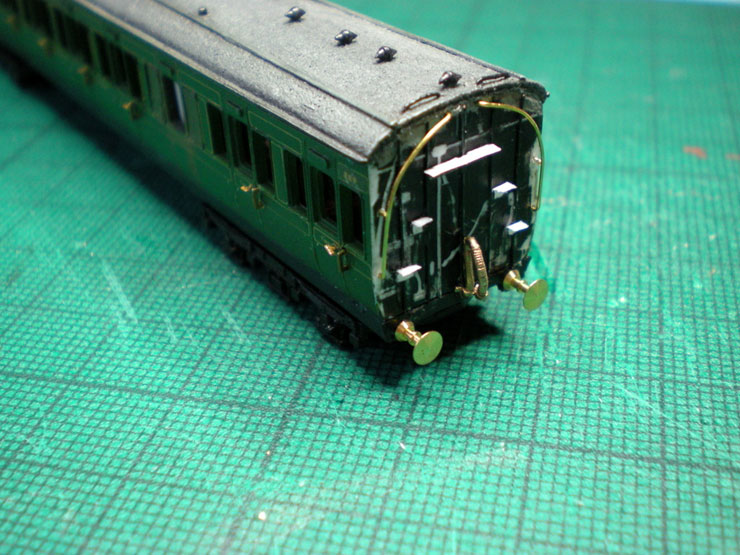
Steps in place:

Curved hand rails added around the steps:
At the other end, the second horizontal rod in
place and also the vertical hand
rails:
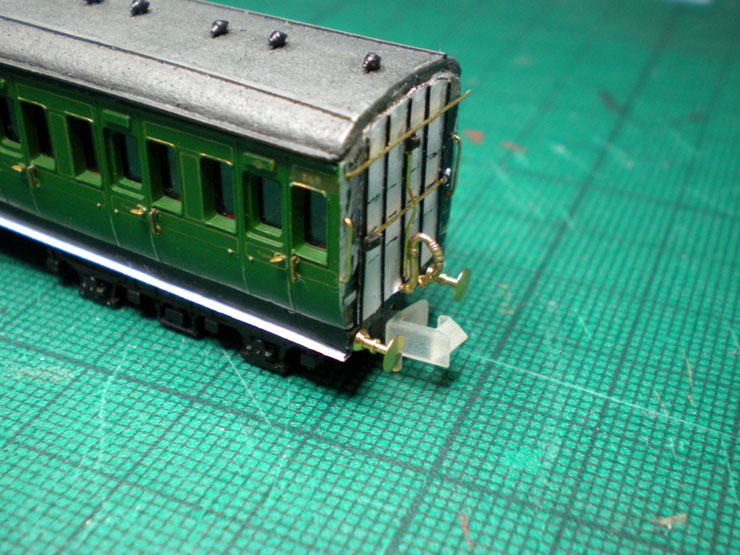
N Brass vacuum pipe added, with the lower stock
bent into an L-shape and
inserted into pre-drilled hole on buffer
beam:
Vertical rod place on other end, although getting
the noticeable kink into this was
the work of over an hour:
Running boards added, using paper again, soaked
gently in superglue from
underneath until hardened:
Last vacuum pipe in place:
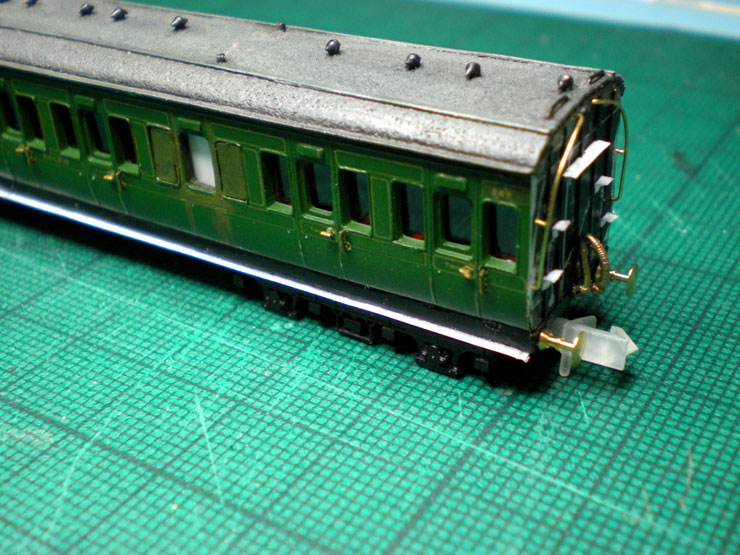
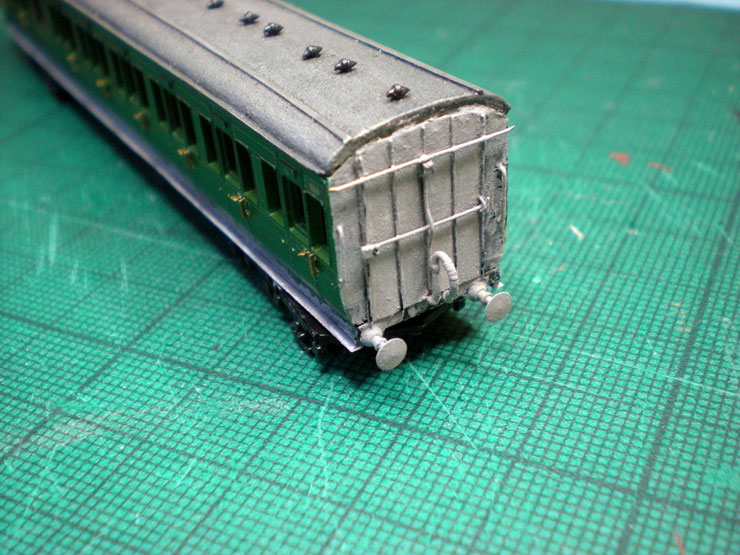
Full detailing on the 'steps' end:
Full detailing at the other end:
That's construction done. The next step is undercoating the new bits
and pieces prior to painting most of them black. Do you think it'll
pass muster?
21 June 2015
Reflections: the curved hand rails were
surprisingly easy to do, perhaps because there was more to hold
onto. The bottom 6mm was straight, so only the top part needed to be
rolled on a superglue cap and then folded at the tip to lock into
the pre-drilled hole under the roof. The 'U' bend was a nightmare
though! I would have used card for the running boards but there
really wasn't the clearance for the bogie, so paper it had to be. It
seems to be strong enough with 'responsible' handling.
I've done an undercoat tonight, which seems to bind
together all the various additions into one carriage. I'll take a
snap tomorrow.
22 June 2015
Here are the undercoating shots. It makes them look
a little like Farish or Dapol pre-production models (I wish). The
paint looks a little grainer in photo form than it does in real
life. One or two things I've noticed from this job is that the 3D
roof could have been a millimetre longer at each end to provide an
overhang. The torpedo vents could also have come with slightly
longer 'stalks' so that they could be properly raised above roof
level. Some of these look a little squat, and getting them to sit
just right was very fiddly.
After taking these shots, the first coat of black
went on. It takes a while to apply, what with all this detailing
getting in the way of the brush, but a second coat tomorrow may just
do the job.
23 June 2015
I think the blackness of the end panels will
largely disguise the lack of roof overhang for this coach (and for
the other roof I have), but when Mr Etched Pixels is more available
I'd like to ask him to produce the next batch slightly longer. There
was some filing involved to take off a bit of 'fluffiness' at the
ends, so this didn't help the length either.
24 June 2015
Not quite a 'trundling around the layout' shot just
yet, but apart from a bit of minor touching-up on the edges, the
main painting is done. So here's the just-about-finished article
without wheels, on the embankment:
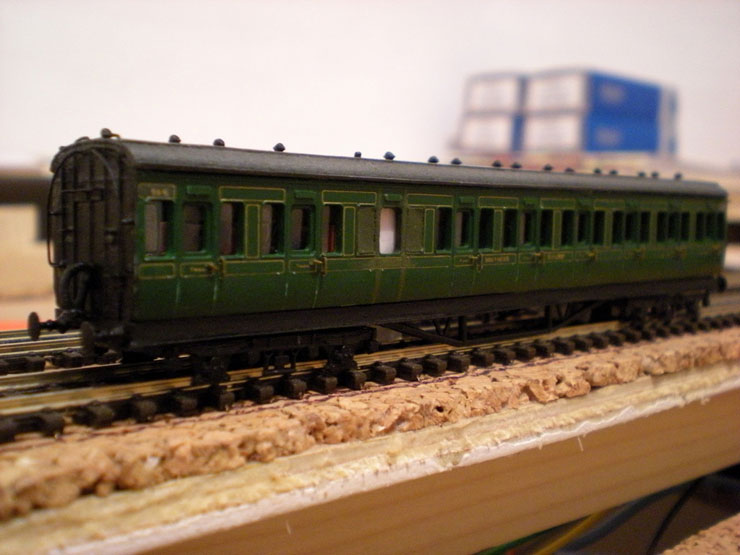
The only thing that lets it down is the fact that I
couldn't match my olive paint touch-ups with the original Farish
green. Next time, no loos, and the results should be even better.
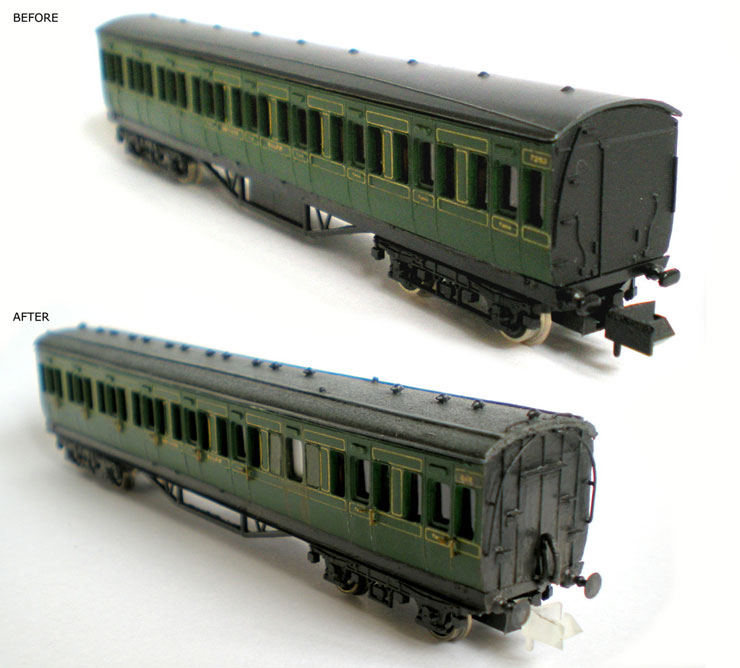
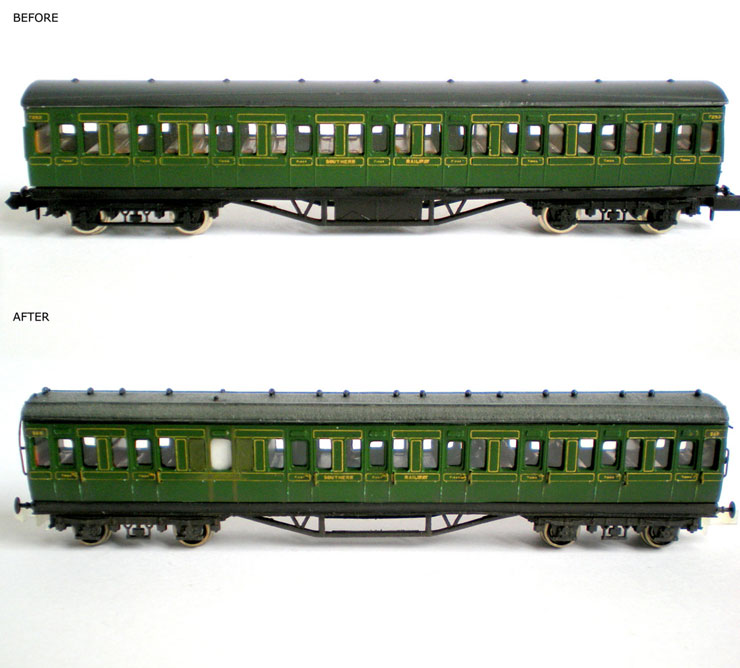
1 July 2015
Do you realise that it took a year, almost to the
day, to get this project from first post to last 'before and after'
shots? A good deal of that time was spent sourcing parts and getting
the roofs printed, but the work itself took from February to the end
of June. In my defence, a lot of it was experimental work, with lots
of testing and pondering and rewriting of the order of works, and
then a little light weathering to take the intensity out of the
black ends and running boards. I'm firmly convinced that the first
'production' upgrade will take much less time. In the meantime, here
are the before and after shots.
For anyone who plans to have a go themselves
(please do!), the complete and final order of works is at the start
of this thread.
|