|
14 September 2016
After completing the first Farish non-corridor
conversion (see pages 1 & 2), I needed to add a brake third to
form a 2-car set. It took a while to get around to this, and seemed
to take forever to get started on the work once the coach was
actually on my workbench because I had to order some parts from
Etched Pixels. But then I was ready to get going.
The work started on 29 March 2016, but I waited
with reporting it because I didn't expect it to take this long.
Anyway, I have more than enough photos to cover about half the
project, so here we go.
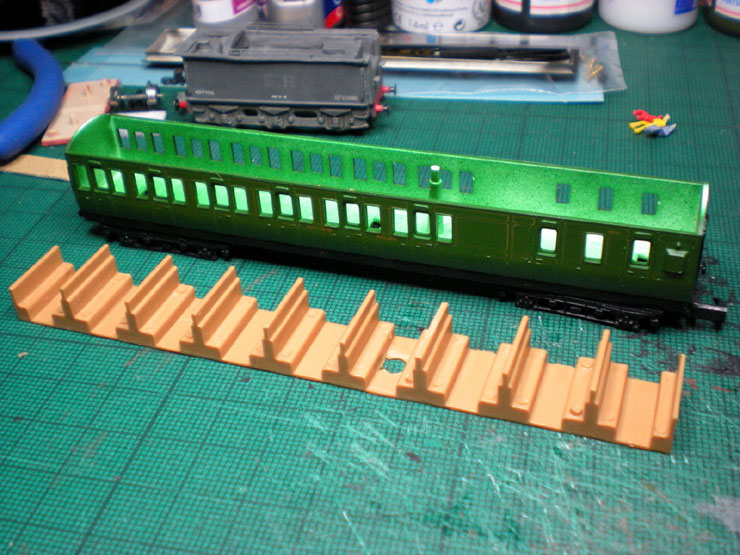
The first stage is to pull the coach apart. The
roof comes off (to be sent to the 'spares' pile), the seats and
window strips come out, the old pizza-cutter wheels come off, the
underframe between the bogies comes off, and even the black Rapido
couplers come off.
Three seated passengers from a cheap-but-large pack
of Chinese-made figures lie just behind the coach. They'll need
repainting into something far less luminous for the 1930 setting.
The brake area needs to be painted, just in case it's visible
through the windows
after construction. Plastic green is
never a good look when you're trying to produce
a bit more
realism. The carriage seats are also getting an undercoat, but only
after
the seating for three compartments were removed - these were all
located in the
brake compartment anyway!
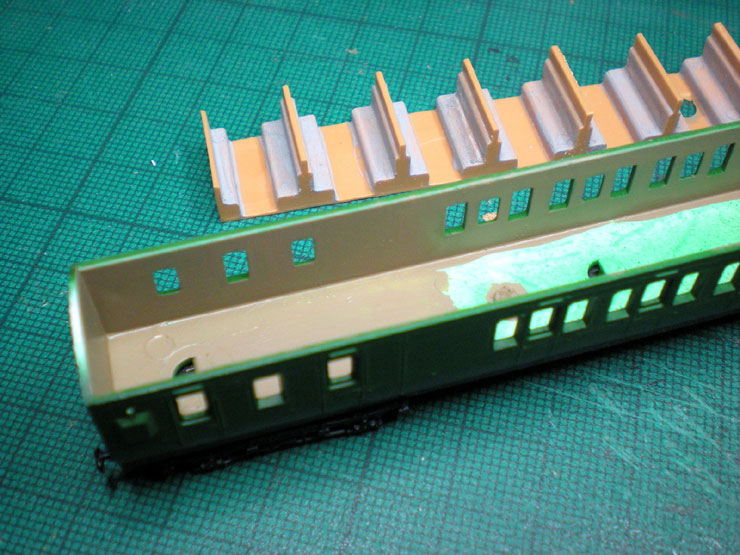
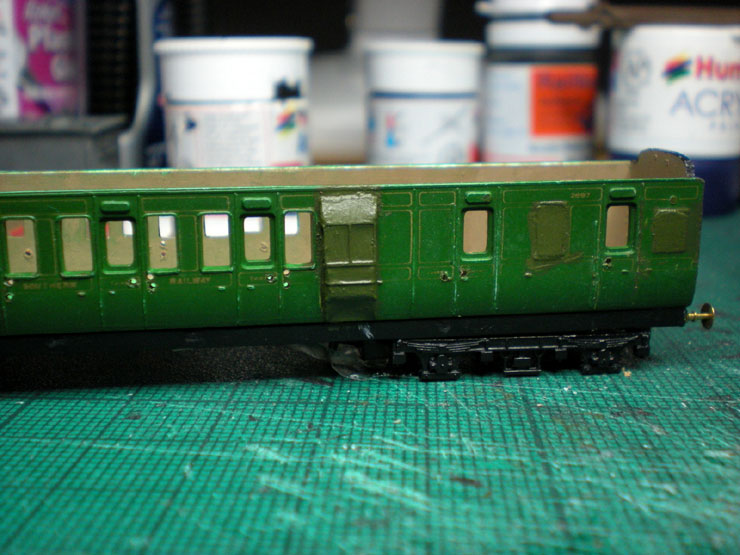
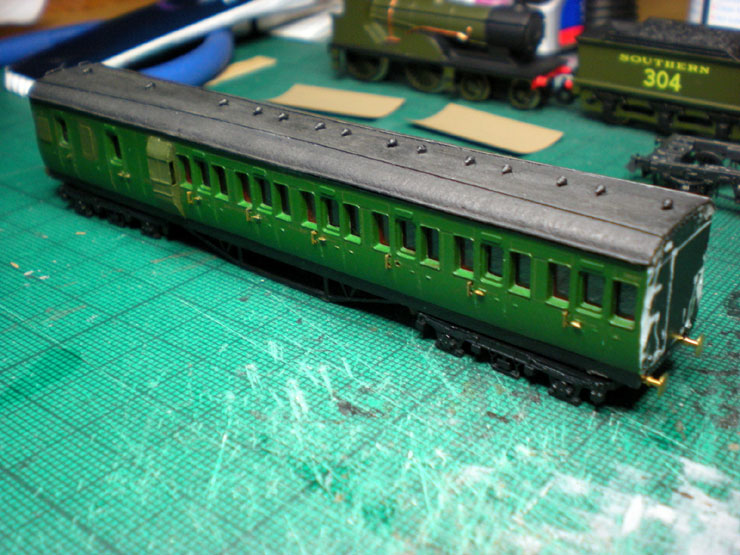
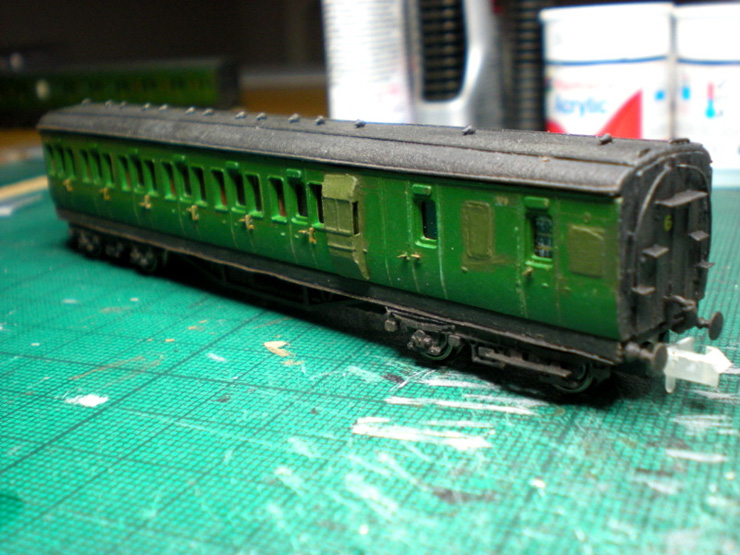
Next was to carve out part of the carriage ends so that the
distinctive LSWR
elliptical roof could be added (a 3D print from
Etched Pixels).
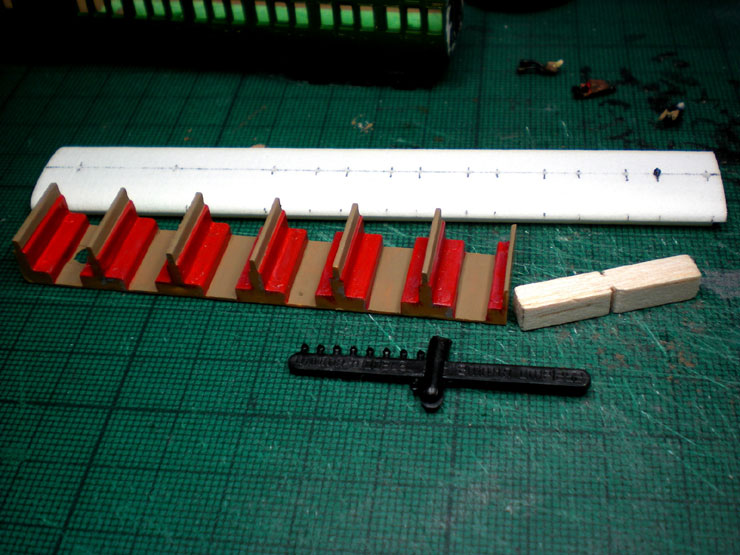
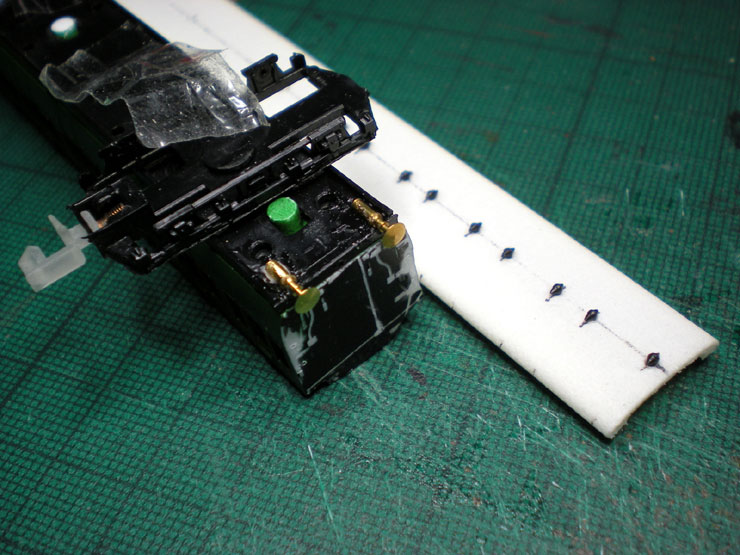
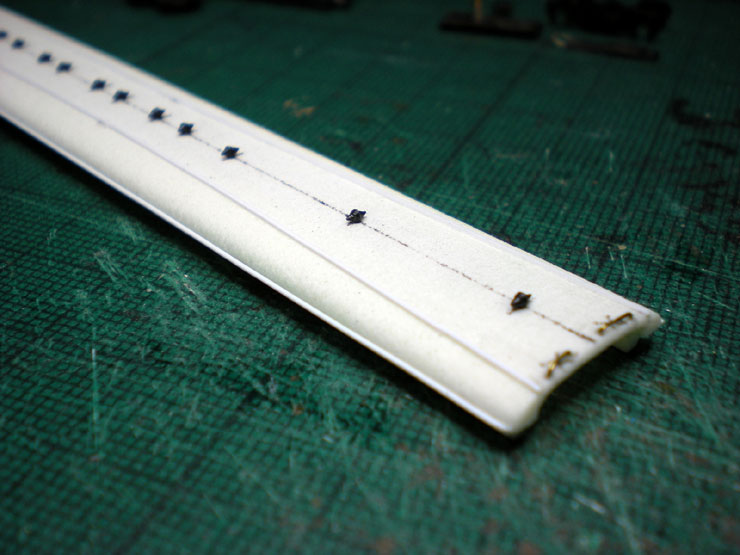
The roof now fits nicely, so it can be marked up with a centre line
and then cross-marked to locate the torpedo air vents. Each vent
fits centrally over the seated
area of a compartment, two vents to a
compartment.
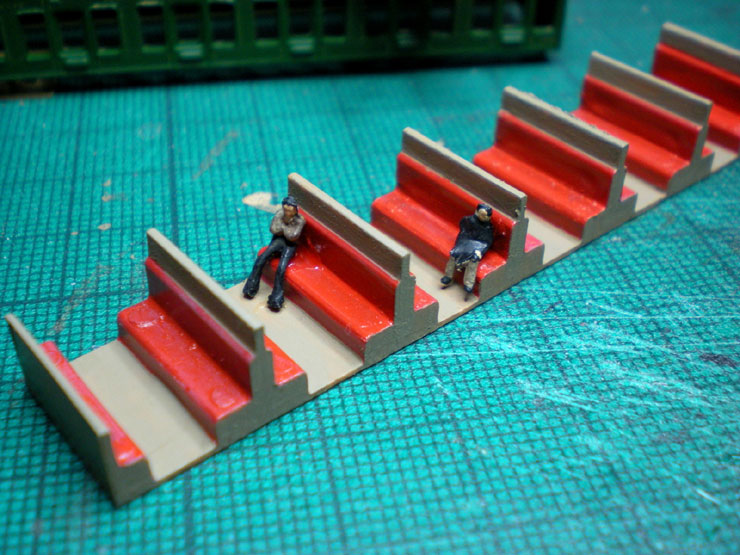
The carriage seats have now been painted in third class red, while
the balsa block
is being shaped into the battery boxes that will sit
between the carriage bogies.
The first coach, a non-compartment
first/third, didn't have anything like this
because battery boxes
were expensive to buy and fit, and one set was more than
enough for
two (or three) coaches.
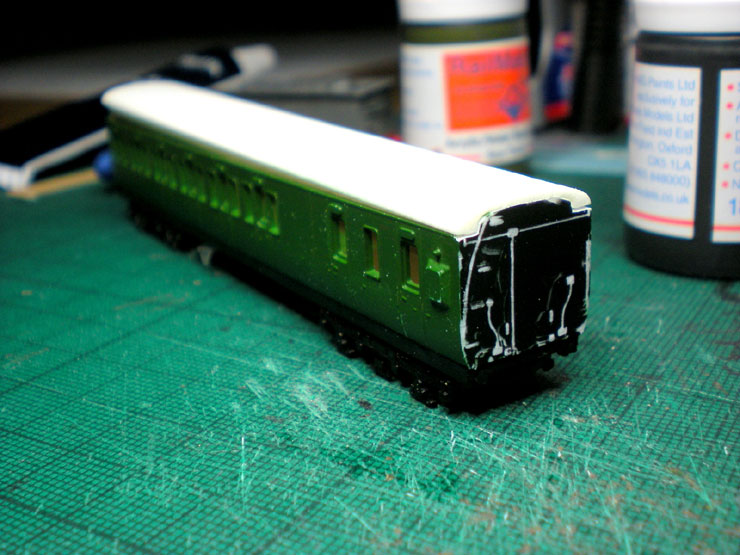
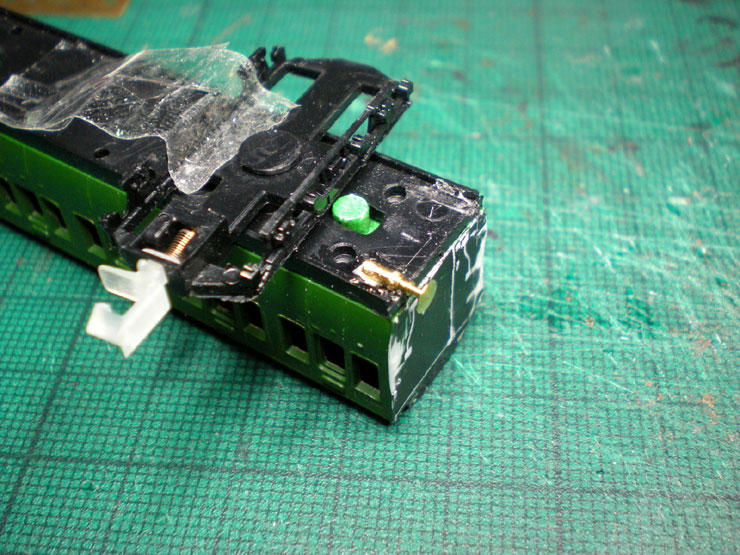
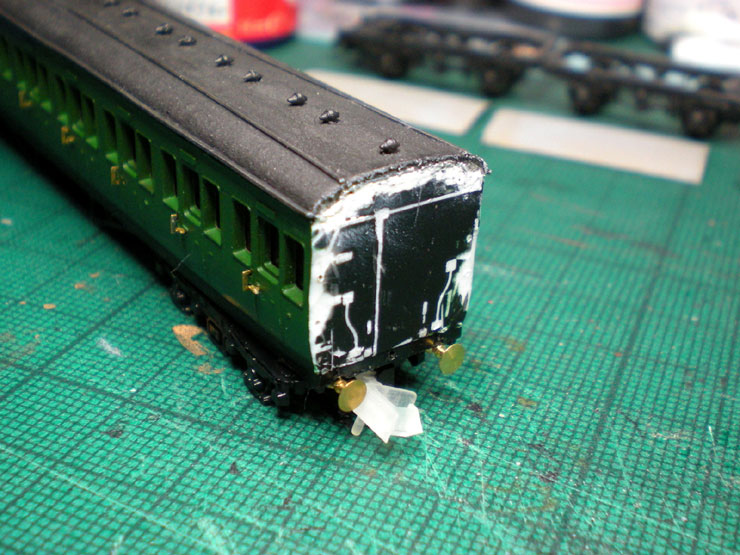
Holes were drilled into the buffer beam so that brass buffers could
be fitted. The
new 3DR clear(ish) coupler has also been fitted, and
the carriage's end detail has
been carved and filed off. There's a drill hole in the centre of the
buffer beam -
that's where the vacuum pipe will be located.
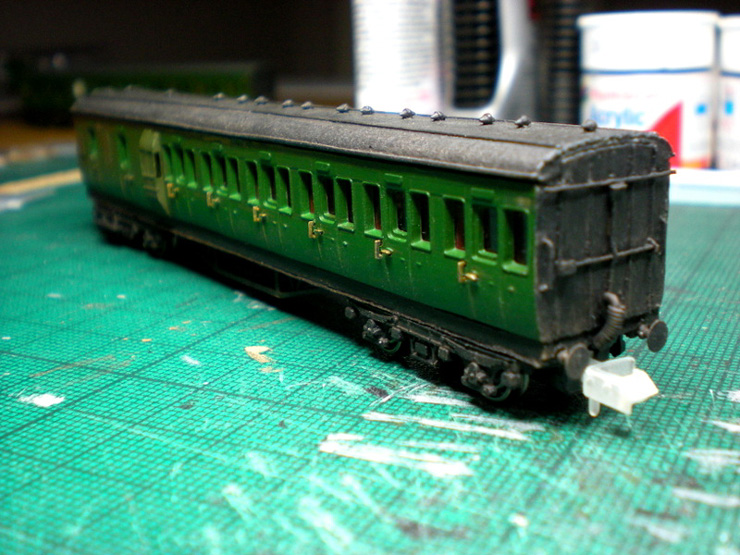
Both buffers have been fitted and the roof has its torpedo
vents fitted. Re-supplying these from Etched Pixels took an age,
so the project was put on the back-burner for some time after
this part of the work.
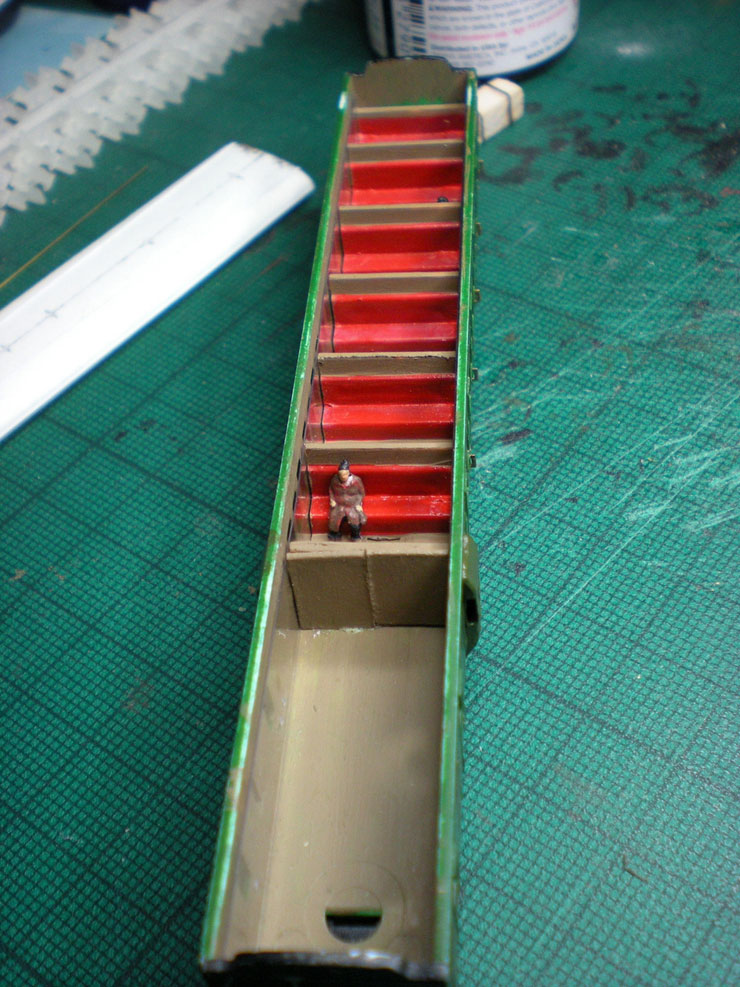
Painting on the seating area is just about done, with the plastic
brown being over-painted in a general Humbrol mid-brown and the
painted passengers added (one
of them is hiding at the back of the
seating area). This one's clearly not a rush-hour
service.
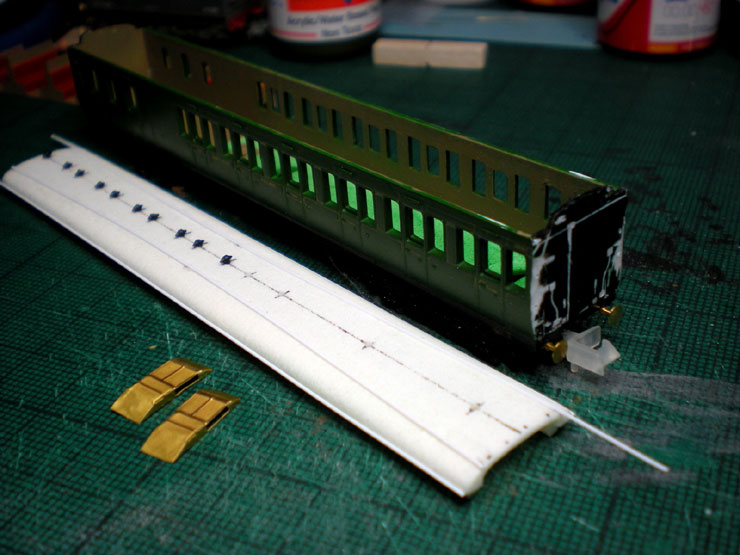
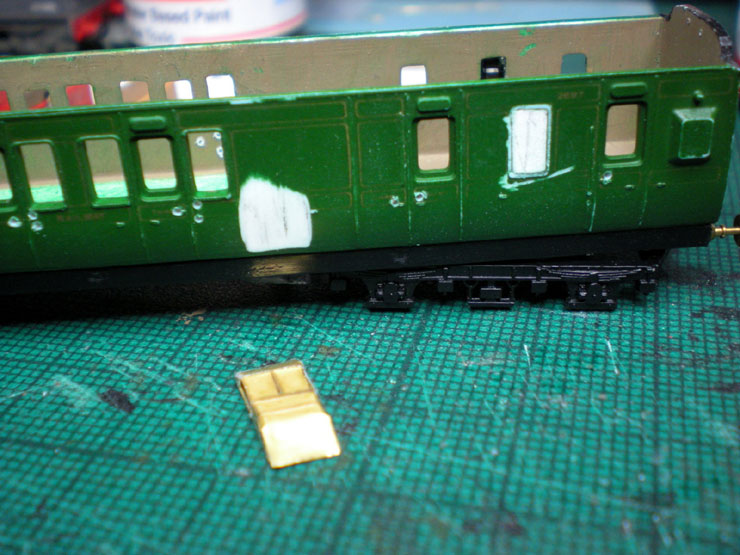
Now rain strips need to be added to the roof, and also the gutter
area at the edge.
The two brass items are full-height guard's
look-outs which will replace the small
look-outs that were much more
of a later feature of Southern Railway carriages.
Still waiting for the rest of the torpedo air vents...
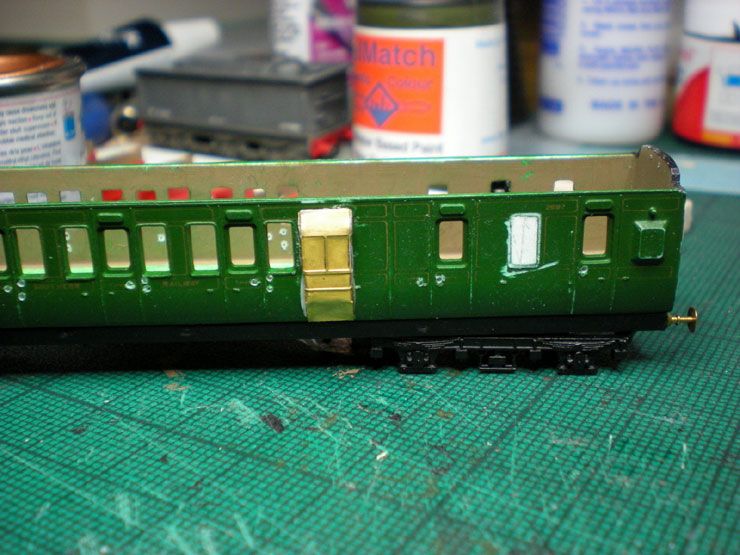
The new look-outs weren't designed to fit to Farish coaches, though.
The Farish
coach has quite a curve below door handle level (door
handle and grab handle
holes drilled, as you can see). So a flat
file has to be used to take out an area of
the curve so that the
look-outs will fit on almost flat.
The middle window in the guard's compartment has been filled in with
a bit of card.
That was one window too many for this 1912-pattern carriage.
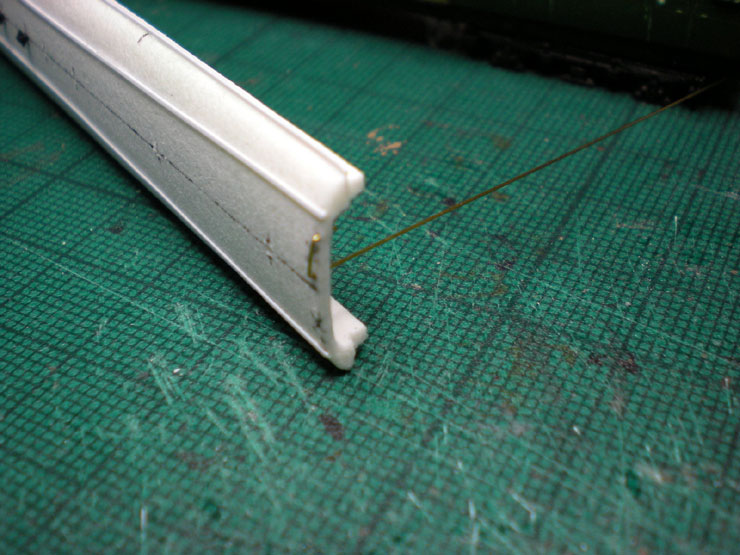
New guard's look-outs added...
Grab rails being added at the end of the roof which will sit above
the exterior
access steps.
Old guard's look-outs removed with a bit of careful filing. The odd
scratch and cut
will always appear with this kind of work, but a bit
of painting later will more or less
hide it.
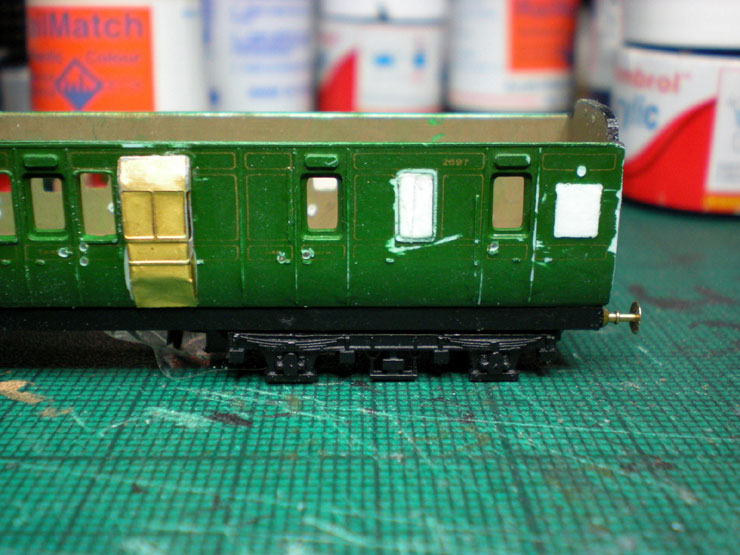
New look-outs painted in Maunsell Green, along with the other
changes along the
carriage side. I know it's a far from perfect match to the Farish
green, but it will be
fine until someone works out what colour to use instead.
The battery boxes needed a bit of extra panelling, so cotton seemed
to be the best
way of doing it.

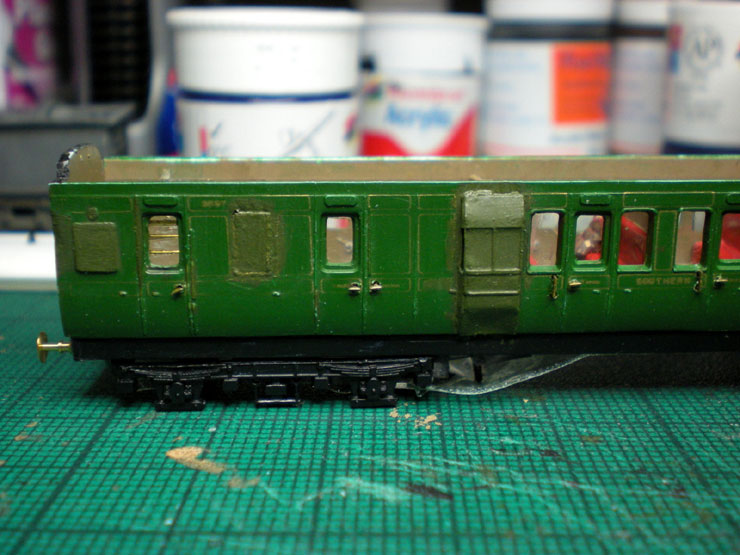
Here are the carriage's shortened internals fitted in place, with the guard's area
having had a
panel added to separate it from the compartment area. Still waiting
for those
torpedo air vents.
Brass bars added across the guard's door, but the glue was
misbehaving on this
occasion, so the clear plastic window strip is
pretty badly marked.
The roof has had all its 'bits' added and is ready for painting (the
new batch of
torpedo air vents arrived!). Rather than painting it in a solid
colour, I apply a thick
wash of 'roof dirt' and then various thin washes of darker grot to
create a
variegated colour. It may not be perfect but it seems to be a closer
approximation
of what a once-white canvas-covered roof might have turned into over
thirty years
of service in a soot-laden atmosphere.
Painted roof in place, with filler at the ends sanded and painted to
highlight any
need for further sanding.
A little more filler applied and sanded.
And that's the end of this update, but there's more to come for this
carriage.
20 November 2016
After having run the finished coach at the
Burnham-on-Sea MRC show a week ago, I'd better finish off this
report on the work needed to get there.
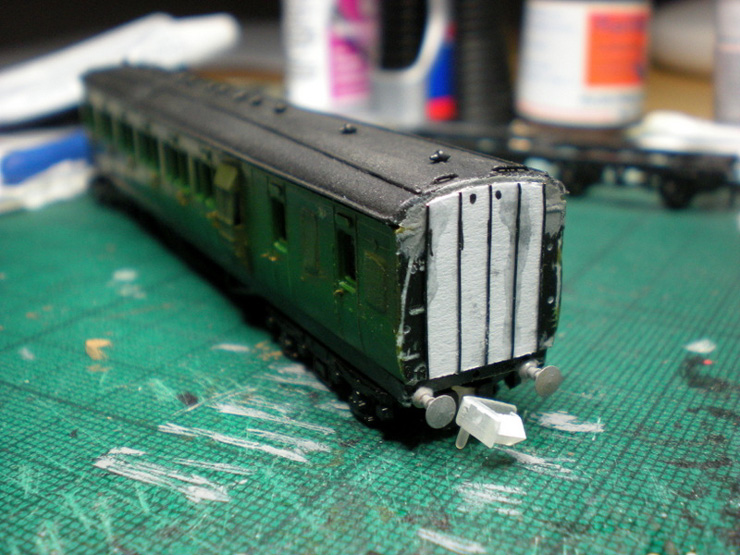
After having carved off and filed down the carriage
ends, the new end 'covers' were placed on top, providing the
distinctive vertical banding seen on a typical LSWR carriage. The
two black dots at the top are for drill holes - this is where the
steps and handrails will go. The new buffers have been primed.
Next up is adding the running board - a thin strip of paper held in
place with Bostik
and then superglued solid. The detailing at the 'non-steps' end of
the carriage
shown here have also been added. The horizontal top bar is linked
into the
passenger alarm cord system, allowing the driver and guard to see
which carriage
has the emergency.
Back at the 'steps' end of the carriage, the steps and hand rails
have been added,
primed, and painted. The set number - 61 - has been added (look
underneath the
top step) and some weathering has been applied over the top of it
all, mostly a
couple of washes of frame dirt and a bit of a dry-brushing of the
same colour.
The 'non-steps' end has had the same treatment.
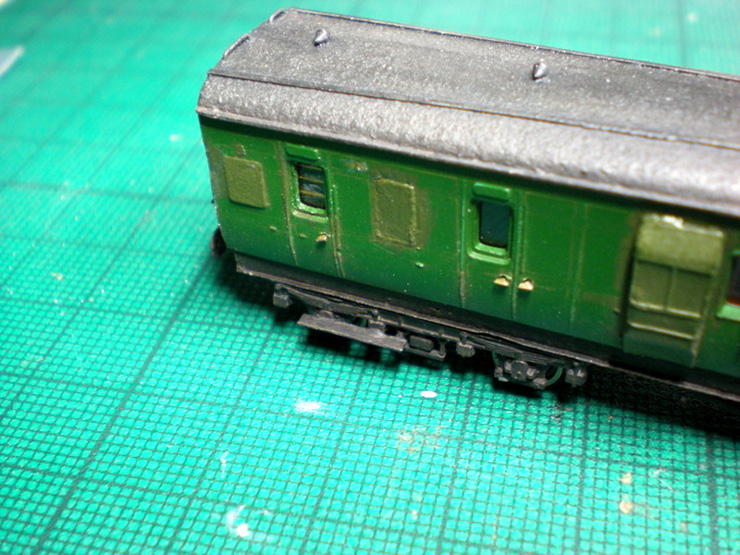
This is the clearest shot I can take of the changes to the guard's
compartment,
with the old lookouts having been removed (it looks as though a
metal cover has
been secured over the hole). I've also added the guard's step to the
bogie, just
above the axle box.
And that's about it. This work took a lot of evenings, mostly with
small steps being
taken, but was easier than with the first carriage because I knew
what to expect,
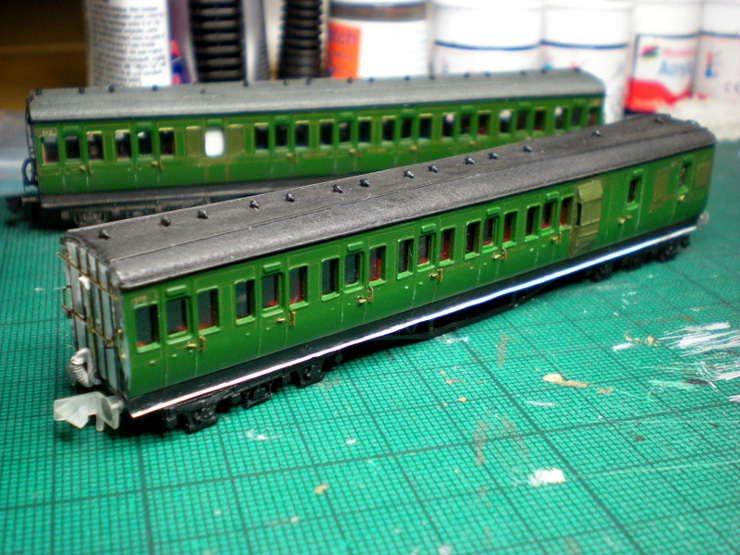
and could follow an established order of works. Together they look
very satisfying...
and one day I may even add another brake to the near end to complete
the set.
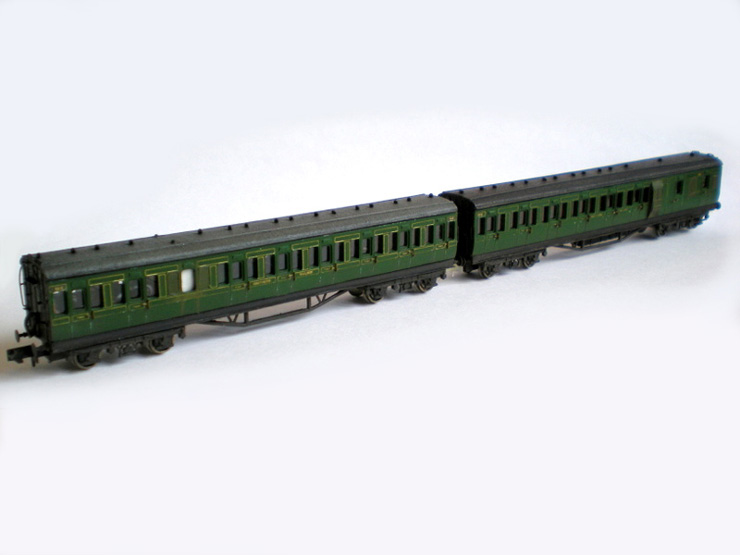
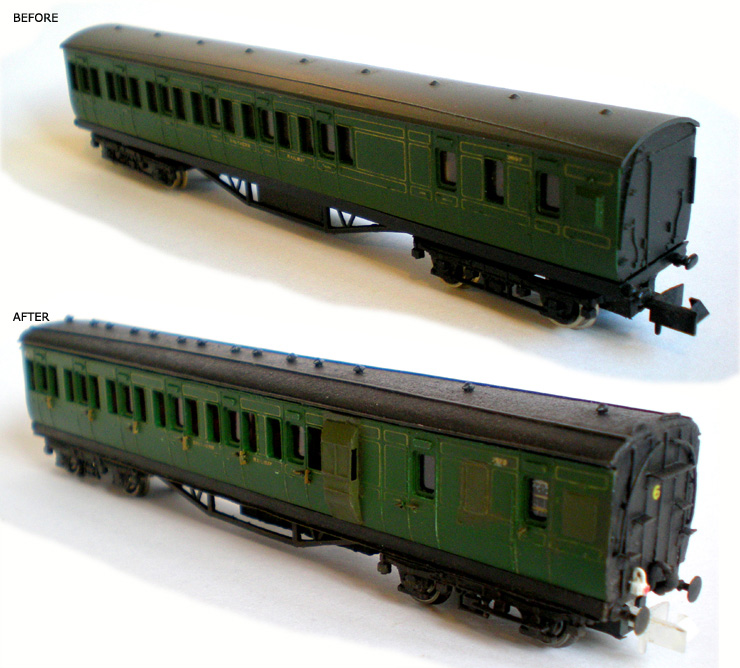
The before and after photos show up the difference between
thirty-five year old
generic carriage and early twenty-first century rebuild of an early
twentieth century
carriage. It's quite a change. If only I could find the right green
for Farish coaches...
|