|
17 October 2017
The lower level electrics on the layout are getting
close to completion, so I've been turning my mind towards getting
the scenery work started. Part of this involves building Evercreech
Junction station (EJ), although the platform shapes have been in
place for quite some time already - see
Building
Bournemouth West for the S&DJR Part 5.
This new infrastructure thread will largely cover
the modelling work needed to build, paint, and detail items that
will go on the layout, allowing the 'building' thread itself to
cover layout construction work. As a first entry it's a bit of a
monster because there's quite a bit to cover, all of which has been
taking place this year.
I started off in the early summer by working on the
loading gauge for the EJ Goods area behind the station, and the
water column that will sit between the tracks at the station. Both
are white metal kits from Lytchett Manor Models, so both were washed
in soapy water to remove any film and then they were tidied up. The
water hose was shaped and moved about to try and reflect the shape
adopted by the real thing when not in use.
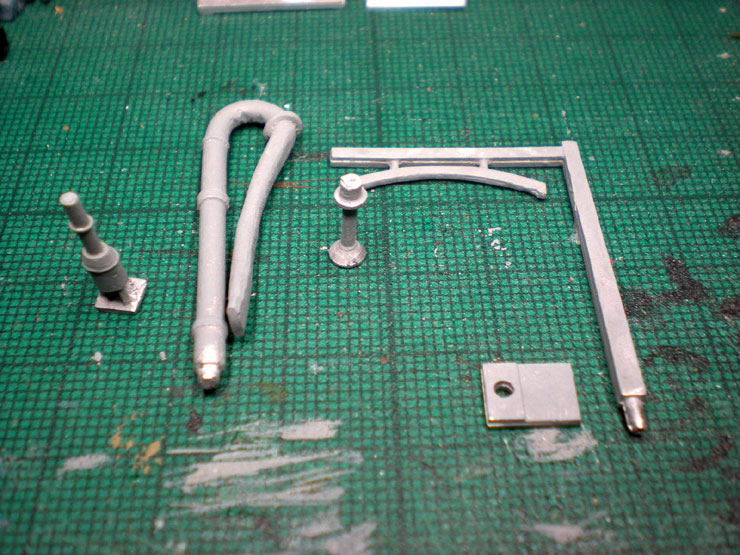
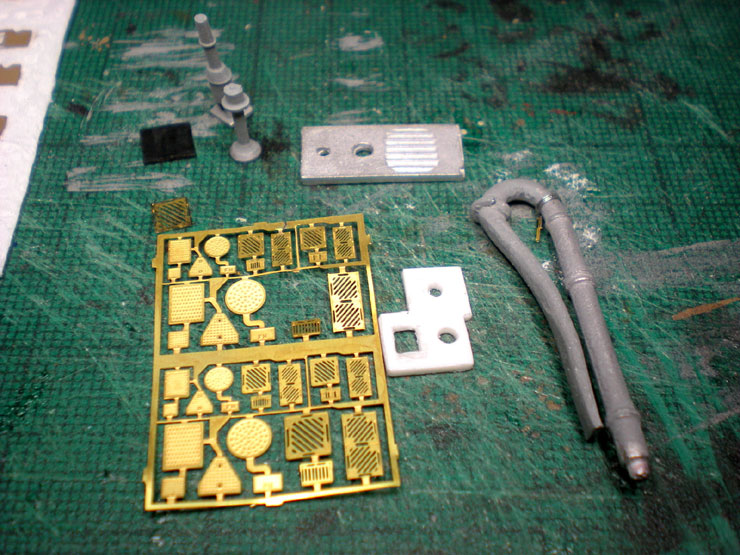
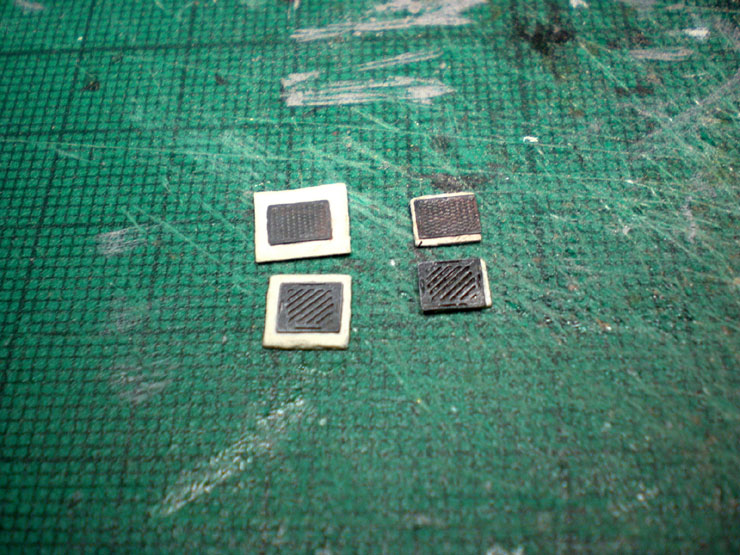
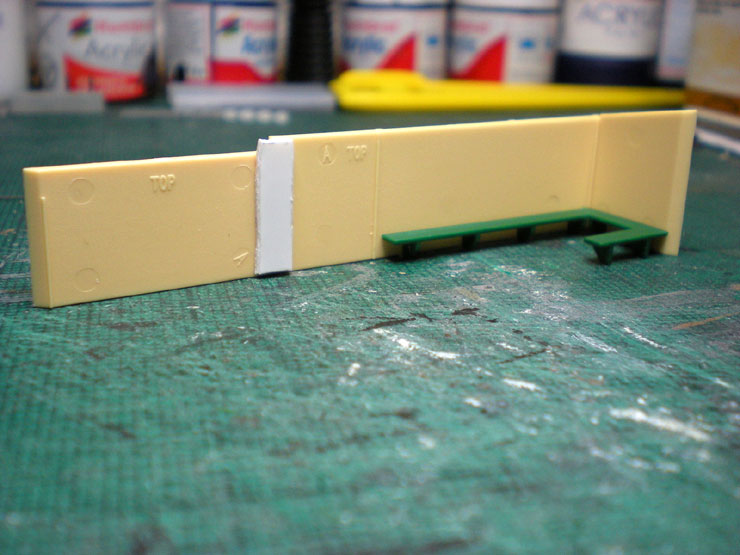
The base that was supplied with the kit (upper centre in the photo
below) wasn't a suitable match for the real EJ so I replaced it with
a piece of plasticard (the white material in the centre of the
photo). Two holes were drilled for the water column and wheel post,
and a square for drainage. Brass drainage covers from Langley Models
supplied the nearly-correct drain cover for the square hole.
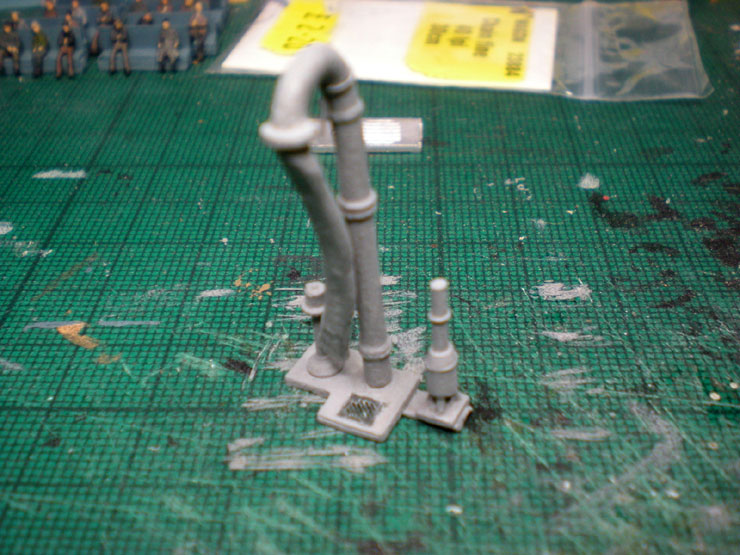
Fully assembled, with the heater on the right and drain cover in
place, the entire kit was undercoated.
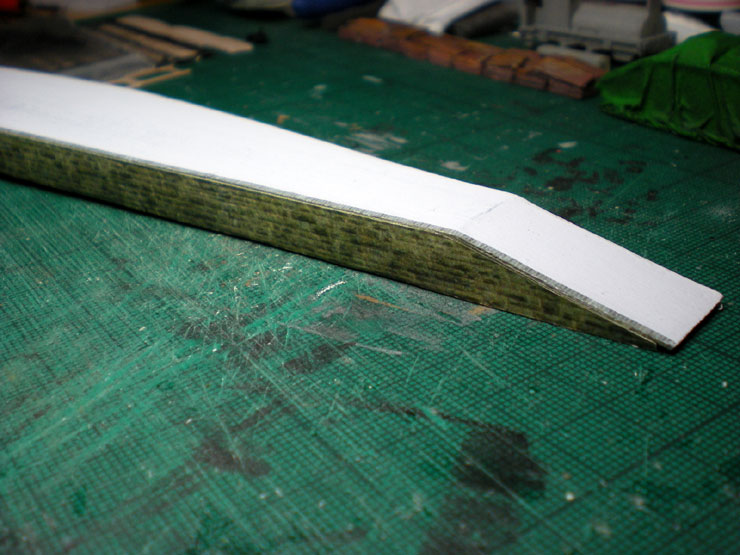
The loading gauge was an easier prospect. That needed several coats
of white due to poor coverage but eventually looked like this:
Four more drain covers and manholes were needed to mask screw holes
in the EJ platforms, where I'd had to screw the balsa wood platforms
into the layout to get them level and secure (I'll do the same for
the platforms at Bournemouth West but will screw up from underneath,
so there will be no surface holes to cover). The drain covers will
hide the screws, but will still allow the platforms to be removed if
necessary.
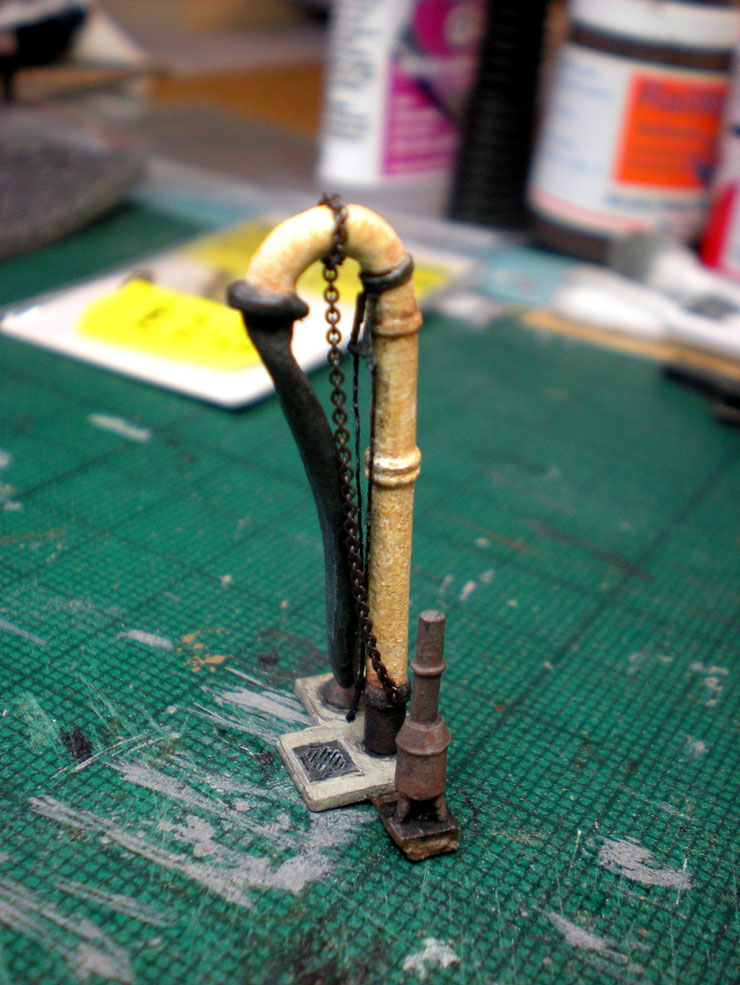
Research was carried out to try and pin down the right colours for
the water column. This fairly worn-looking creamy colour was
achieved by painting a layer of enamel white over the undercoat, and
then adding acrylic flesh colour over the top without any sealant.
The main column base was painted black in 1959/1960 up to the third
ring, so this shot is an 'after' correction to remove most of that
black - it took a while before I discovered the change. The heater
beside the column is suitable blackened and sheened with a layer of
rustiness.
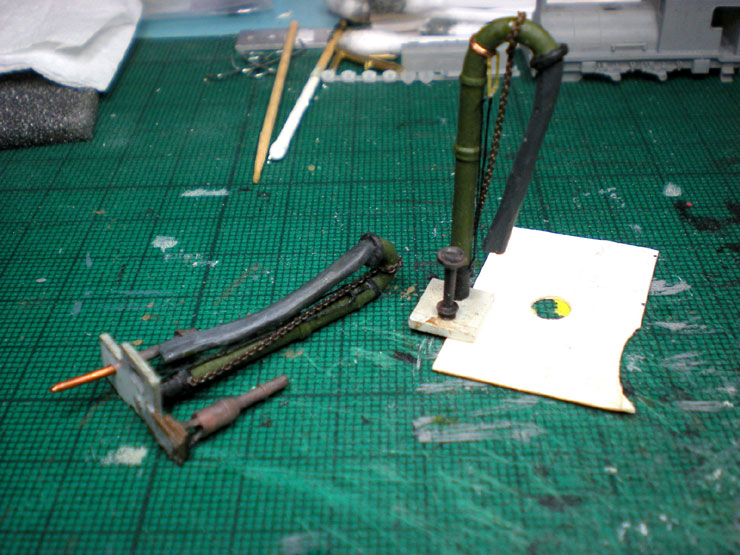
Unfortunately, the paintwork was largely complete when I found a
black and white photo showing the water column in what seemed to
be SR green. That photo was dated in the 1930s, so it was far more
appropriate for the period I'm modelling (1930).
I should have realised that because the SR ran the infrastructure
side of the S&D and left the loco side to the LMS, the
infrastructure items would be painted in SR colours. The 'flesh'
colour was used later, once BR's Western Region (ex-GWR) had taken
over. So a re-re-paint was in order. I also did the water column for
trains heading in the other direction. Chains were added afterwards.
These were used to swing the column hose over and up to the fireman
on the tender so that he could insert the hose into the water tank.
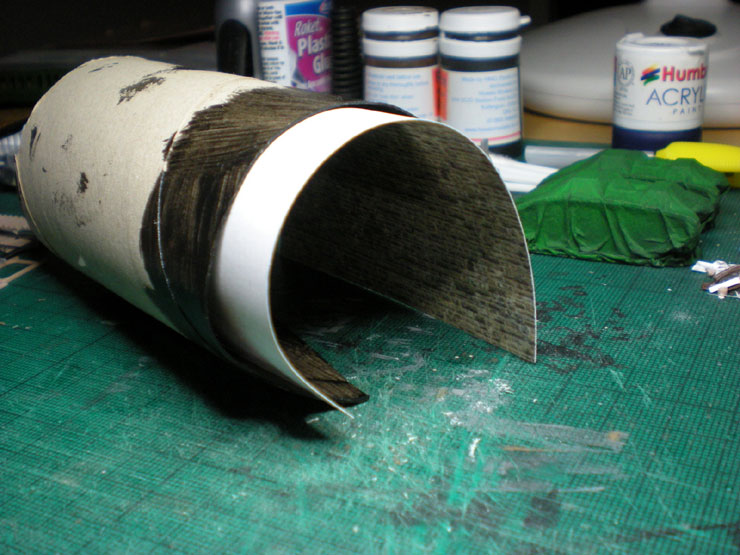
Another job more easily done was to add stone paper to the inside of
a tunnel - aka used toilet roll.
The station platform sides also received paper - stone where
necessary but also quite a bit of brown brick paper too. The
platform edging was essentially bare brick at this date. Painted
white lines were a wartime introduction to ensure that no one
walked off the platform in the blackout (the same thing goes for
black-and-white poles and kerbs).
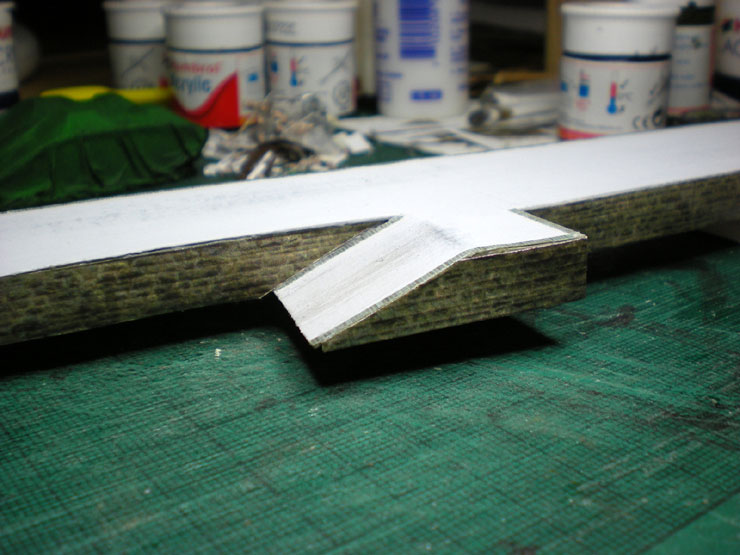
The loading platform at the back of EJ was also added. This isn't
strictly accurate, but I'm working with limited space for my yard,
so I can't model the real yard in full detail.
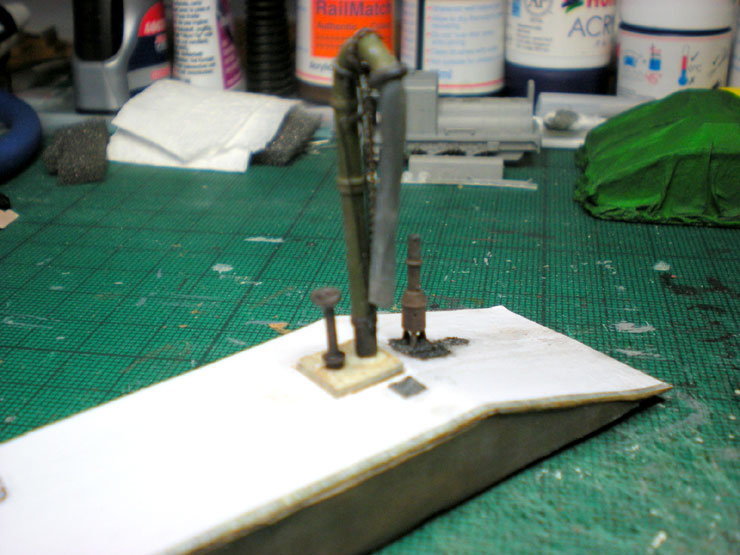
One water column installed in place at the end of the platform,
along with a drain cover and a suitable amount of ash from the
heater.
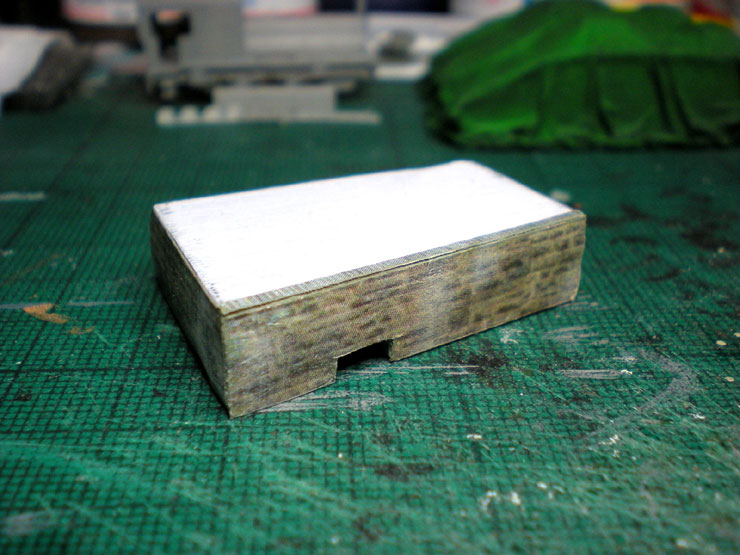
This mini-me platform is actually the cattle dock. It sits at the
mouth of the EJ goods yard, with access from the field that will
sit behind it.
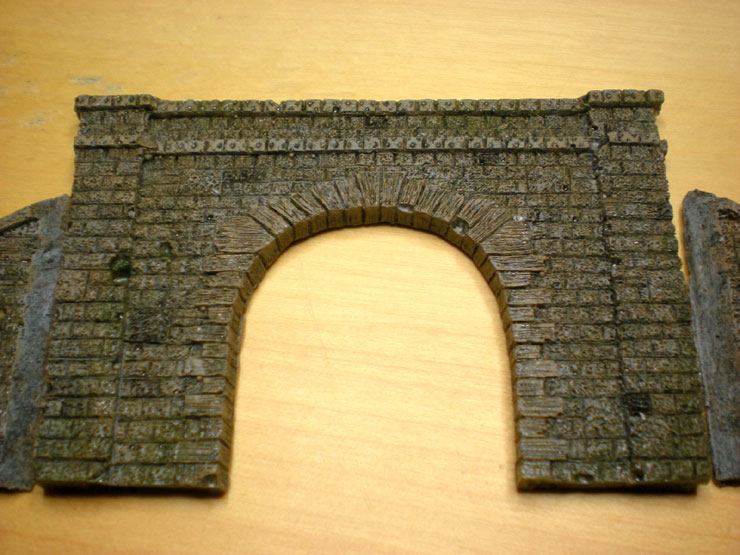
To compliment the toilet roll tunnel, the tunnel mouth that'll sit
in front of it was painted. This was an unbranded resin tunnel mouth
bought via eBay. I wish I knew who the maker was as I need one more.
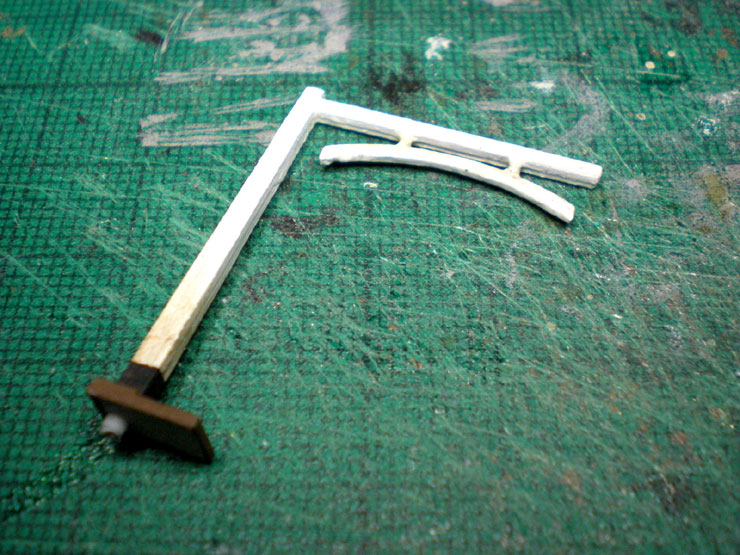
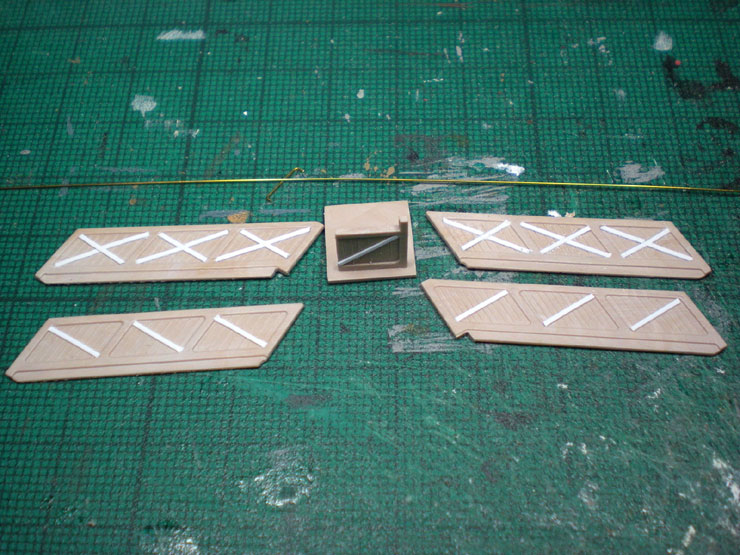
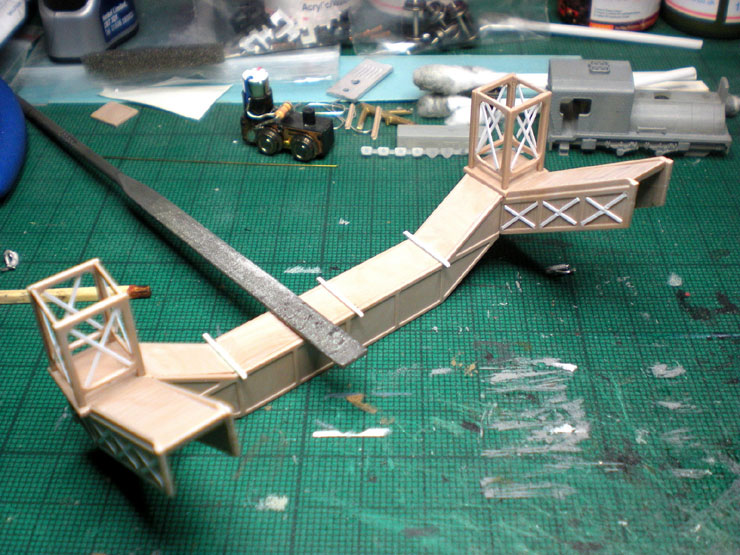
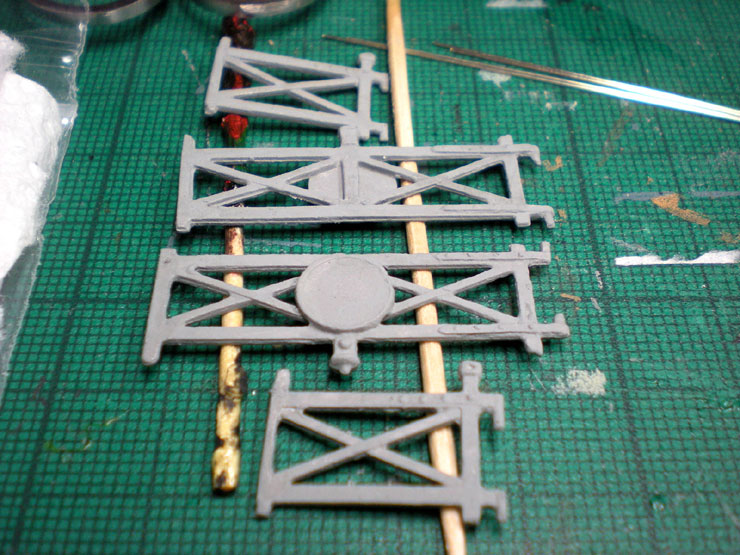
A far more complicated job was building the Ratio station footbridge
kit. The instructions are extremely vague, and the bridge also
needed a good deal of customisation if it was going to match the
real EJ station footbridge. That work started with scribing vertical
wooden panelling on all of the sides, and then adding the cross
struts over the top which were cut out of microstrip. Needless to
say, this took many evenings of work.
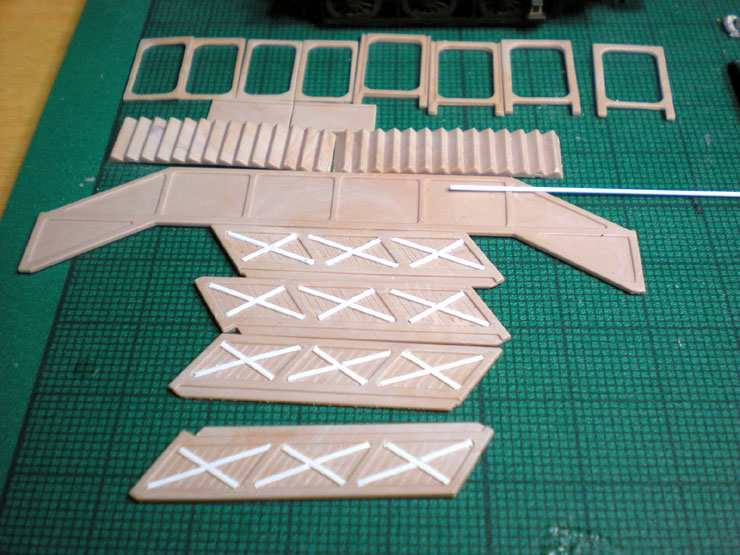
The bridge support columns also needed 'wooden' cross-struts added
(the white crosses inside each light brown piece of plastic). By now
a one-piece-a-night approach to constructing the bridge was starting
to show progress.
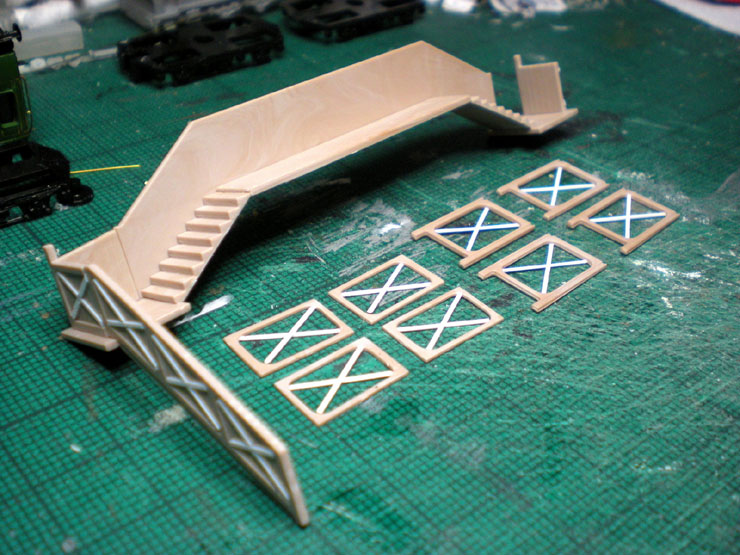
With the main body finished (and this took several weeks, mostly
because my main job at this time was on the
SECR Farish
Carriage Conversions), I could add thicker microstrip sections
to mimic the three support arms under the footbridge.
The final additions at this stage were the smoke deflectors (one
over each track) and a chunky post in the left-hand inside corner.
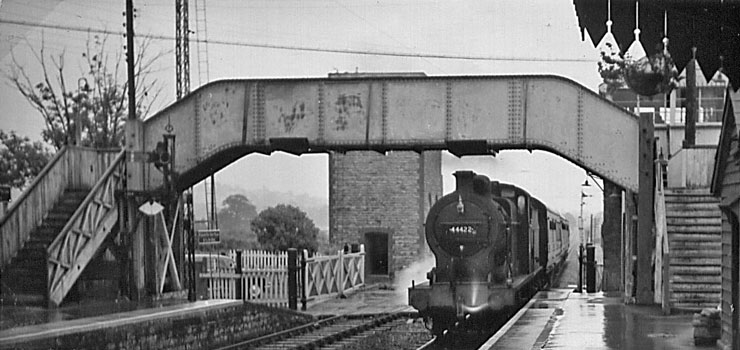
The real bridge retained its original steps but the span which
crossed the tracks was replaced by the SR with one of their new
concrete bodies. A thick wooden post was added at each corner, on
both sides, to secure the bridge span to the old steps, something
which is easily mimicked with matchsticks. Only one was painted the
same cream colour as the bridge. The rest were unpainted, so these
will be installed after the bridge has been painted.
It seems to be impossible to know exactly when the concrete span was
installed, but a date between 1925-1935 is realistic. There are
almost no photos of the bridge from that period, at least not
online, so there's a bit of guesswork involved. I opted to go with
it because it's almost an exact match for the Ratio kit, meaning no
customisation (for once!).

Here's the real thing for comparison. It's not an exact match but
it's pretty close. Any ideas how I can mimic the four bolts in each
post, near the top...?
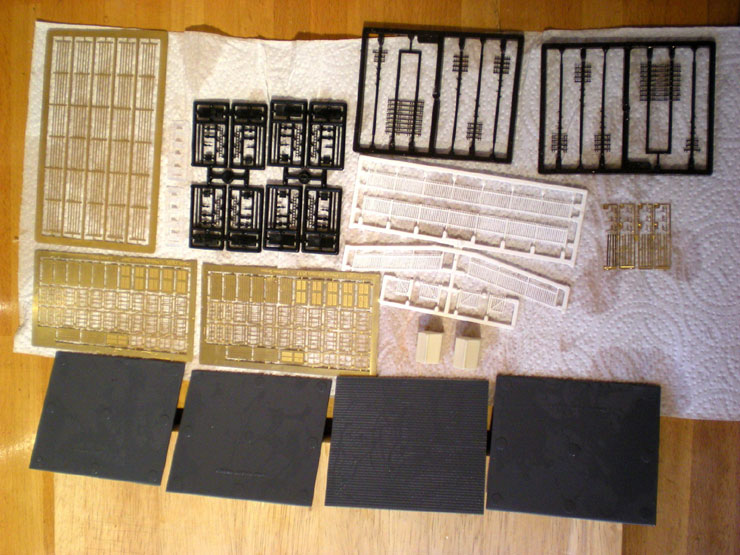
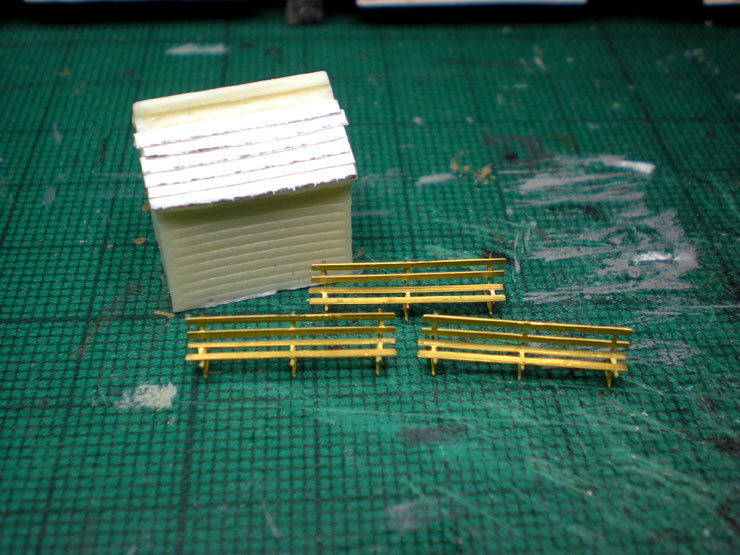
Finally, here's one for the future. Most of this is either Ratio or
Peedie Models. Peedie provided the etched brass windows and doors -
a custom order - plus five-bar fencing and two sheds (you'll see
what they're for), while the LSWR platform benches (far right) come
from Shire Scenes and the rest is Ratio - white palisade fencing,
telegraph poles, station lights, and roofing.
Right now I'm adding slate tiles to the roof sheds and have started
on the level crossing gates seen just beyond the footbridge in the
live photo above...
13 December 2017
Although there's stuff happening on the
Grouping Workbench thread,
most of it involves long-term projects that are rumbling on very
slowly. Infrastructure projects, on the other hand, seem to be
fairly easy to push through quite quickly.
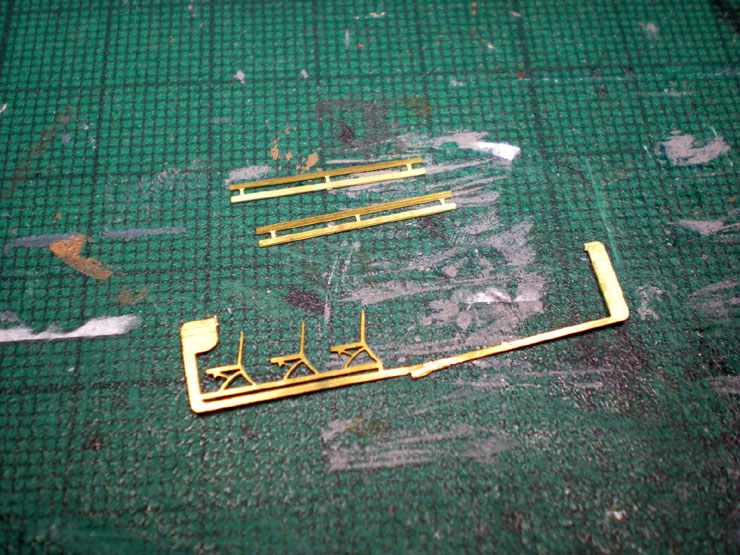
For now I'm concentrating on fixtures and fittings for Evercreech
Junction (EJ), starting off with a set of benches. These come in
etched brass and have to be removed very carefully (I found out that
Tamiya do a set of specialist scissors for this sort of thing, but
they're not especially cheap).
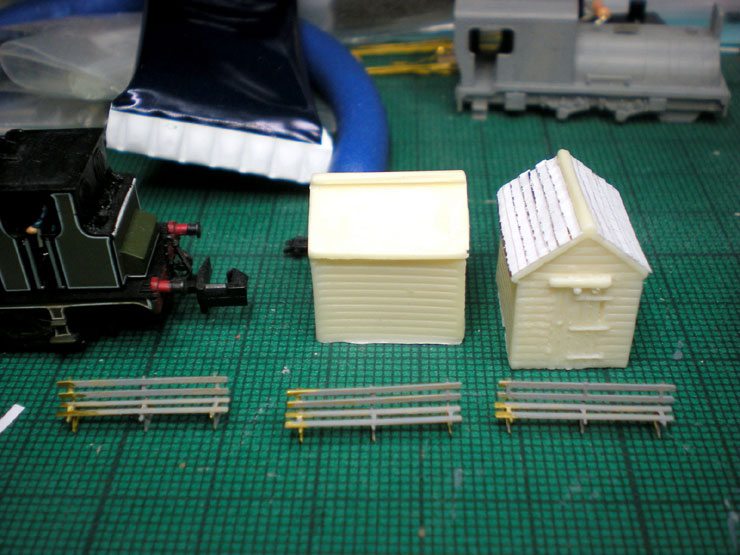
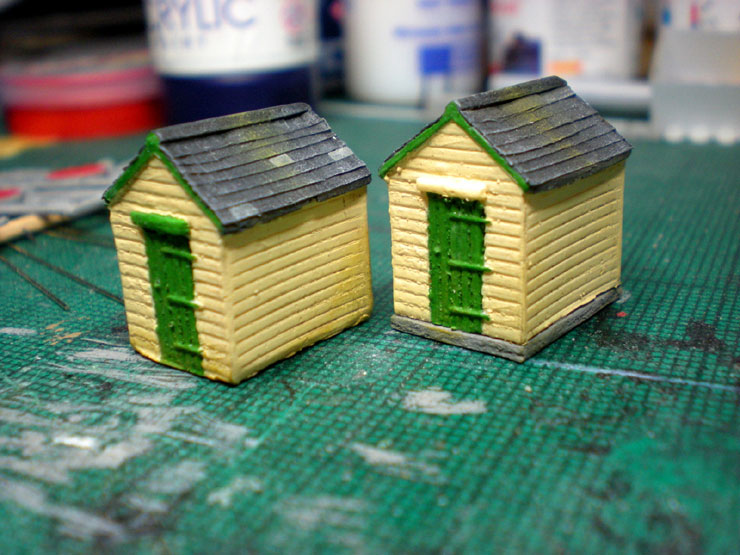
Benches assembled, and the first of two Peedie Models garden sheds
needs some work to turn it into one of the wooden huts on EJ's
platforms. All it really needs is a slate roof, so individual
courses of paper are being laid one over the other, with scoring to
show the tiles on each strip.
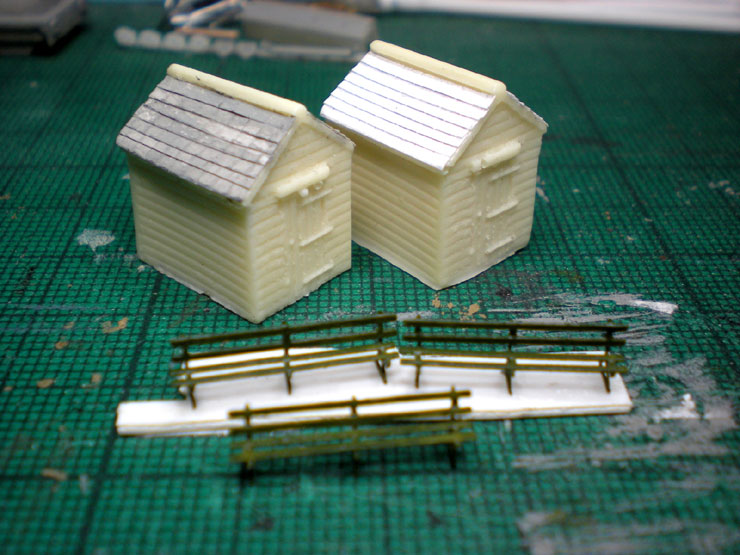
With one hut done successfully I can start on the other one. The
benches are being painted, but quite slowly as I hold onto one end
while painting the other end.
Huts done - I won't be painting them until I finalise the SR stone
colour to use on the bodies. The benches are also fully painted and
varnished.
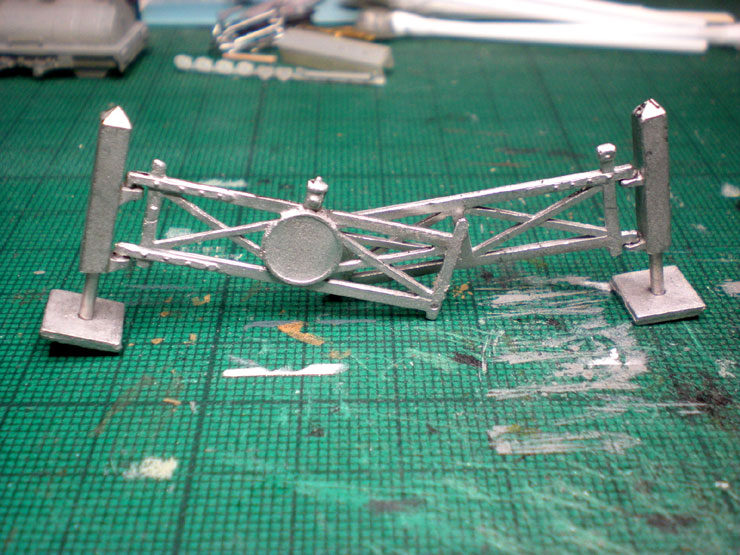
The Lytchett Manor Models level crossing white metal kit would have
been okay to use if I'd stuck to the original plan to have a
non-opening, non-accurate level crossing. But as I've studied photos
of EJ I've learnt more and more about the details on the real thing
and want to transpose them to the model version.
So the gates had to be longer and also working. That means combining
the double-track version with a single-track version to get the
length of gates needed, and then fitting the posts onto the layout
so that the gates can be made to open before I paint anything. There
will be more to come on this...
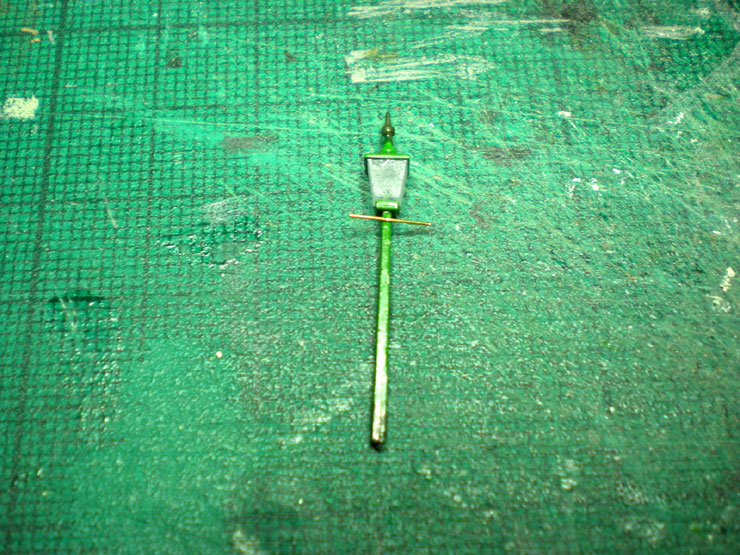
Something that was easier to get on with, although their
instructions for assembly were very ambiguous, were a set of gas
lamps for EJ's platforms. These are in flexible - but fairly fragile
- plastic (one of the stems actually snapped in half with very
little effort required). They also needed a brass 'crossarm' to be
attached. Drilling through the stem would have been ideal rather
than attaching them at the back, but a couple of trials showed me
very quickly that this wasn't going to work.
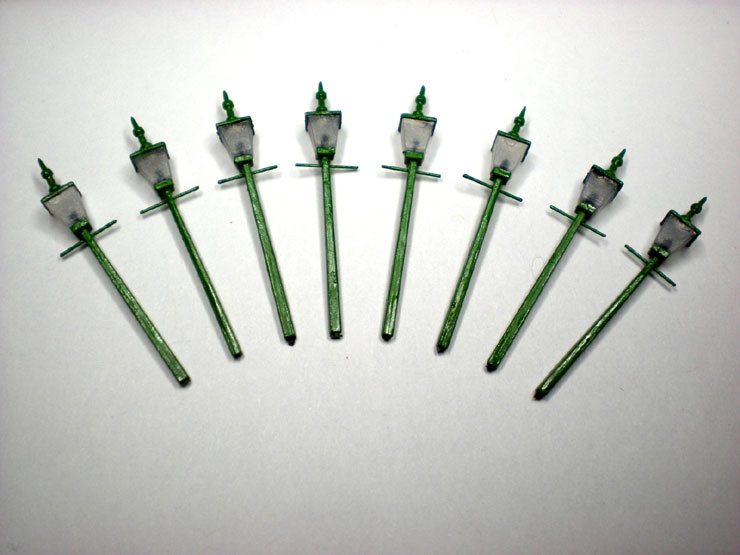
Here's the full set for EJ. I could do with about four or five
wall-mounted lamps too, but I haven't found a supplier for those
yet.
14 October 2018
I've been a bit slow with the infrastructure
updates this year, primarily because not much was getting done while
the layout wasn't working properly. A visit from my non-resident
electrical expert in September fixed that and my enthusiasm for all
things layout was rekindled.
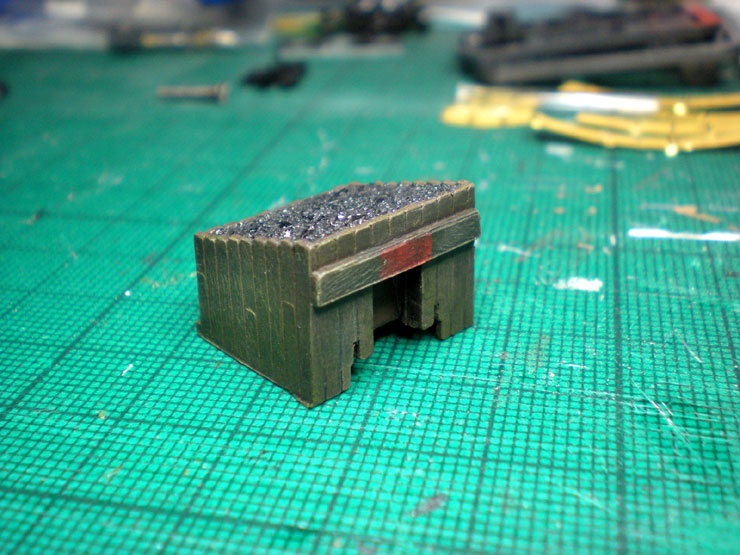
One of the easiest jobs was to paint up the buffer
stops for the colliery loco stabling point, with real coal added on
top:
I was also working (slowly) on getting the level
crossing gates next to Evercreech Junction station working properly.
They won't be motorised, and they won't normally be in the open position
(to block the line in favour of the road), but as there was no Sunday
service on the S&D it would be nice to be able to represent that sometimes.
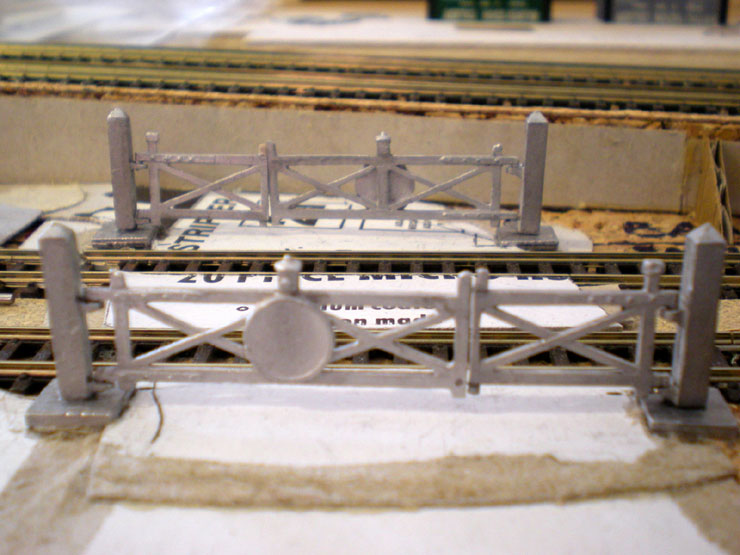
Then the gates were taken to the workbench where they were given an
undercoat. Apart from painting the warning roundels red (some time
after taking this photo), there
they've sat ever since! Once I've finished work on the station
footbridge though, there will be no escaping this task.
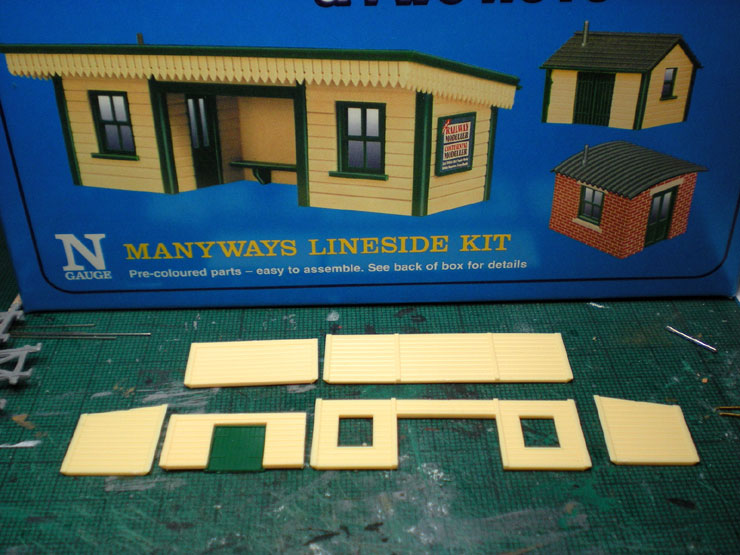
Next up was the wooden waiting room on the Bath side of Evercreech
Junction station. Take one Peco lineside kit of a typical SR waiting
room...
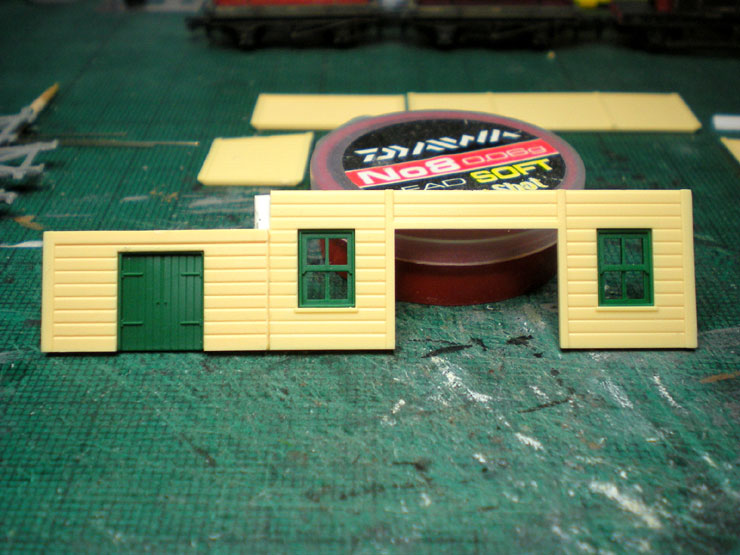
...and then add the front door panel of the accompanying wooden hut
to extend the waiting room, plus add in window frames and door...
...then scribe some plasticard to fill in the gap...
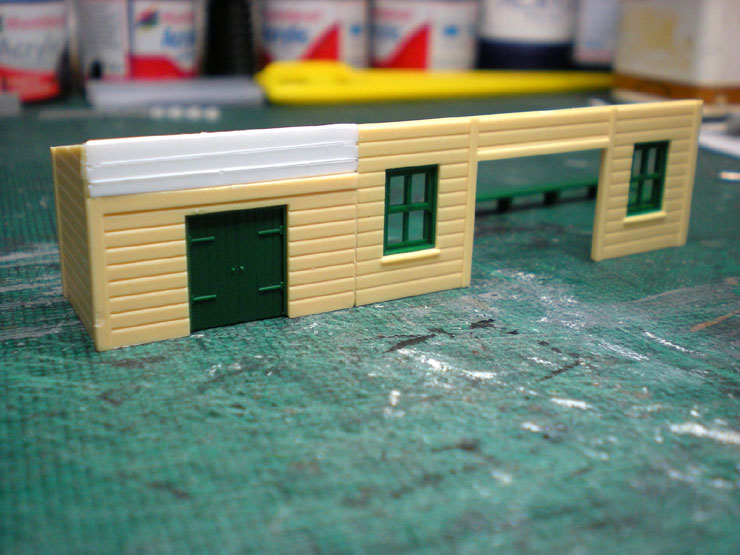
...stick the same extension onto the back panel...
...fill in the gap there too (not visible here) and start painting
two Peedie Models garden sheds to act as the two small platform huts
at EJ.

The etched brass items on the right are noticeboards. They come with
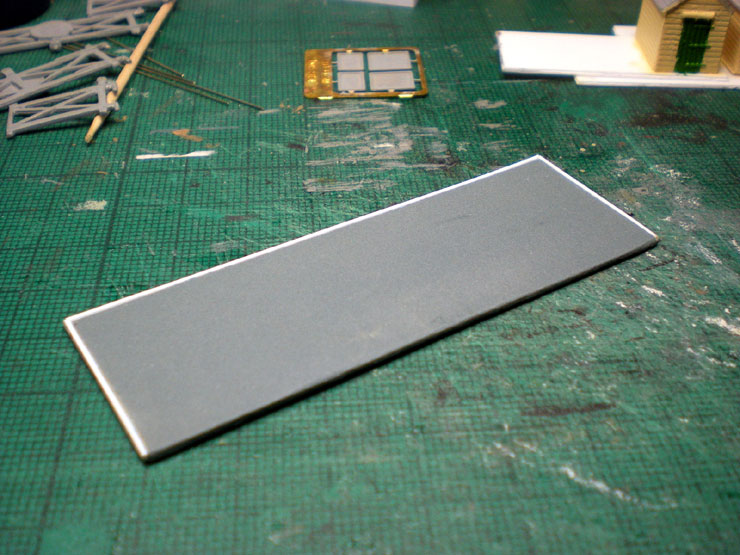
the Peco kit. The Peco roof, of course, was now too short so I had
to make one of my own out of plasticard.

Not being entirely happy with the roof surface I glued a sheet of
wet-n-dry fine grade sandpaper to it. Much better, and now it could
be painted.
The completed roof is attached and the valancing around the edge is
starting to go on - I could use Peco's side panels for this but
needed to get some SR/S&D valencing from Peedie Models for the
extended front.
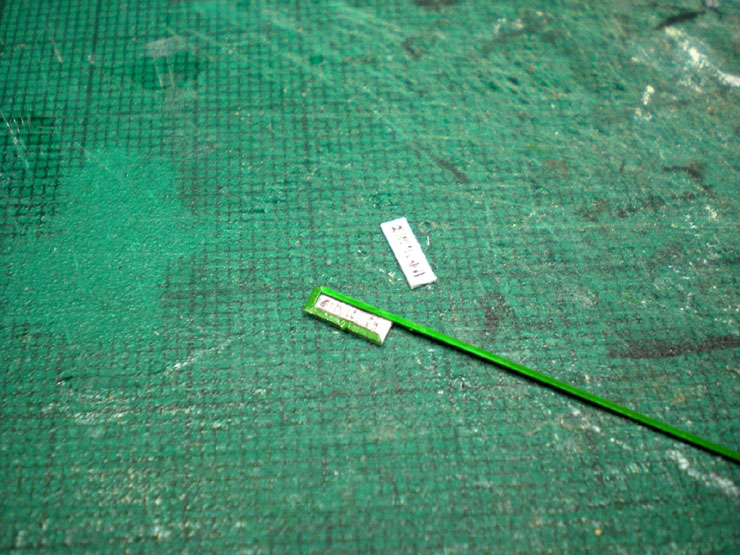
Then I also realised that two of the Peco noticeboards were too big
for the locations they needed to be in, so I had to make my own
frames to go around a couple of supplied narrow adverts.
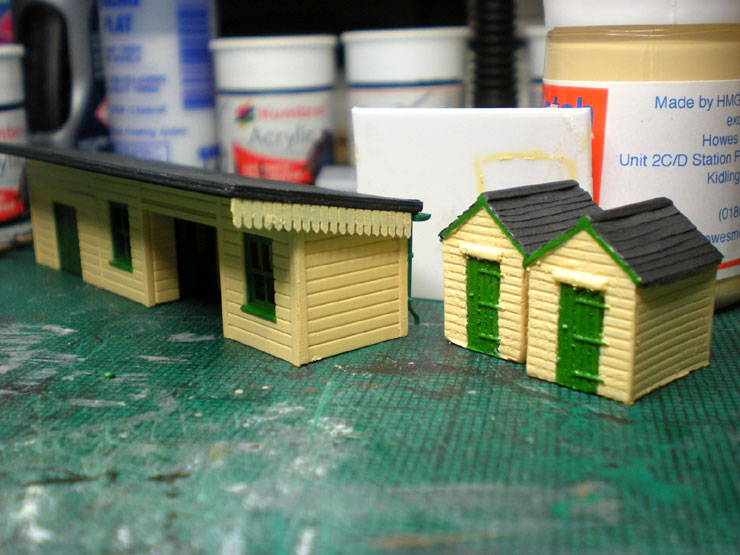
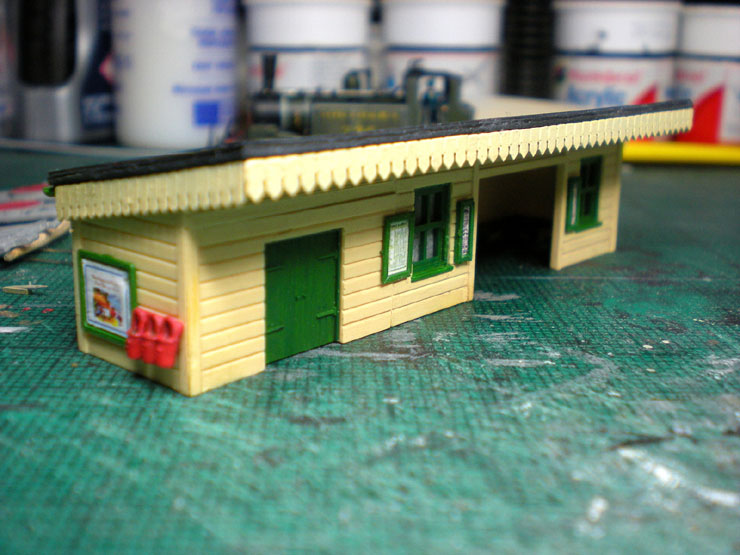
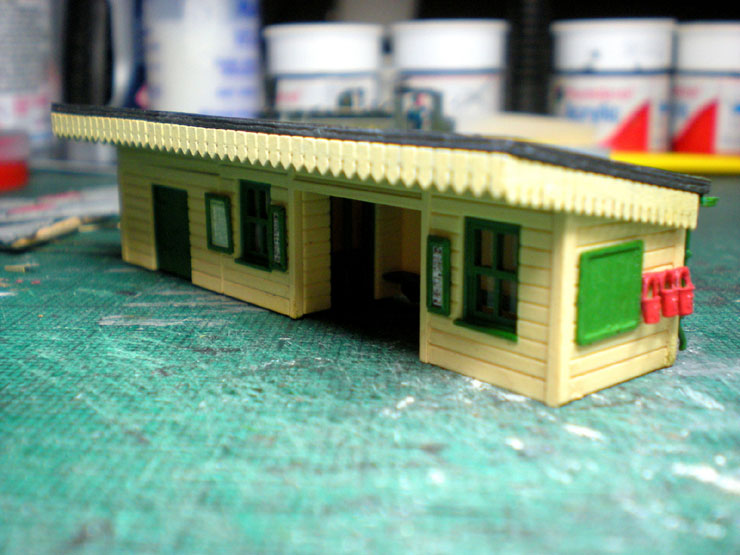
The huts in their completed state. The one on the right is on a
concrete base, just like the original hut.
The finished waiting room with extension is also complete, apart
from two tall chimneys to be added at a later date. The fire buckets
come from Springside Models, and the two scratchbuilt notice boards
can be seen on either side of the main entrance. The valencing looks
really good. One of the wall planks seems to have sprung its nails
above the storage cupboard (near the camera). The stationmaster will
have to get that seen to.
7 April 2019
It has been a while, but a return to modelling has
been made. The winter was taken up with rebuilding four websites to
the latest mobile responsiveness standards so that everyone who
browses on a smartphone could see them properly - including this
website. That work involved rebuilding in minor or major ways around
2,500 individual pages, plus lots of testing, head-scratching, and
eventual solutions found to quite a few problems. Hopefully it will
be worth it as I post more updates here this year.
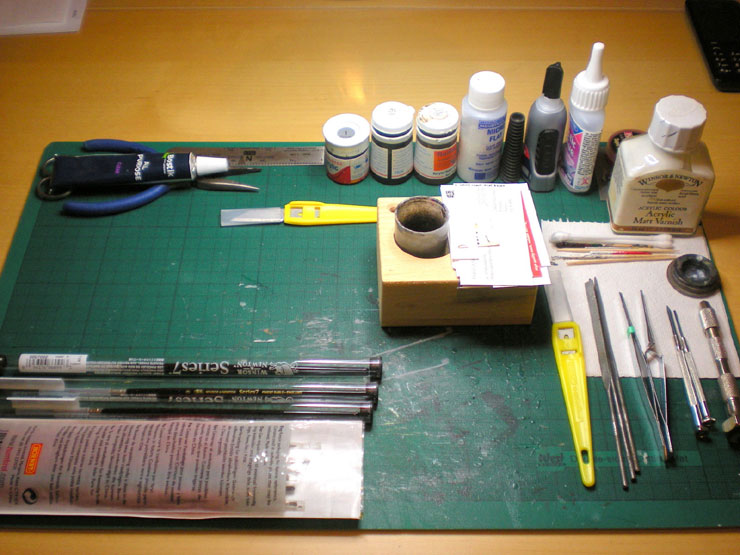
The first thing to do, though, was completely clear
the 'workbench', give it a good clean, and then arrange only the
most vital bits and pieces on it. It's a bit like a spring clean of
the house and then moving the furniture around so that it feels
fresh. There are now just two projects on the workbench, with a heap
of others queued up but safely out of the way for now. It's good to
be back in business.
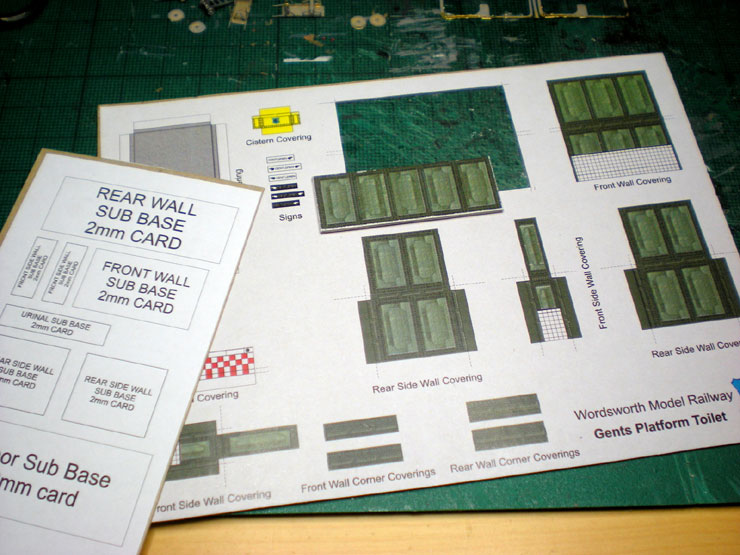
The first thing to report as far as layout infrastructure goes is
that Evercreech Junction station now has its very own lavatories for
gentleman on the Bath-bound platform. Later photos of the station
all show concrete panels around the area, but inside can still be
glimpsed a Victorian-era metal lavatory structure. Taking the easy
way out for once, I downloaded an OO gauge card kit from the
Wordsworth Model Railway website
here [external link]. It needed to be shrunk down before
printing onto label paper and then being stuck onto thin card.
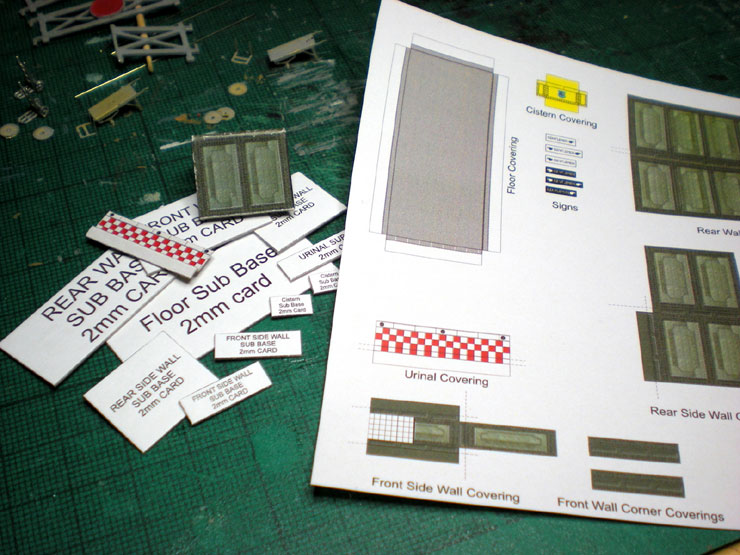
Then all the pieces need to be cut out carefully with a craft knife.
Unfortunately the folding process does do a bit of damage to the
printed sides.
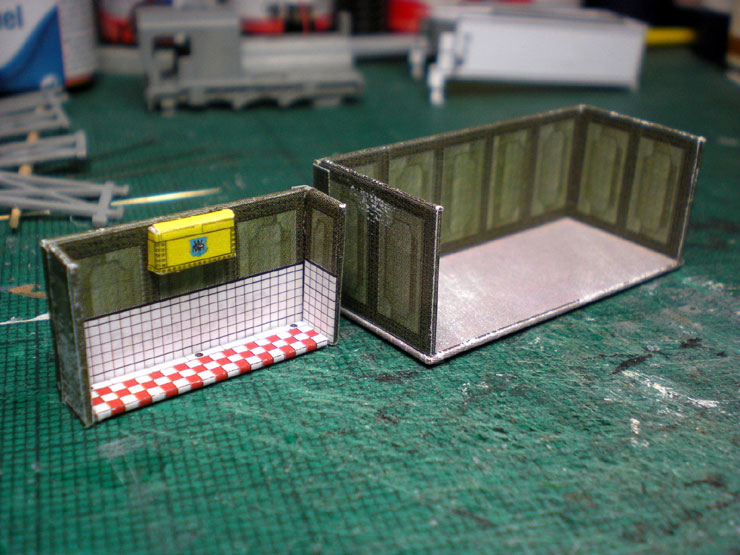
Once assembled, you have the lavatory section itself and the
'discretion' shell to hide the goings on. This photo is a little
cruel in showing up the detail...
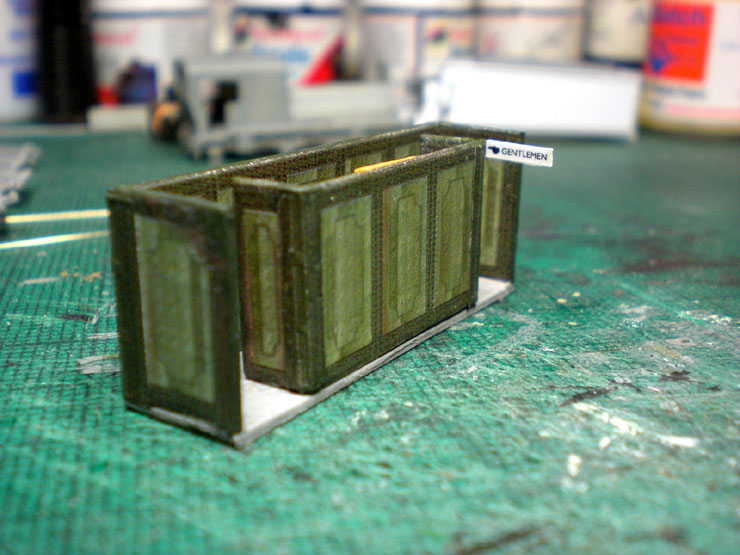
...but at least all of the scratches to the printed surface can be
masked with paint - either green tones to blend them in or brown
tones to simulate rust. The two pieces have been joined together.
And here's the aerial view that no gentleman would ever want you to
see!

More work to be described soon.
17 May 2019
I'm still processing one or two long-running tasks that will
eventually be placed on the completed layout. The first job to have
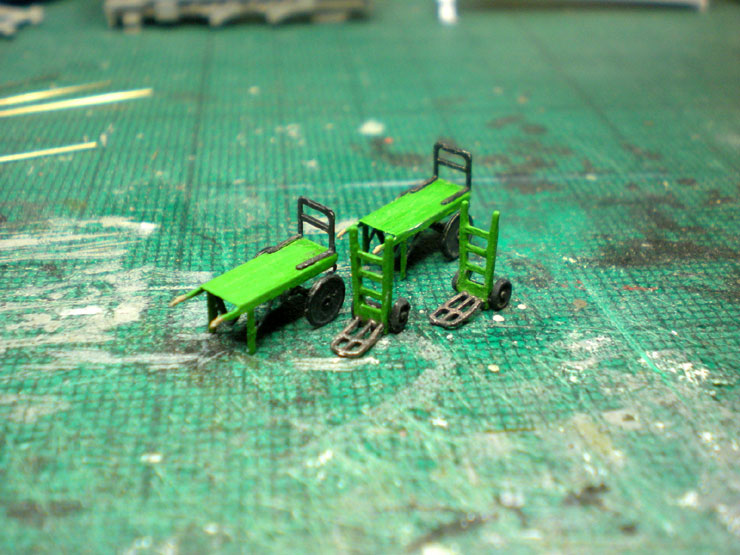
been finished lately involved the very tricky task of putting
together two etched brass station barrows and two luggage trolleys.
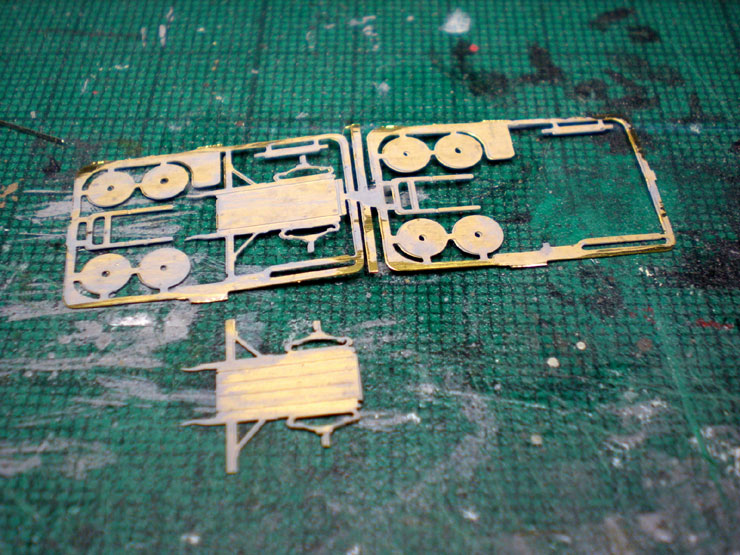
The final result, below, involved several evenings of painting parts
of each barrow or trolley while holding onto the other end. The same
process was repeated for varnishing. Eventually though, the finished
results looked like this, although the camera has made them look a
little more garish than they really are:
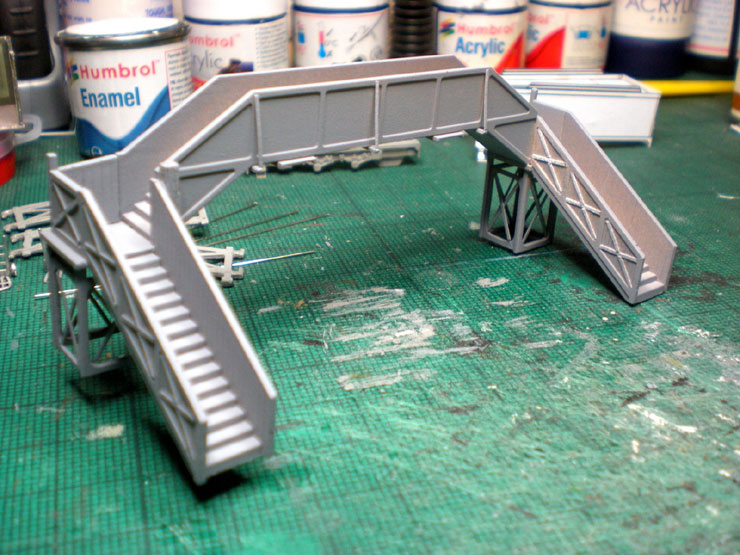
A long-running kit-building project has been the footbridge for
Evercreech Junction station. With the customised building work
completed, the entire bridge was undercoated.
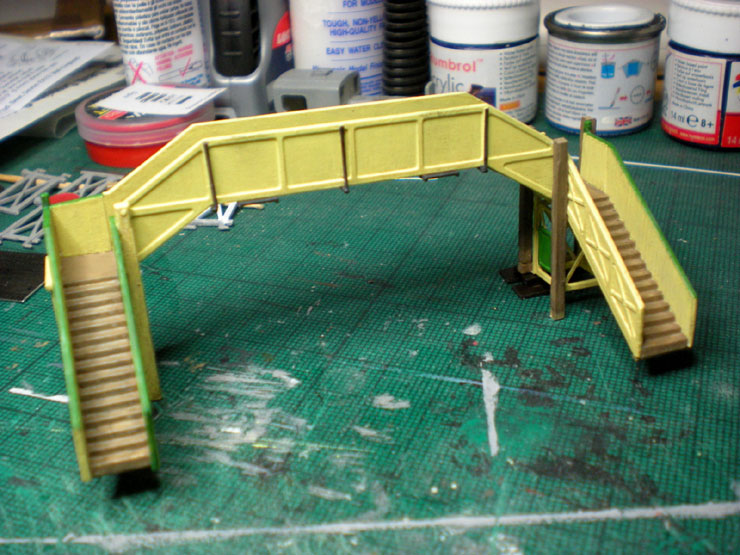
Then many, many nights of painting followed, although a lesson was
learned when it came to using BR-era photos to judge the colour
scheme.
The bridge when it was under Western Region (GWR) control towards
the end of its life was quite a different colour from the days in
which the LMS provided most of the motive power to the Somerset &
Dorset Joint Railway and the SR provided infrastructure support
which included maintaining bridges, signal boxes, and station
buildings, all of which were painted in its distinctive cream and
green livery.
The finally-completed bridge is shown here, with three of the
support posts in place. The longest of the posts - the one at the
front) will help to secure the bridge into the station platforms.
Now for a terrace of railway workers cottages to be positioned
against the approach to Bournemouth West station. These started from
a download of the Wordsworth Model Railway OO gauge card building
below:
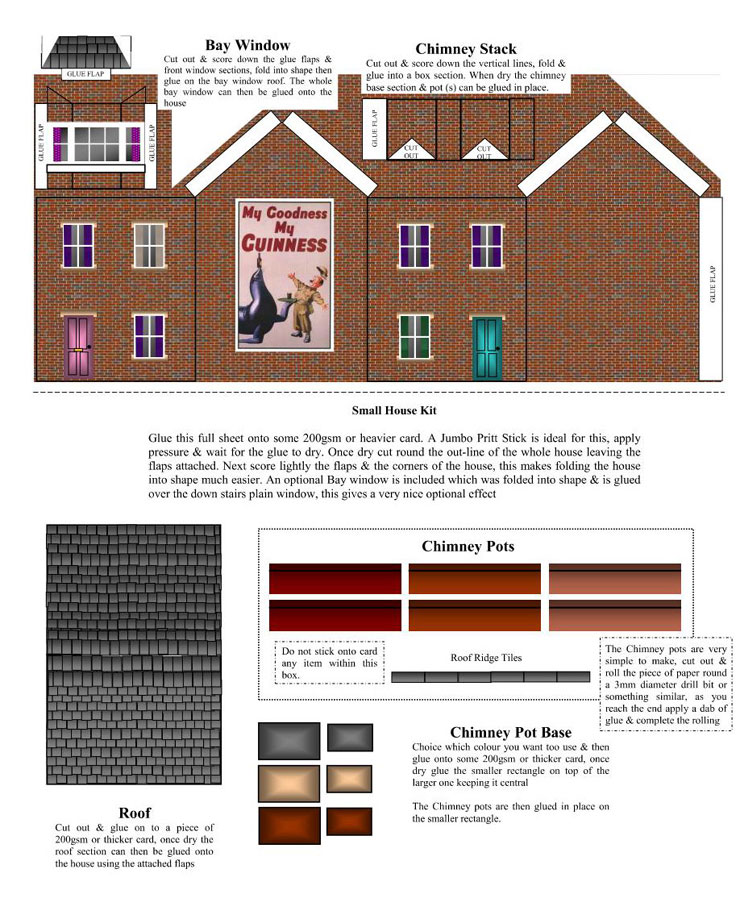
The PDF was reduced in size by very nearly half, and then rebuilt to
include four cottages in one terrace, as shown below:
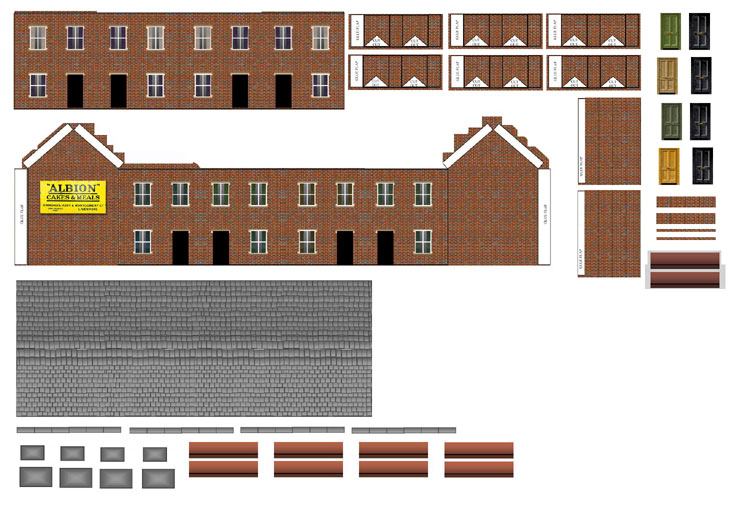
Next was to print it onto thin card, cut it all out, and start
building with plenty of internal supports to help prevent warping.
It's strange to realise that this is my first card building kit in
around thirty-six years.
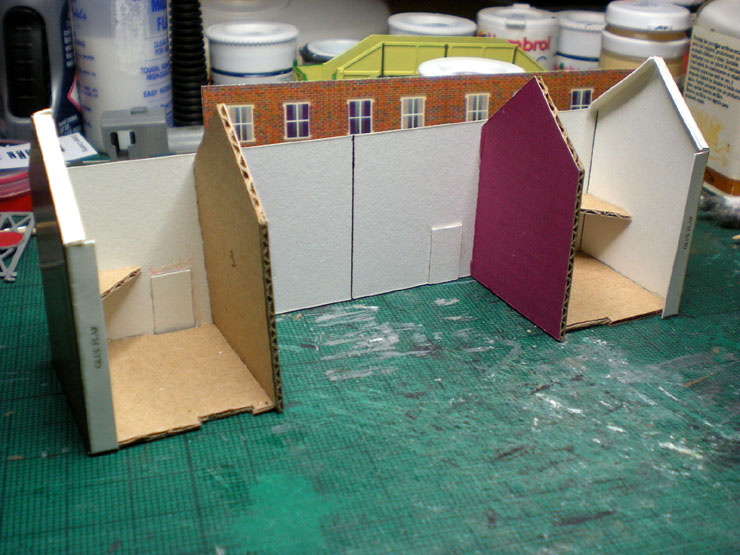
Much more internal support was added. I won't be going down the
route of internal lighting because I simply don't have that kind of
time available. Even building the basic kit took several weeks of
short evening working sessions.

The final building also gained plastic guttering and downpipes from
the ratio series, flashing around the joints between chimneys and
roof (paper strips painted silver), plastic chimney pots (spare kit
sprue cut to the appropriate length and painted in a mix of red and
brown acrylic), window cills (which may or may not be a little
oversized), and a good deal of weathering (I got a bit carried away
on the side wall under the enamel advert, but I can disguise some of
this with some moss creeping up the wall).
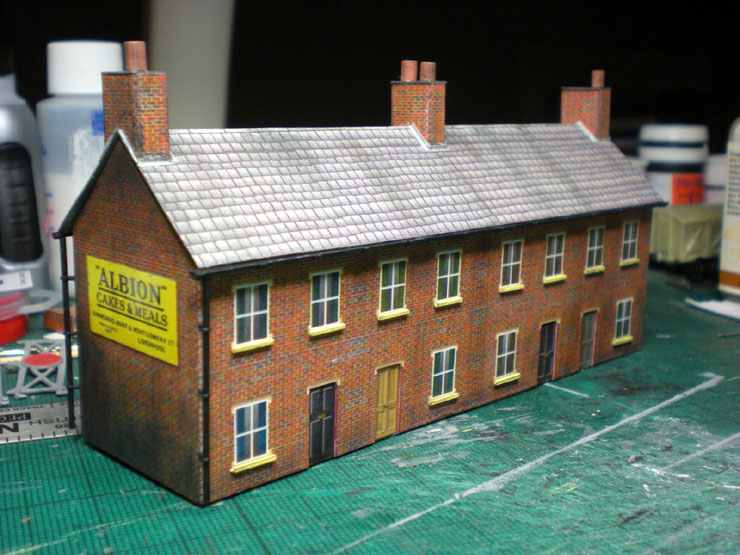
Building this terrace allowed me to firm up some of the basic scenic
structural work on the layout and begin the work of laying a lane
along half of the middle section on the layout.
|