|
24 September 2017
Beginning on 12 June, I started tackling a new
carriage conversion project.
I stumbled across a couple of carriage diagrams for
former South Eastern & Chatham Railway stock (the SECR lines are
now part of Southeastern's service area in Kent). The carriages seemed
close enough to Farish suburban coaches when it came to doors and
windows and basic chassis, so it seemed to be a relatively easy
rebuild.
Two examples had also been spotted at Templecombe
in 1937, on the Somerset & Dorset Joint Railway, so there's every
chance that they were transferred there between about 1930-1935.
Perhaps 1930 specifically is a little optimistic but records for
pre-Grouping carriages under Southern Railway control in the pre-war
period are sometimes quite vague, so I think I can get away with it.
Given the date of this first post on the project,
well over three months later, the hope that it would be an easy
project was clearly over-optimistic! Anyway, I wanted to get on
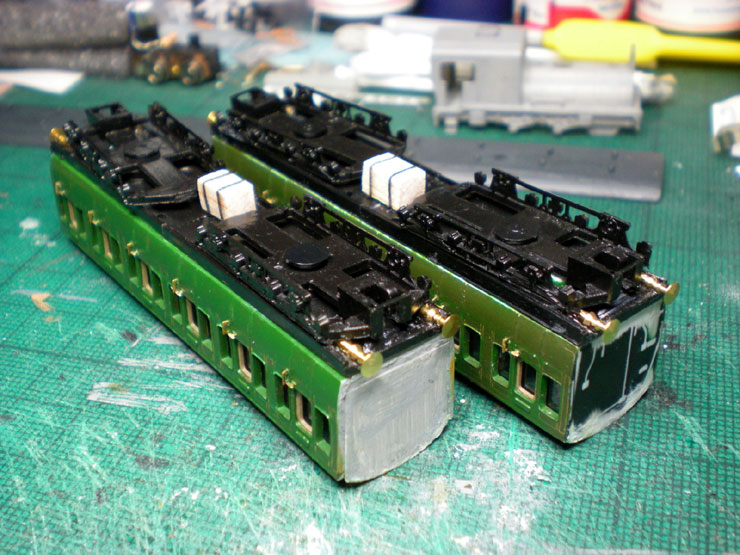
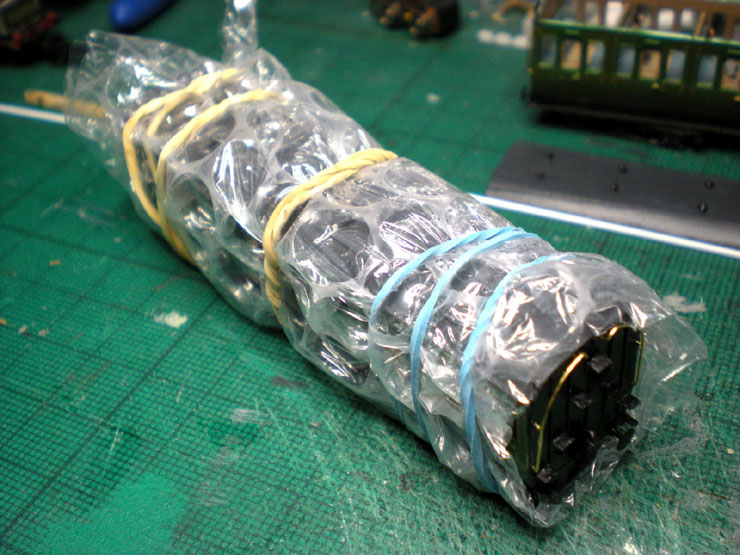
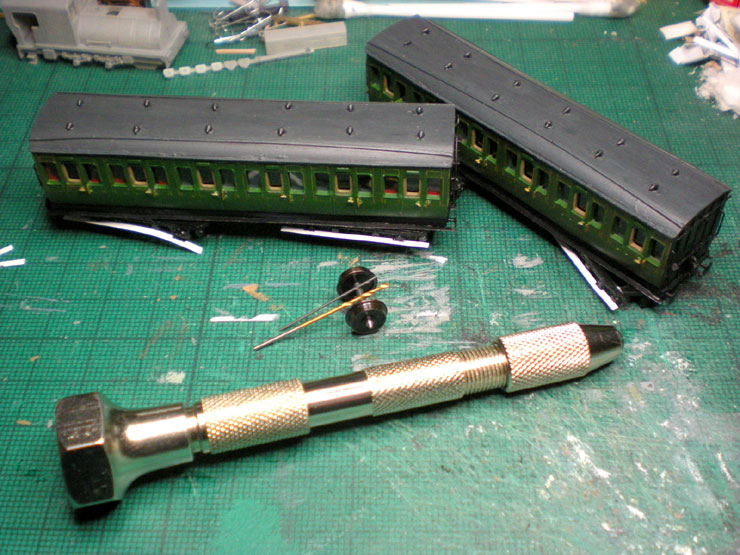
with it so here's where I started, by dismantling two full length
Farish suburbans (at a scale 58.5 feet, if I remember correctly).
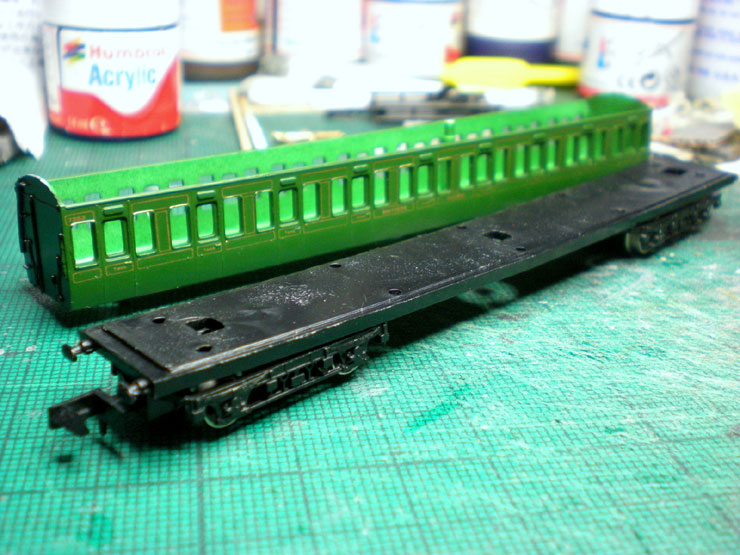
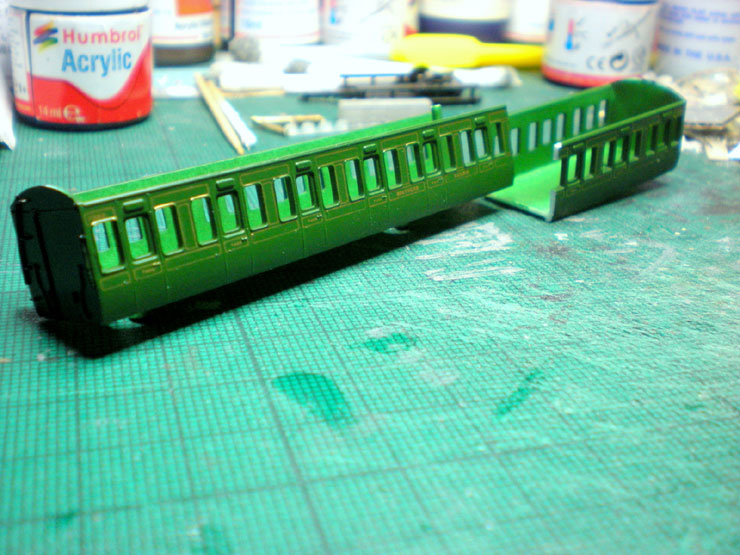
Then the end three compartments needed to be removed
from each carriage using a razor saw. The SECR diagrams were for 44
feet-long 6-compartment carriages, so three compartments had to go.
The compartment spacing on a Farish suburban isn't quite the same, so
these scale up at about 39ft, but there's nothing I can do that, and
visually it conveys the 'right' impression anyway. I left a
millimetre or so extra on the bodies so that the could be filed down
to being 'just right'.
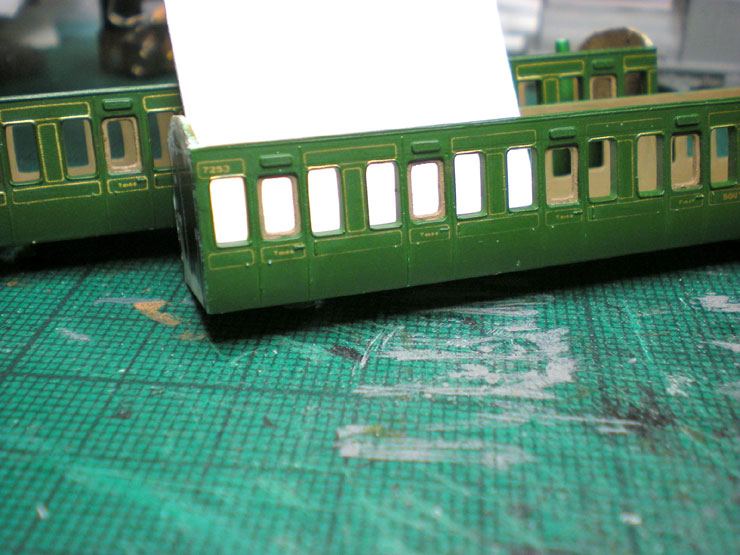
One of the first jobs was to do something I hadn't realised was
necessary when I worked on the first two carriages in the
LSWR Farish
Carriage Conversions thread - painting the droplights in 'wood'
colour. It was the first carriage in the
LSWR
6-wheel Race Set that taught me this lesson. Now I had
twenty-four droplights to paint...
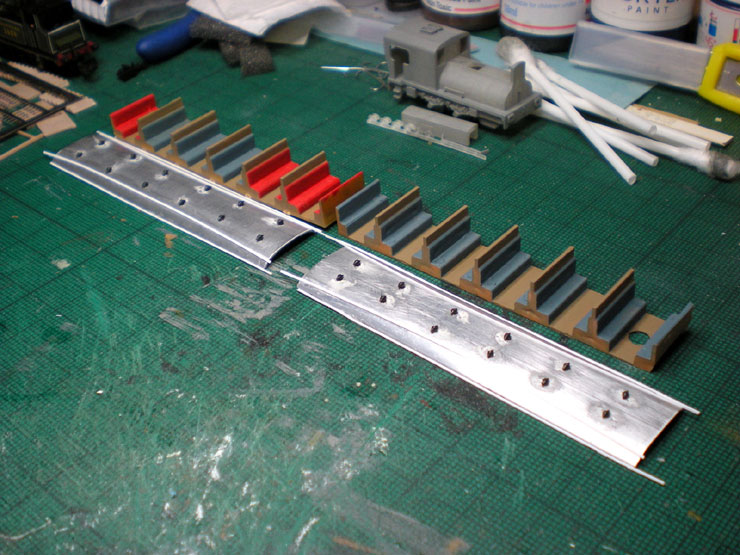
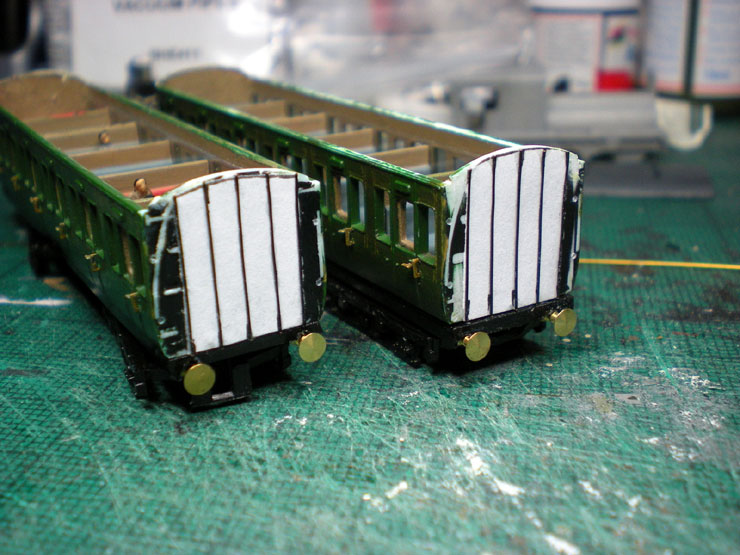
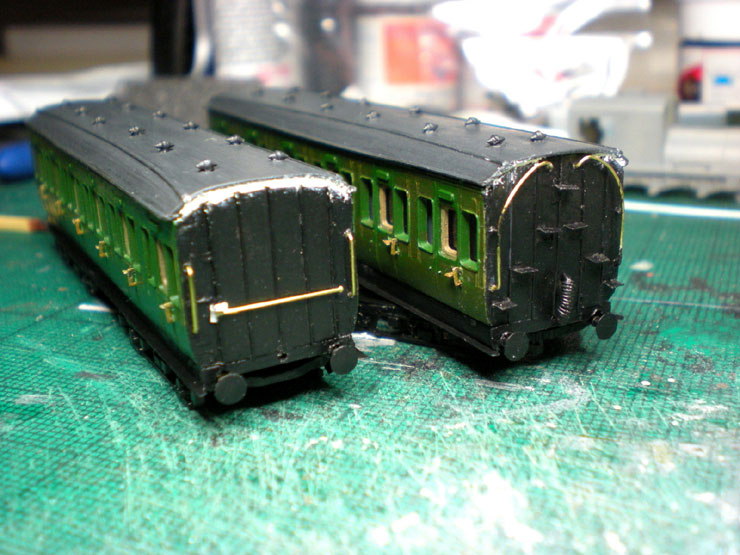
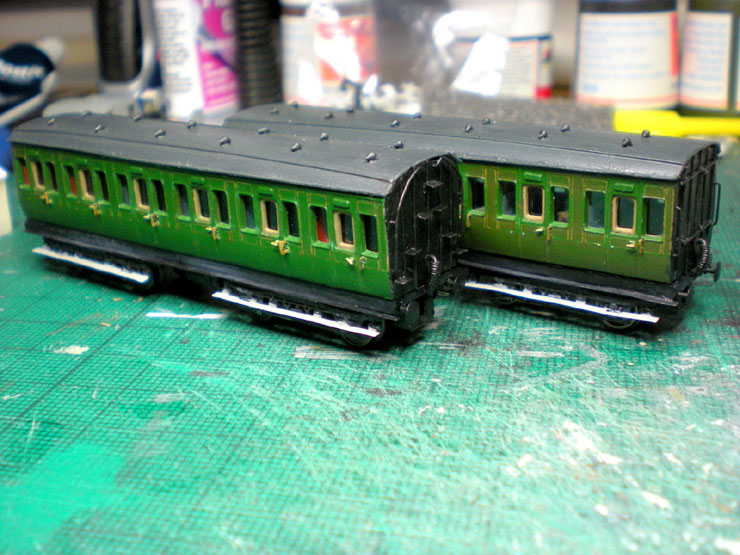
New roofs were needed to match the SECR profile, and these aluminium
roofs were from Etched Pixels. Although they're meant for GWR
Siphons, they're also suitable for this coach diagram. But they're
quite hard to cut down, file, and bend to shape. Fitted by now were
the new end panels to fit the gap left by sawing off the ends.

The roofs needed to be drilled for torpedo vents, and this was even
more tricky than cutting them down. Masking tape helps to cut down
on the drill bit slipping but it's not infallible. Two roofs, with
two air vents to a compartment, side-by-side in line with the doors
(a noticeable difference from the all-in-a-row vents of LSWR
coaches).
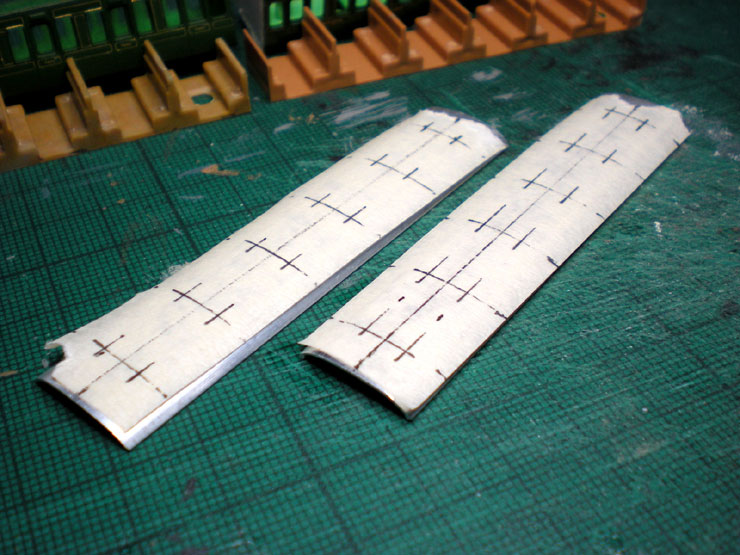
This was the result - a few drill head dents, and one or two
slightly out-of-alignment vent holes. I corrected the worst two and
the rest seem not to be especially noticeable.

The plastic torpedo vents (also from Etched Pixels) were fitted and
glued from underneath. Then the rain strips and cantrails were
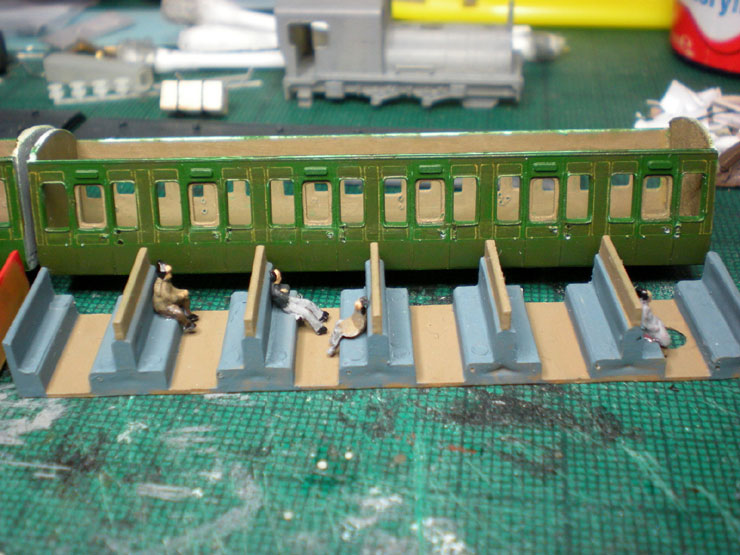
fitted, and the seating was painted (blue for first class and red
for third class).
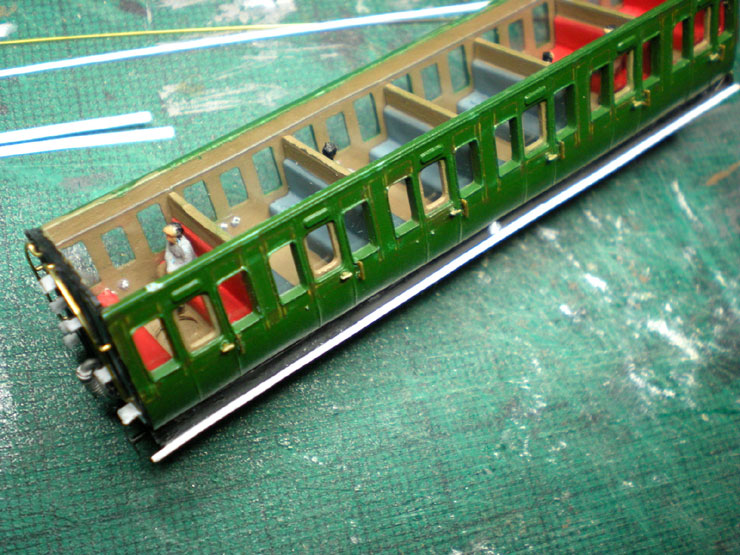
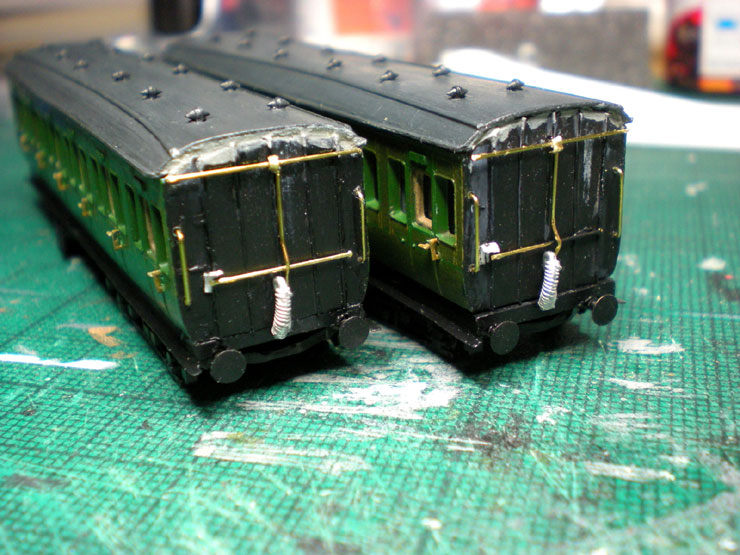
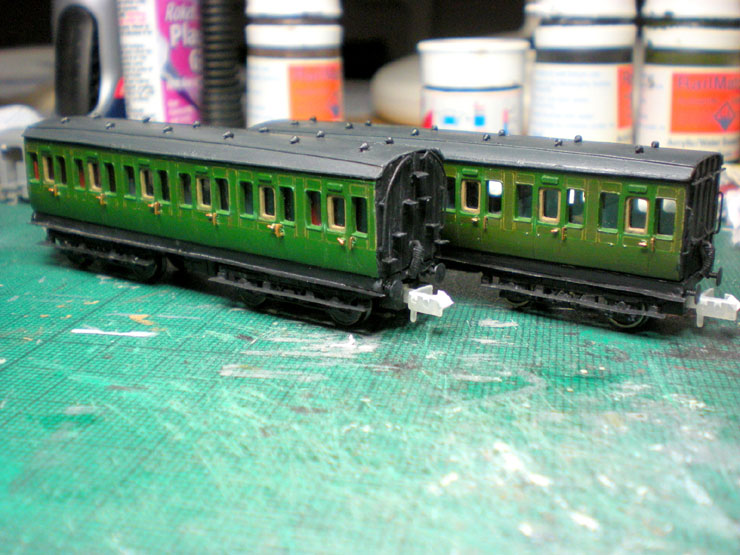
The next job was a trickier one. The Southern Railway lining on the
Farish suburbans generally follows the western division (ex-LSWR)
pattern, which was longways along the body, but the eastern division
(ex-SECR) lining was vertical - on these coaches anyway. I used a
fibreglass pen to remove the bits of existing lining that I didn't
need.
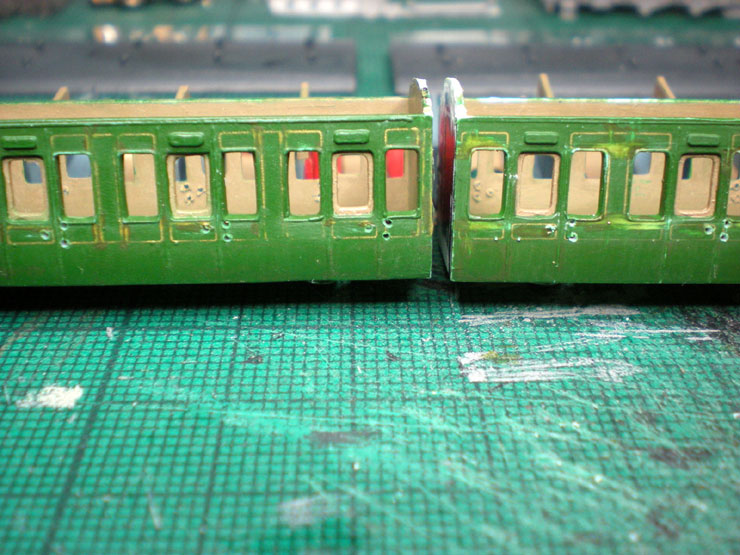
Then I hand-painted the vertical bits along all four carriage sides,
with a few corrections in Maunsell Green afterwards, and then a bit
more lining to fill in the sketchier bits. The finished result is
shown below in harsh sunlight to try and make it more visible. If it
looks a little worn then that's fine. These carriages were hardly
front-line, first rate express stock. They would have been painted
no more than once a decade, or perhaps even only patched up after
the first rebranded livery change after 1923.
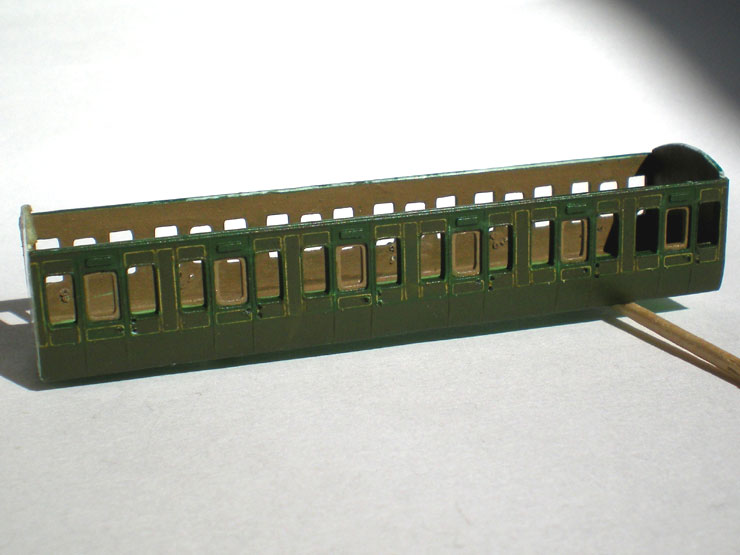
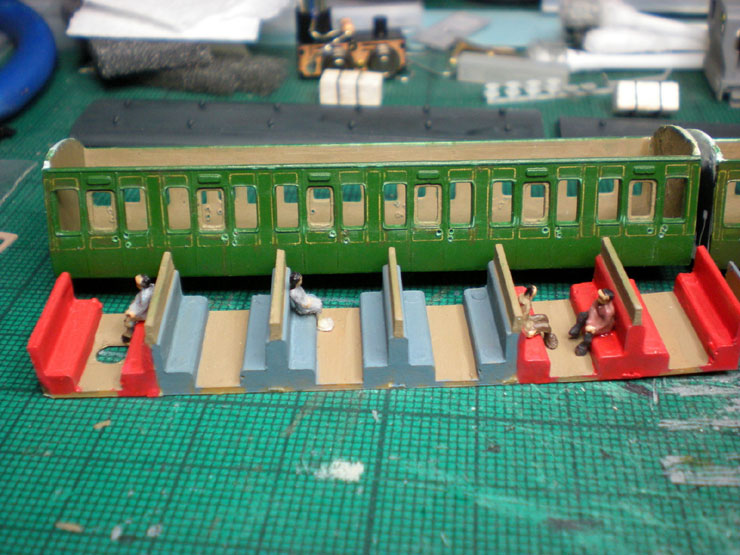
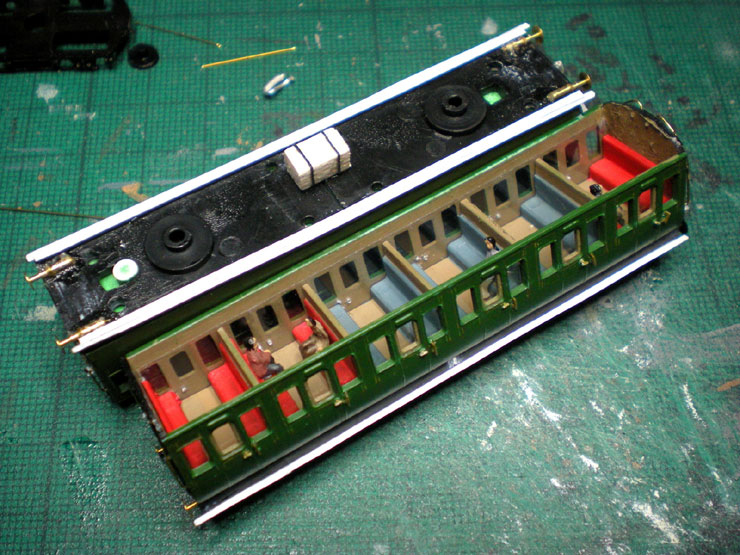
The new lining can be seen here - the product of ten hours of
work spread across two weeks. The seating is now fully painted, and
so are the passengers.
The lining on the first class only carriage came out a little better
- sharper - but then that's the way it should be.
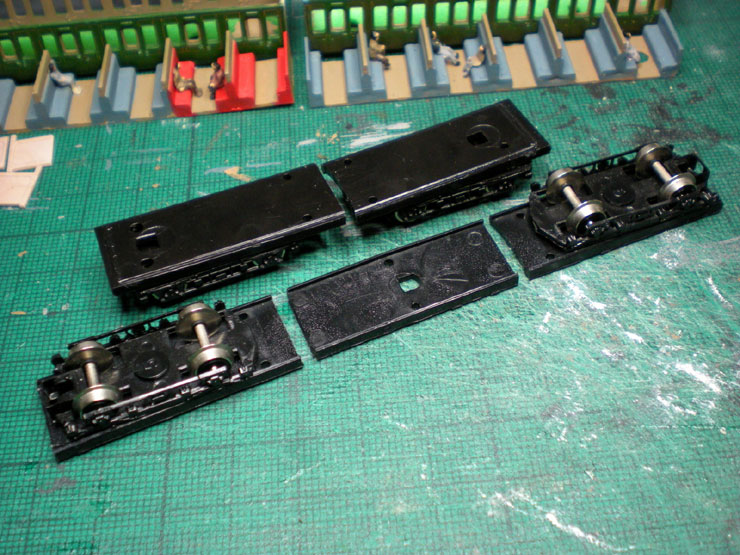
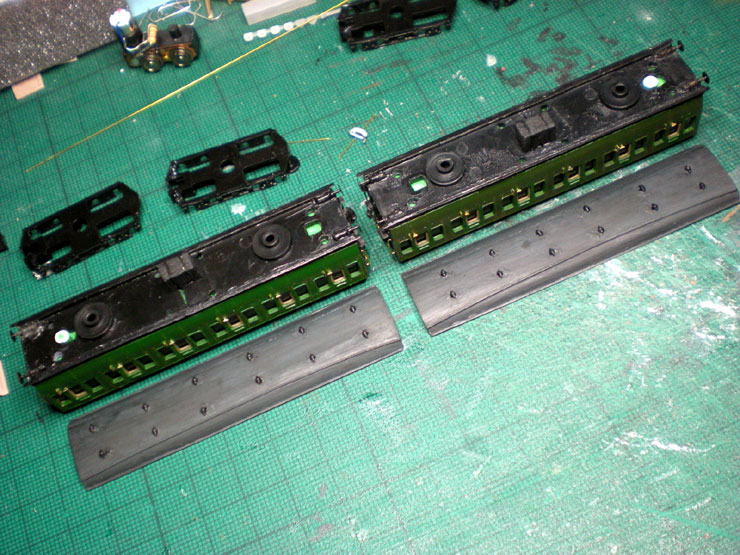
Now it was time to cut down the two chassis and fit those to each
carriage. Two cuts per chassis did the trick, with the middle piece
being rejected. The bogies are a little big for such short coaches,
but only a little bit.
They fitted perfectly, thank goodness, with only the central join to
fill later with a bit of Milliput.
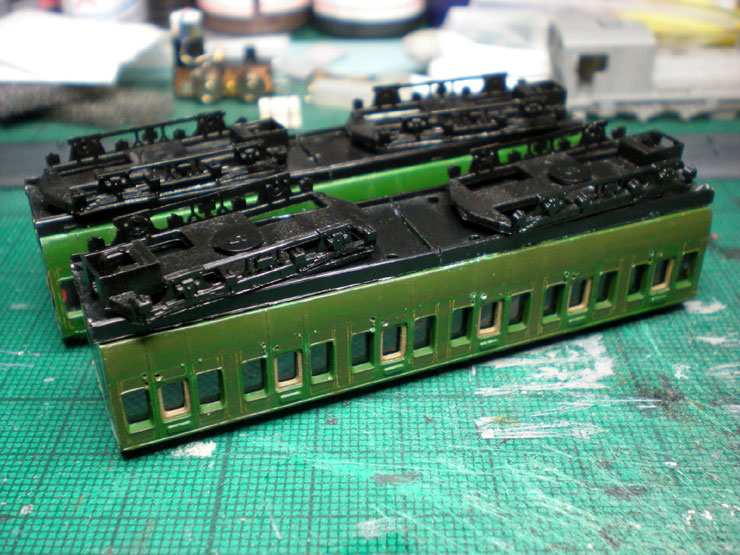
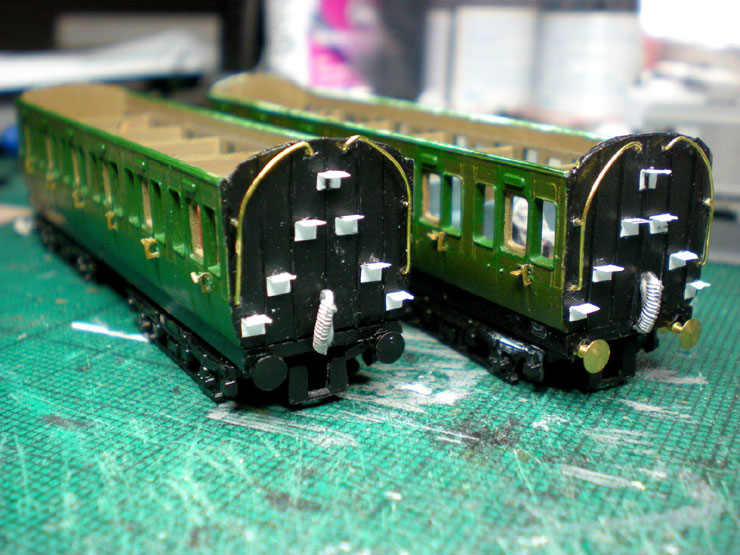
Now comes the buffer-fitting session. I cut off the plastic Farish
buffers, drilled out the base, opened up the holes and scoured a dip
out of the chassis itself so that the brass buffers (Etched Pixels
again) could be sunk into the chassis a little to keep them clear of
the bogies. I also set them back a little too far so that I could
close up the coupling distance between carriages. When the end
detailing is all in black, no one will ever notice the deliberate
mistake, and the gap between coaches will be more or less realistic.
Door handles and grab handles have also been fitted, after touching
up the drill holes with a little Maunsell Green paint.
With all four buffers fitted to each coach over about a week of work
(roughly an hour a night), the next job was to fit the balsa wood
battery boxes. They're a little shorter than on the real thing to
allow the bogies enough clearance.
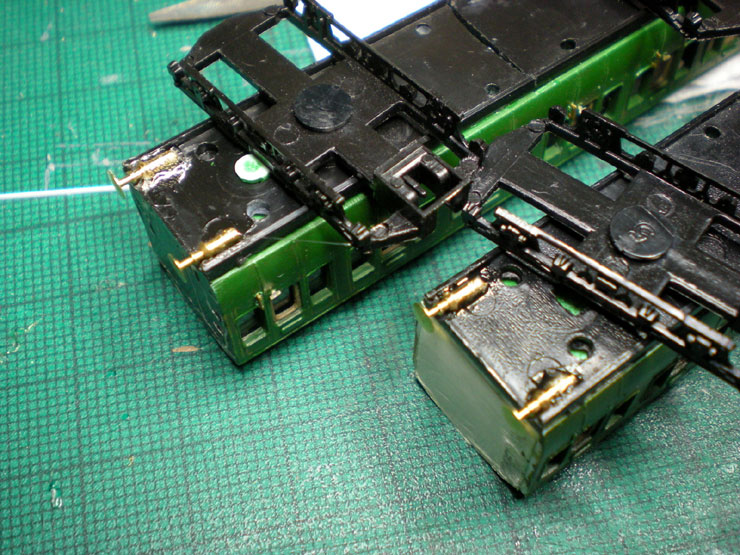
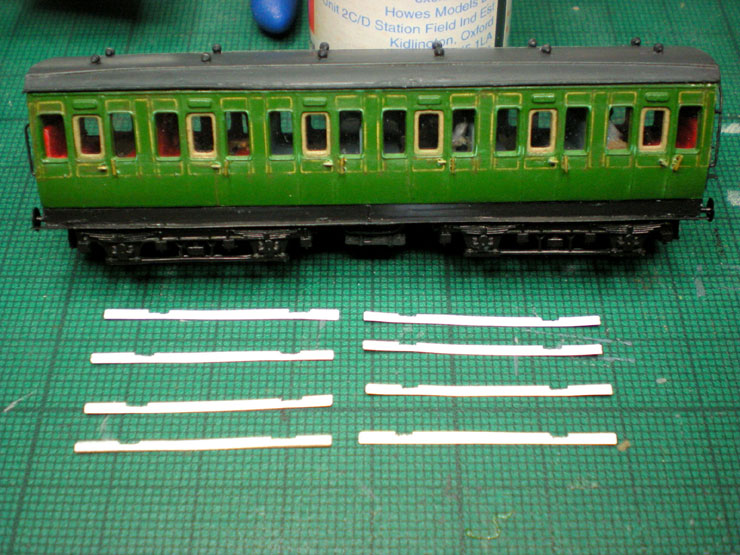
With all the side and under-detailing done, it's time to start
tackling the end detailing. The usual paper panels with jewellery
wire added over them provide the base for all the later work. And
that's were we are for now.
The next instalment shouldn't take another three
months to post...
18 November 2017
The next stages were just as fiddly and drawn out
as the rest of the work, but they only took another two months to
complete, not three months this time. Detailing continued on the
carriage ends, including 2x2mm paper steps pinned on with a dab of
Bostik and then soaked in superglue.
The handrails were especially difficult to shape
for these two. They took a solid week of minor tweaks and tests to
get right, although a couple came pretty close straight away. The
one holdout took longer to whip into line. Then the white metal
vacuum pipes were added.
The next stage was the customary addition of the running boards
under the carriage body - paper again, tacked on with Bostik to hold
it in place and then soaked in superglue.
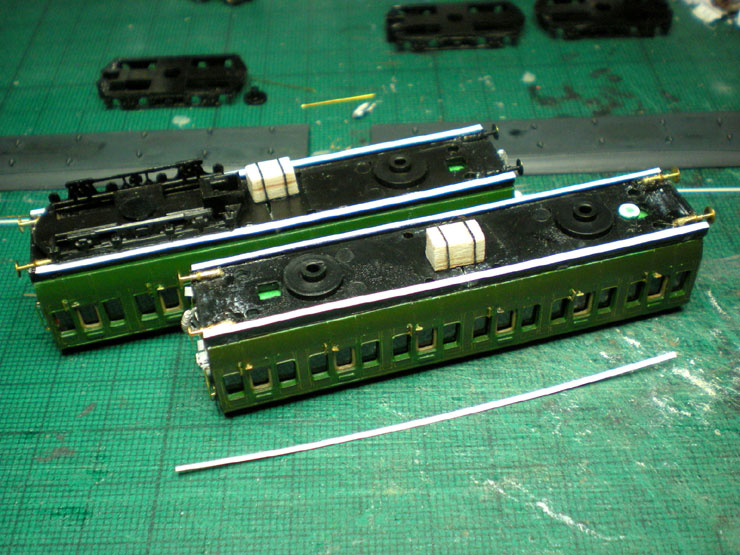
The gap between the two halves of the chassis has been filled with
Milliput and the long running boards are starting to harden up with
several thin coats of superglue.
Yet another photo of the same stage!
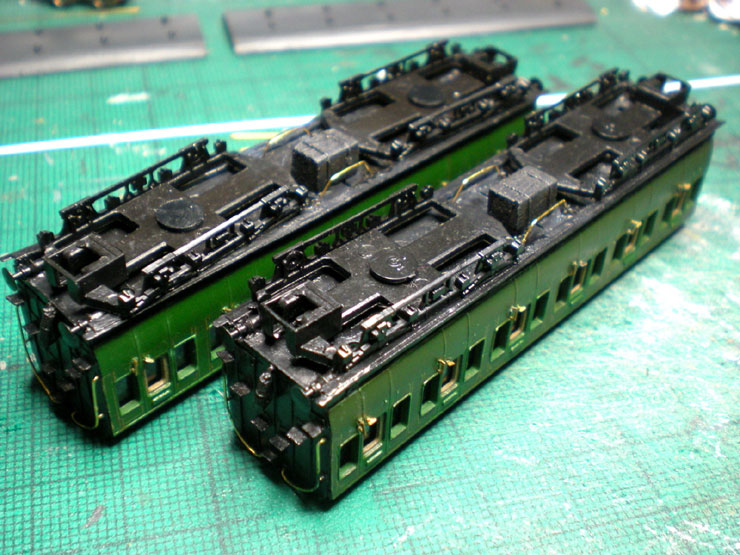
The running boards have been painted black, along with the battery
box under the carriage. The aluminium roofs have had their torpedo
vents added, two per compartment, side-by-side over the middle of
the compartment, rainstrips outside of these, and cantrails on the
outer edge of the roof. Then they were painted in several thinned
washed of 'roof dirt' and a few of black (they're not quite finished
in this shot).
Underneath, the bogies are added, and some rudimentary frames
in-between, around the battery boxes.
Time to glue on the roofs. They were very difficult to shape and
position accurately, so this would be a bit of a make-or-break task.
Each roof was taken individually, with a thin line of Bostik and
plenty of dabs of superglue over the top. The two seem to act
together pretty well, combining flexibility with solidity. Then wrap
and leave to cool overnight...
With both roofs done - almost completely successfully barring a bit
of a hairline gap - some Milliput was applied to the bigger gaps at
the carriage ends and then detailing could start on the non-steps
end.
The top bar on the carriage on the left is linked directly to the
emergency cord. When that's pulled, the top bar is turned (flagging
to the guard the precise carriage in which the cord was pulled), and
the vertical pipe kicks in the vacuum braking system. Train stops.
Now for running boards across the axle boxes on the bogies. I chose
the usual paper, cut to shape, although I really should have chosen
the thinnest card I could find.
It took a good week of gluing to get these all to stay on as there
were only about three or four small gluing spots on each bogie.
Before that I fitted the wheels and it's a good job I did. The new
batch of Farish wheels were a good fit, but a set of wheels I'd
bought from somewhere else required some drilling out of the axle
box. I really should have dumped those wheels onto a different
project.
Anyway, wheels work, bogie running boards fitted, end detailing
completed. Now to start painting over all of them.
The finishing touches included a few thinned washes of 'frame dirt'
around the bogies, over the running boards, and on the carriage end
detailing. The handles and grab handles had a bit of a touch-up of
their paint, and the 3DR 3D-printed short-shank couplers were
fitted.
Also done over the course of another week was the lettering.
'Southern Railway' was added to the carriage centre (four times),
the class lettering was added to each carriage door (twenty-four
times), and the carriage numbers were added, twice per side, eight
times in total using individual numbers to make up each four-digit
carriage number. It's not easy being a carriage detailing
specialist.
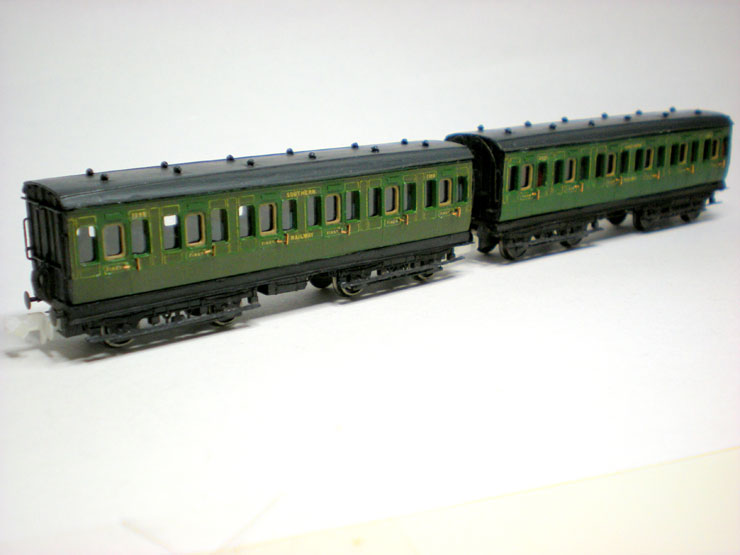
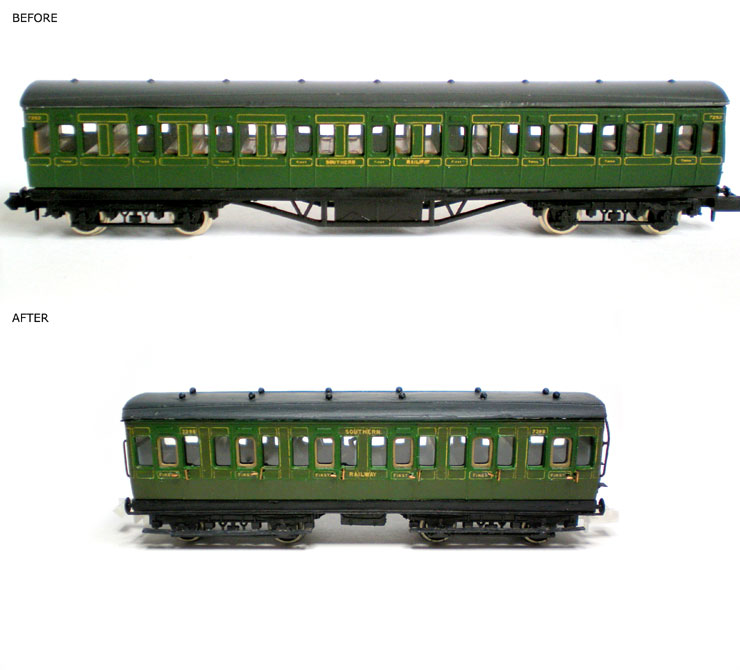
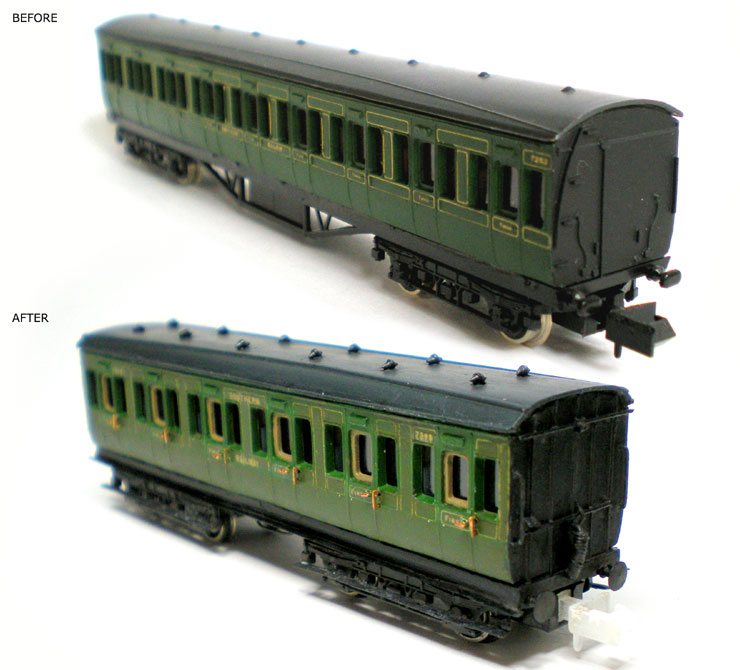
Here are the final shots of about five months of work - the before
and after shots. Job done, and I have two very handy 44ft bogie
carriages to add to my Southern Railway stocklist.
|