|
16 July 2017
Being a sucker for punishment, when I found out
that LSWR block sets of 6-wheel carriages were still around in 1930,
and that Etched Pixels have produced them as part of the Ultima
range, I decided that I needed some of them.
By 1930, many of the first class carriages had been
collected together into three 'race sets', providing better
accommodation in special services from various towns in the south of
England to a day at the races. There were quite a few famous race
courses and meetings in the Southern Railway area (there still are,
but most people these days go by car).
Each race set was formed of ten 6-wheel carriages,
with a saloon at each end with normal couplings, then a first class
coach with normal couplings at the saloon end and close-coupled at
the inner end, followed by six more firsts, all close-coupled. The
close-coupling was little more than a bar connecting carriages and a
sort of 'bump' panel on each coach. Repeating that in N Gauge for
tighter-radius curves would be a bit of a challenge, but I've done
something similar with the double brake van (see page 6 of the
general Grouping Workbench pages).
A smidge of common sense sneaked in, and I
shortened the ten-car set to eight, but that's still quite a bit of
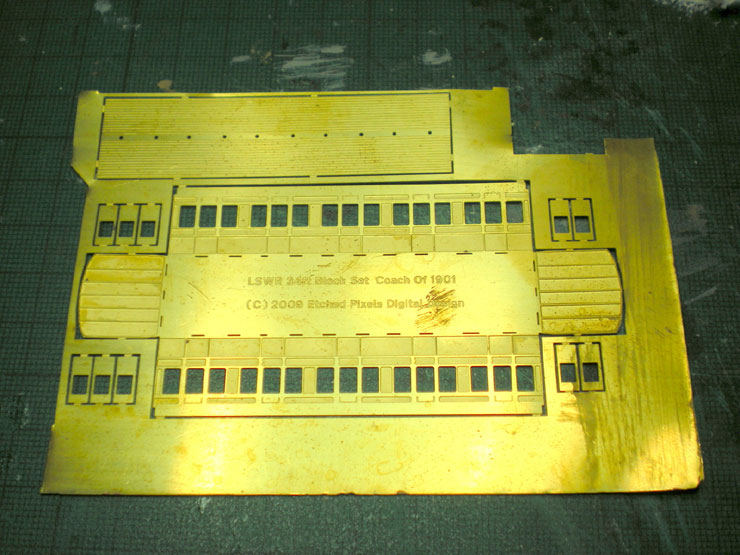
building. The Ultima 'kits' are supplied in etched brass, as in the
photo below. The roof is at the top, the main carriage body and
floor in the middle, and the standalone 'droplights' at either side.
These need to be separately painted and glued in behind the doors...
but there's also the 'tumblehome' to take into account here - the
gentle inwards curve of the carriage body at the bottom of the side
panels - and that complicates things quite a bit.
Anyway, on with the work on one of the central
close-coupled firsts as a test coach. This one took a couple of
months, on and off, as I had to work out how best to do several of
the more tricky stages of the work.
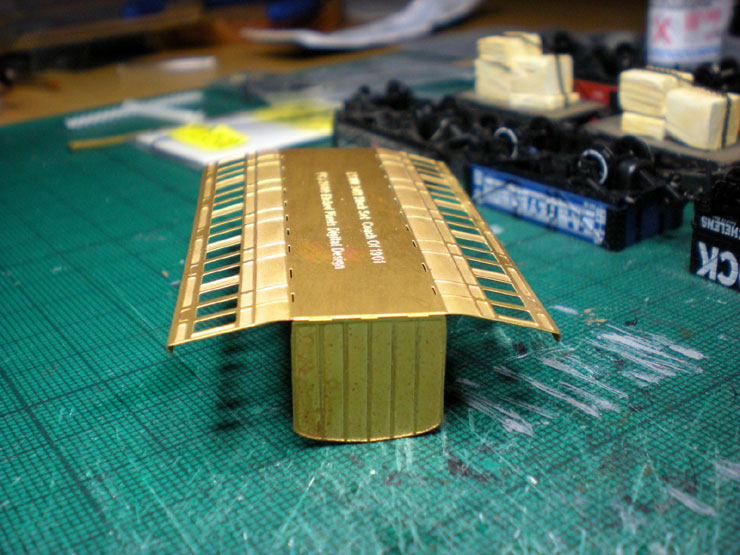
Remove the brass pieces from the etch and fold up the main body,
adding the
tumblehome curve to the lower side panels. That's harder than it
might seem, and
getting a consistent curve along the entire side panel means a bit
of adjusting.
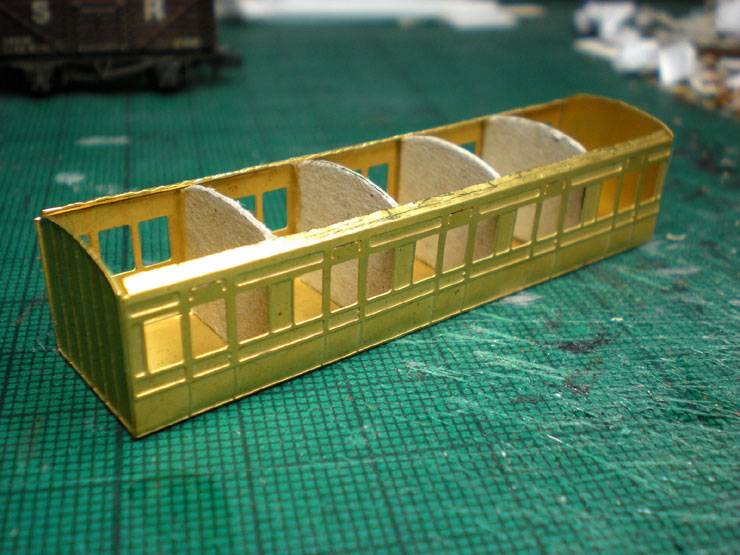
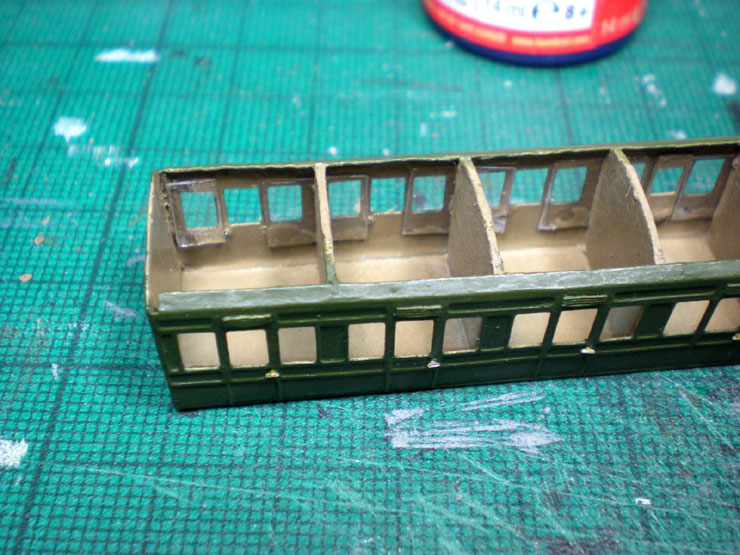
There were no instructions regarding the interior so I made up my
own
compartment dividers from card and also used these to glue the body
in place. Yes,
gluing. I'm not risking a soldering iron on this!
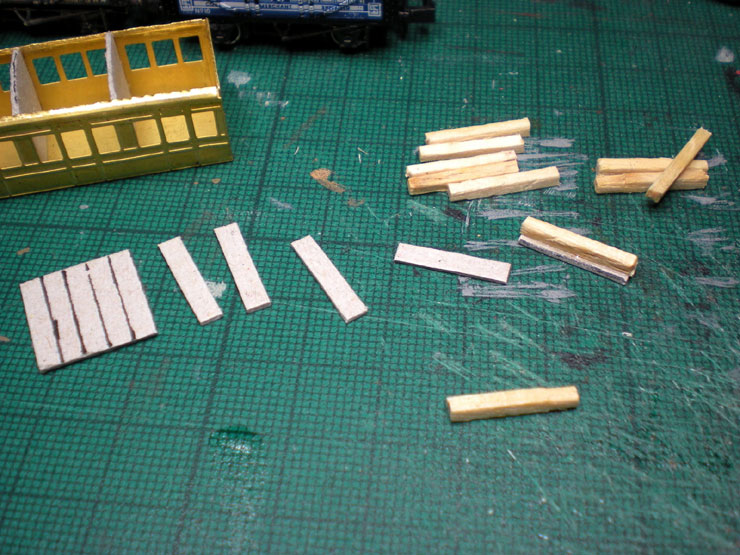
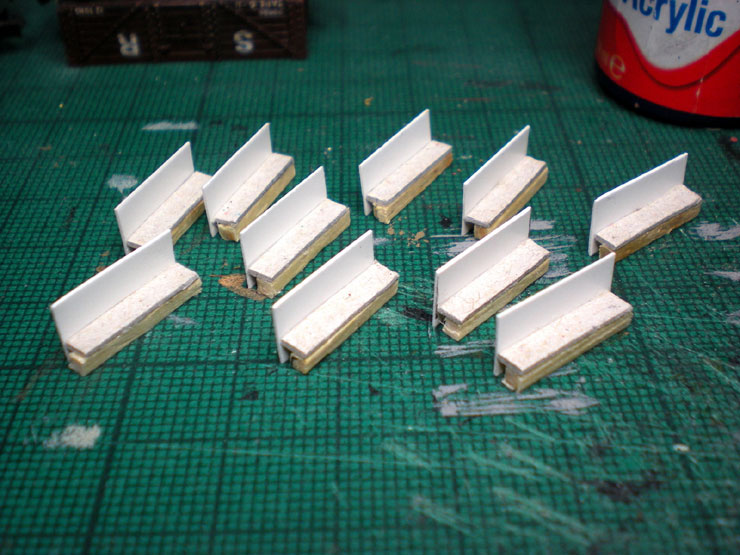
Next I needed bench seats for each compartment, so that meant
cutting card and
matchsticks.
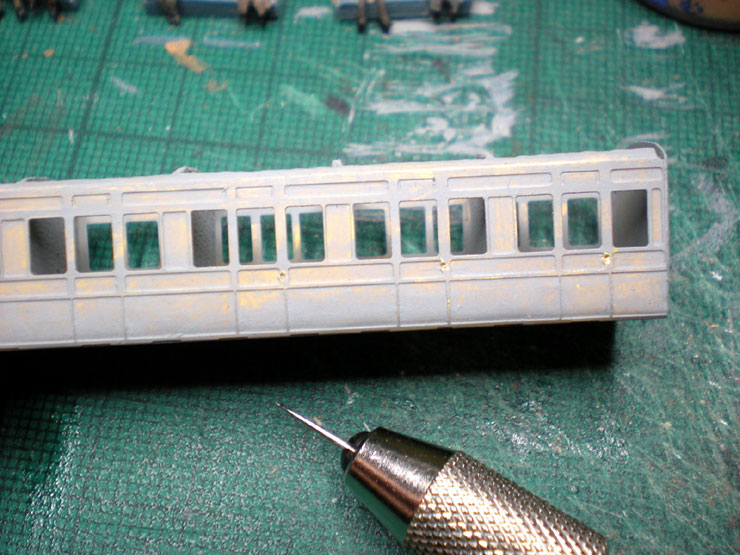
Something else was needed - door handles. I usually add grab handles
too, but
the Etched Pixel ones seemed too large for this kit, so only the
door handles would
be added. Drilling through the brass proved impossible with a hand
drill. It just
wouldn't go anywhere, and pushing against the assembled coach body
was
denting it quite badly - note to self, drill door handle holes
before assembling body
next time. In the end I put a darning needle in the hand drill and
used that. It went
through the brass very easily.
A piece of card to serve as the back rest completed my bench seats.
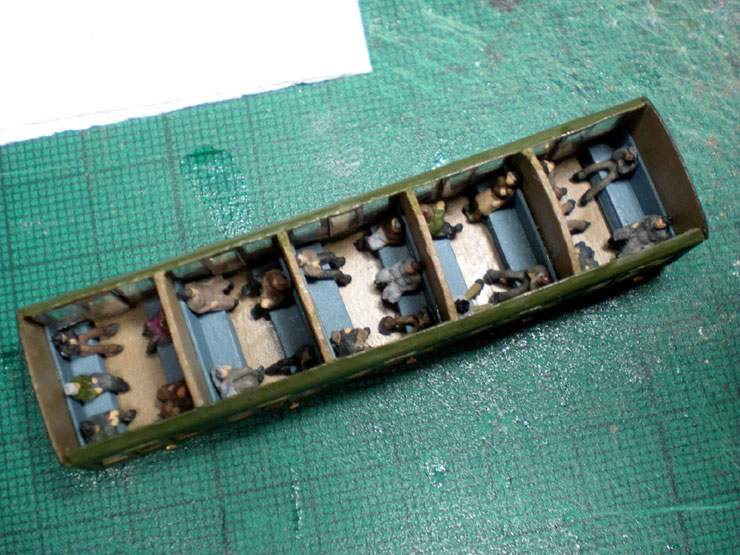
Now all the seats were painted in first class blue and some
crazily-coloured
passengers were added. Well, you lot can't go to the races in 1930
dressed like
that, so we'll have to get you kitted out in more appropriate
colours.
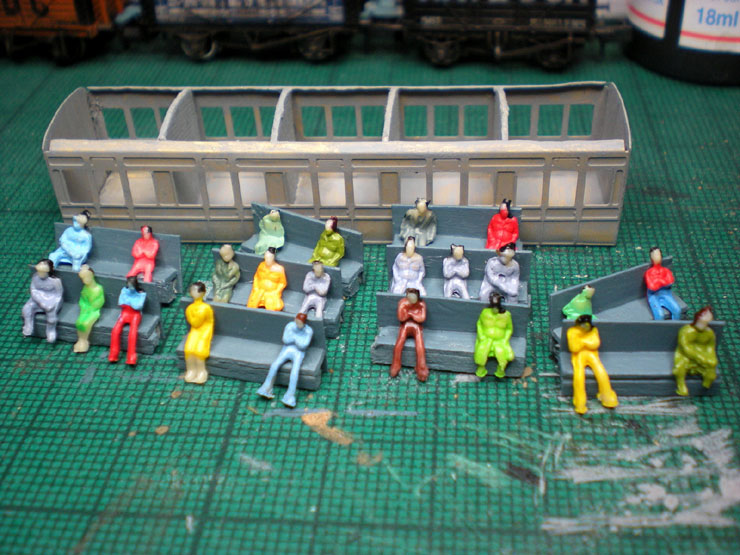
They were all undercoated in grey before receiving a batch of muted
colours -
greys, browns, and blacks mostly, with the odd dull green or blue.
The finished
result will be seen later.

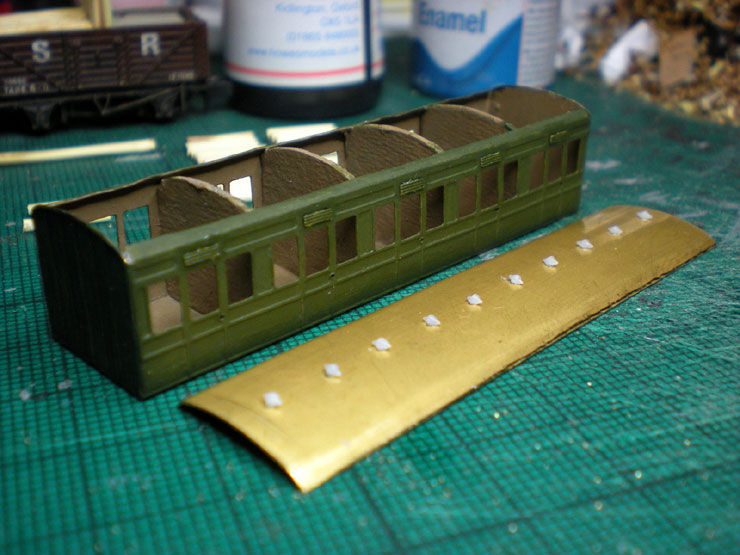
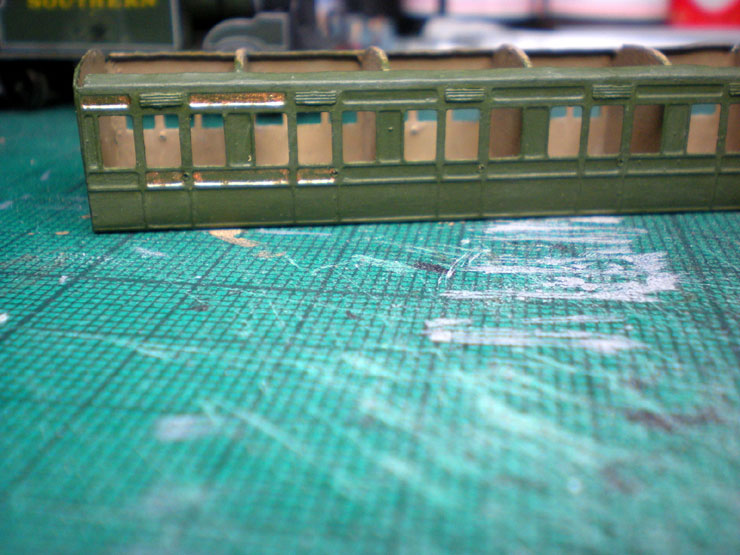
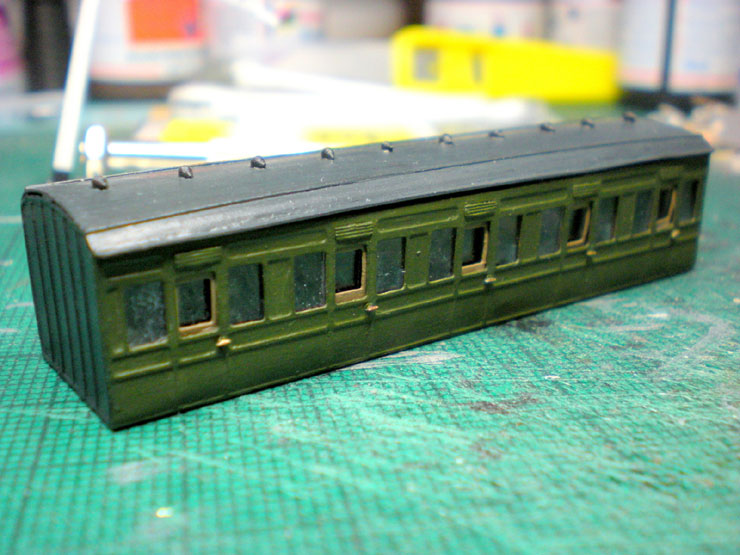
With the door handle holes drilled and top lights added (the grooved
panels above
the doors), it was time to start painting the body inside and out
(wood-brown and
Maunsell Green respectively). The brass roof was bent to shape and
drilled so that
the torpedo vents could be added.
I did toy with the idea of adding the gold lining by filling in the
panels and painting
the green over the insides of each panel until only a fine line was
left. In the end it
proved too unreliable a process and I don't have a good enough
paintbrush. The
next time I buy paintbrushes, I'll splash out on a quality set that
will actually last.
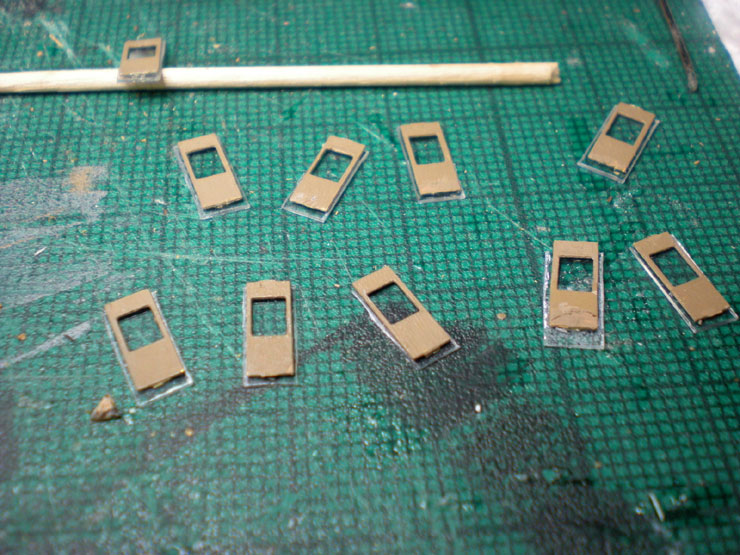
The droplights were painted up and I added clear perspex behind them
to mimic
glass. In the end this didn't work out as the perspex kept falling
off. I found a
thinner perspex to be added on after the droplights were fixed to
the carriage...
Thinner perspex in place over the side windows (this is a very
fiddly job!). Space
left for the droplights...
Now the droplights have been added, although they fit very badly and
needed a
good deal of extra superglue added top and bottom before I felt
reassured that
they weren't going to fall off at the slightest handling.
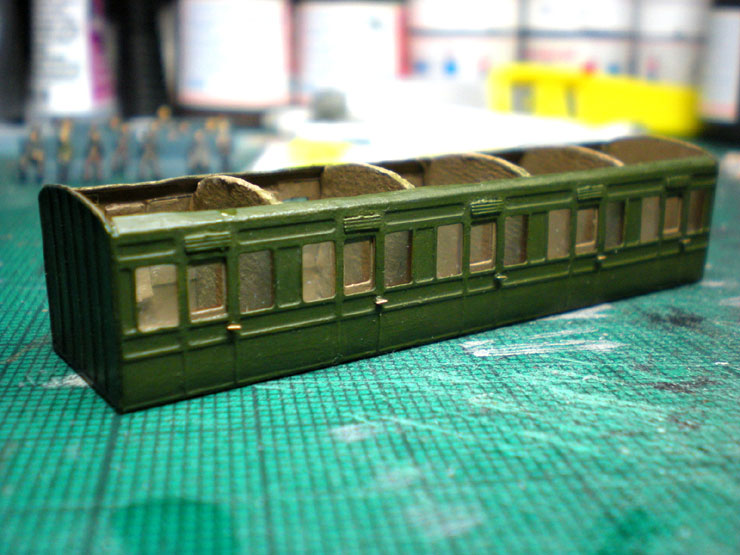
Now the passengers could be lowered in by crane, already attached to
their seats
(Southern and Southeastern take note - you'll be doing it like this
before long). The
benches were a little long at first, catching on the perspex, but a
bit of careful
trimming meant that they fitted in the end. You can see the final
colours used on
the clothing here.
Now the roof could go on. Since that was last seen, I've added rain
strips and
cantrails. The cantrail at the roof's long edge helps to disguise a
small gap between
roof and coach body. A bit of filler hides the slight gap at the
ends.
Now for the wheels. There were a couple of choices
for this, with the Stove R 6-wheel chassis being one. But that needs
a lot of alteration to make it a proper 6-wheel carriage chassis with
a running board and running step (see the
S&DJR Farish
Carriage Conversion thread to see how I did this previously).
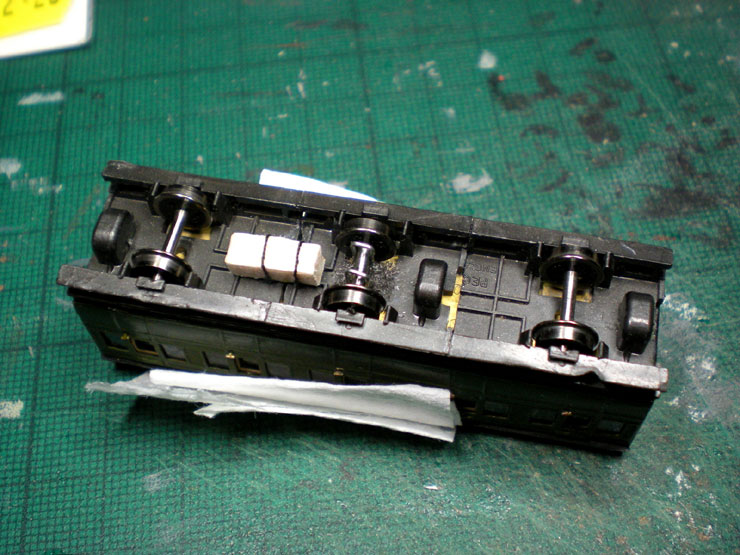
Someone came up with the idea of using the chassis from a Peco brake
van, which already had the running boards in place, and this is what
I went with.
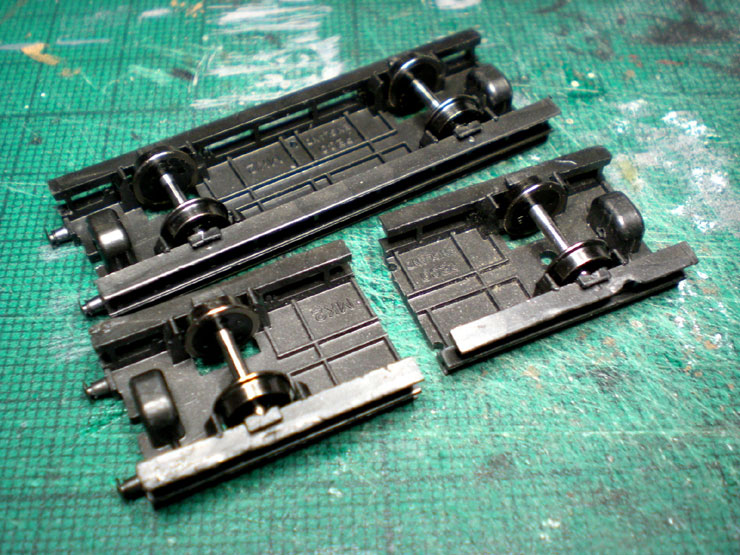
To get the correct wheel spacing that meant chopping two chassis
into four pieces
and using three of those pieces. It took a while to work out the
proper lengths but
the cutting part was easy enough. A little filing made sure that the
fit was about as
flush as could be hoped for.
You can see the gaps between the three chassis pieces here, although
it's the
running boards that really have to be matched up as this is what
will show when
the carriage is on the tracks.
The middle set of wheels couldn't be fitted in the normal way. The
length of the
carriage meant that fixed wheels forced it to derail on some of the
tighter curves on
my layout. Instead I followed the principles set by the Stove R
chassis and created
a stand-alone, free-floating wheel holder - two staples bent to
shape and glued
into drilled holes in the chassis. That really does do the trick,
although it's best to
add a soft piece of foam underneath to help keep the wheels down,
and also to file
off the spiked wheel points that would normally hold the wheels in
place in the axle
box. This bit is important to get right or the filed wheel ends will
catch on the
chassis and cause all sorts of problems. File the wheel points flat
and you'll have
some wonderfully free running.
Also added here is the battery box so ensure electrical lighting to
the carriages. I'd
do the dynamo too (which generates the electrical charge as the
carriage wheels
turn) but it's a flimsy piece of equipment in N Gauge terms and I
haven't found a
satisfactory way of representing it.
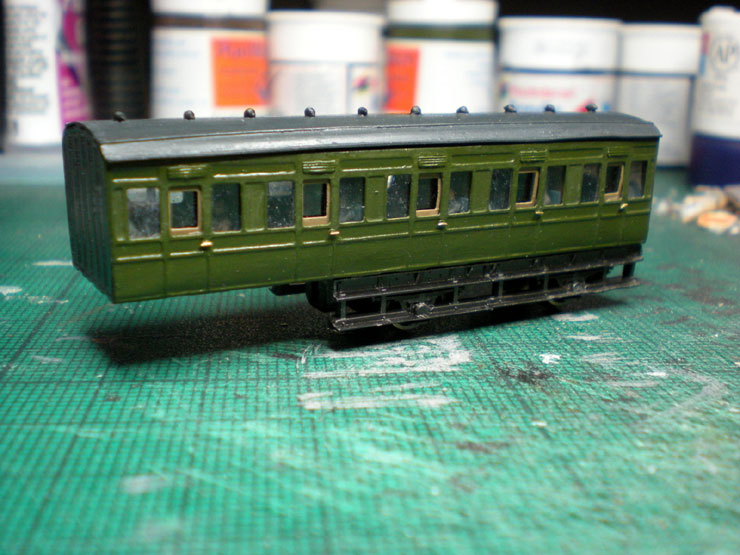
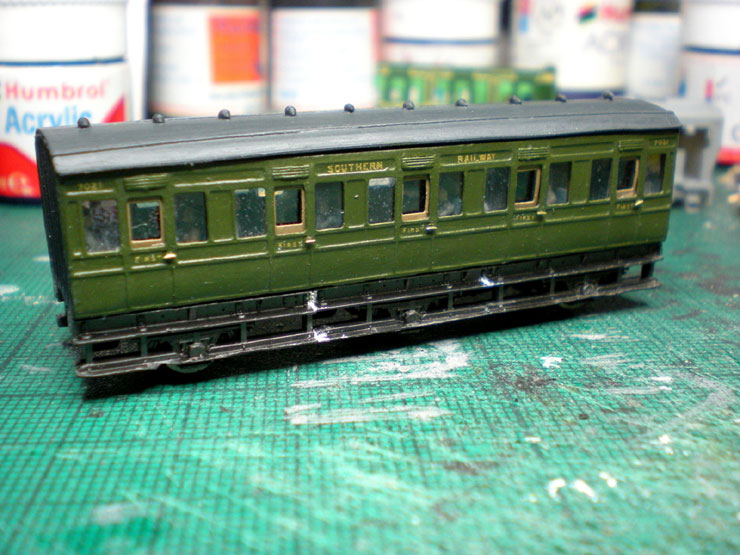
One of the last steps is to add Fox Transfers' 'Southern Railway'
lettering above the
window line, and the class lettering on each door, plus the carriage
number - four
times no less, twice per side!
The brass door handles show up well here, and you can see the little
bits of filler
used to mask the gaps between the three chassis pieces. When filed
and painted
black you'll never even know those gaps were there in the first
place.
A slightly murky shot of the carriage on the layout, although it
doesn't have any
couplers as yet. A staple will serve as the connecting bar between
carriages, with a
spring on one end to force them to close couple, but still allowing
them to open up
on the tight curves.
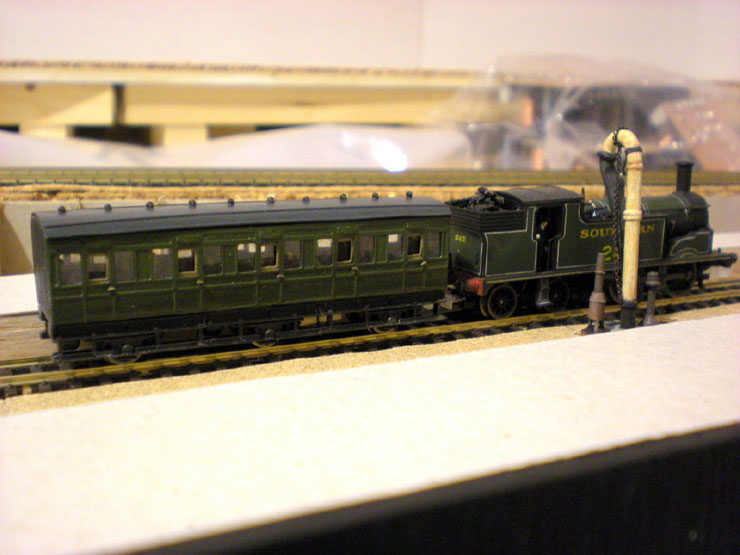
The next stage will be to built an end-first and a saloon so that I
can get a normal
Rapido coupling on the set and actually connect it up to a loco. At
the moment it
can only be used in push-push services... and not on any hills!
|